Process & Design
Softyflow's Process Modeler provides a robust and intuitive environment to visually design, build, and test your business workflows using the internationally recognized BPMN 2.0 standard. This comprehensive guide will walk you through all the essential features and components you need to master to create powerful and effective automated process flows.
Before diving into process design, it is crucial to have your project fully set up. Please make sure you have completed the project setup and have already designed the web interfaces that your processes will interact with.
Process design in Softyflow is centered around creating workflows by orchestrating a combination of activities, gateways, and events. These elements work together to automate your business logic. Each process is composed of interconnected process components that define the precise execution path, enforce business rules, and handle data transformations.
Key Components of a Process:
- Activities: These represent the work to be done within the process. This includes tasks performed by users (User Tasks), automated system actions (Normal Tasks), sending emails (Send Tasks), or even invoking other processes (Sub Processes).
- Gateways: These are decision points that control the flow of the process. They allow you to create branches, parallel paths, and conditional logic.
- Events: These act as triggers that start a process, endpoints that terminate it, or intermediate events that react to timers or errors.
- Sequence Flow: These are the connectors that link all the components, defining the order of execution and the path the process will take.
The Process Builder at a GlanceDirect link to The Process Builder at a Glance
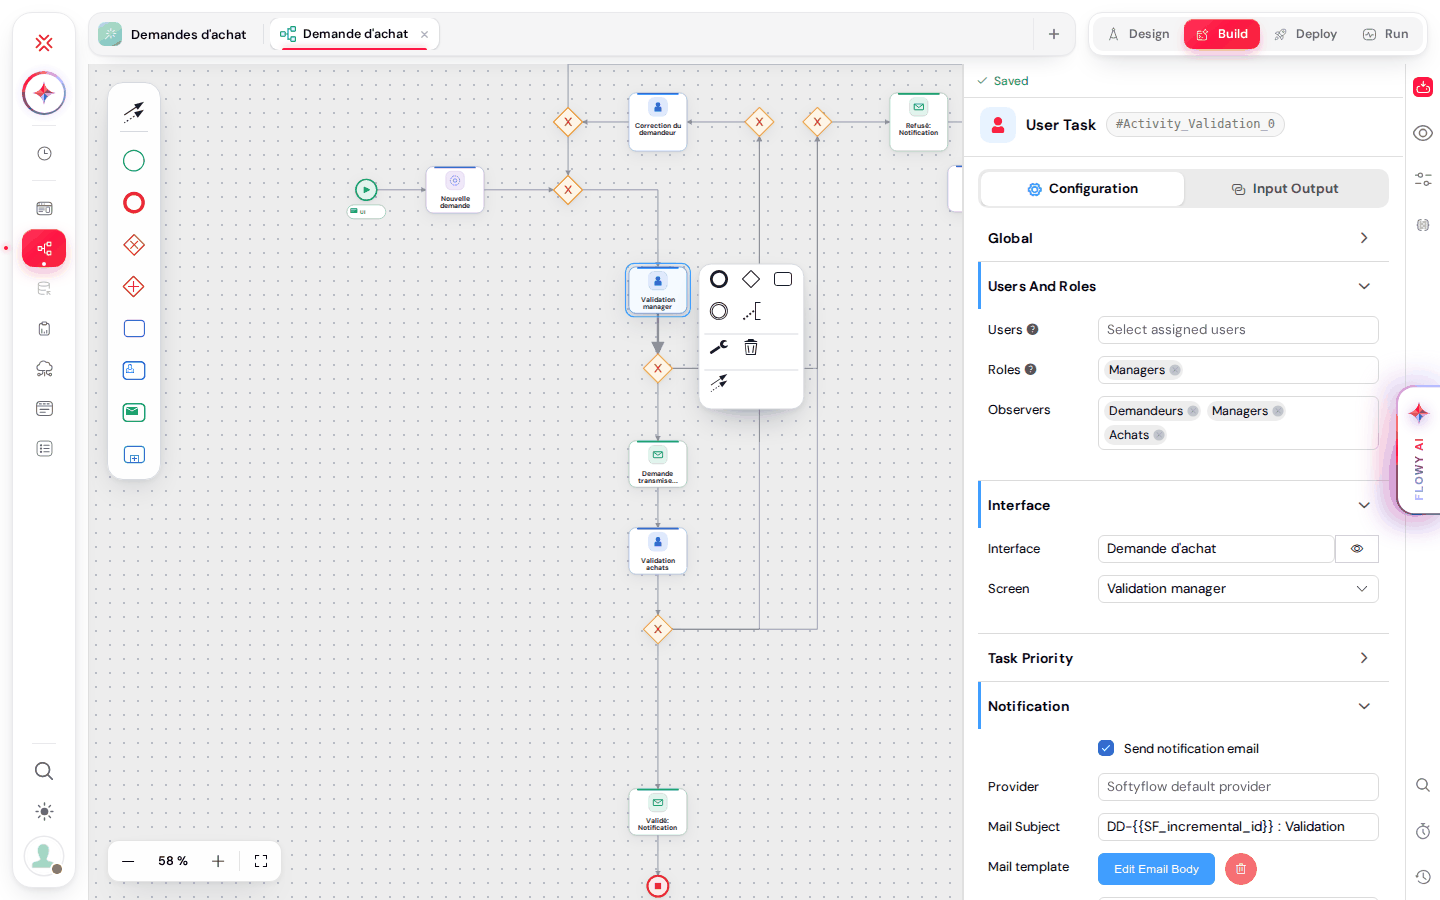
Open a process from the project dock (Processes) or from the Build home of the project: it opens in an editor tab of the project. The builder has been modernized in version 8.6:
- The canvas shows each step as a card: a colored bar and icon tell the type (purple for automatic tasks, blue for user tasks, green for mail tasks), gateways are orange diamonds and the start and end events are green and red circles.
- The palette on the left: the connection tool, start and end events, exclusive and parallel gateways, task, user task, send (mail) task and sub-process. Drag an element onto the canvas.
- The context pad appears next to a selected element: append an event, a gateway or a task, draw a connection, change the element type (wrench) or delete it.
- The zoom controls at the bottom left: zoom out, the current zoom (click it to go back to 100 %), zoom in, and Show the whole process.
- The configuration panel on the right shows the selected element, with its Configuration and Input Output tabs (gateways and events only have Configuration). The save indicator at its top shows whether the process has unsaved changes (see Saving the Process).
- The action rail on the far right: Save Process, Start Process (opens Test the process: start an instance in Test, UAT or Prod with starting data in JSON), Process Settings, Measures, the search in the process, Scheduling Tasks and Process History (saved versions and comparison).
See the Process Modeler reference for the general settings of a process.
Saving the ProcessDirect link to Saving the Process
The process builder does not save automatically. The save indicator, at the top of the configuration panel (at the top right of the canvas when no element is selected), tells you where you are:
- N changes: the number of changes counted since the last save. While the process is being saved, a spinner replaces the save icon of the indicator (the indicator at the top right of the canvas reads Saving...);
- Saved: no change counted. After a save made in the editor, the time of that save follows (for example "just now" or "5m ago"); when you open a process, the indicator only reads Saved.
To save the process, click the save indicator, click Save Process (the first button of the rail) or press Ctrl + S (Cmd + S on a Mac). Save before closing the editor tab: the changes that are not saved are not kept. The Measures have their own Save the measures button (see Measures & KPIs).
The edits made in the Inputs & Outputs drawer (the body of a script, an expression or an action, its name, Apply to all branches) are not counted by the indicator: it can read Saved while these edits are not saved yet. Save the process after them (Save Process or Ctrl + S). Adding, removing or moving a variable is counted.
Searching in the ProcessDirect link to Searching in the Process
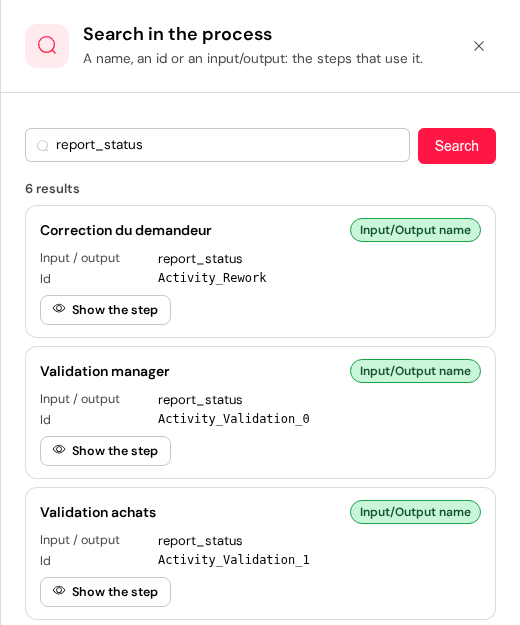
The search button of the rail (magnifier) opens Search in the process ("A name, an id or an input/output: the steps that use it"). Type a text in the Name, id or variable… field and click Search:
- the search looks for the text in the inputs and outputs of every step (their name and their content) and in the conditions of the sequence flows. It is case-sensitive;
- each result shows the step, a tag that says where the text was found (Input/Output name, Input/Output body or Flow Condition), the Input / output concerned and the Id of the element;
- Show the step closes the drawer, selects the element on the canvas and centers it.
Use it to find every step that reads or writes a variable before renaming or removing it.
1. Activities & ComponentsDirect link to 1. Activities & Components
Activities are the fundamental building blocks of any process, representing a unit of work to be performed. Softyflow offers several types of activities to model a wide range of business scenarios.
1.1. User Tasks (Manual Tasks)Direct link to 1.1. User Tasks (Manual Tasks)
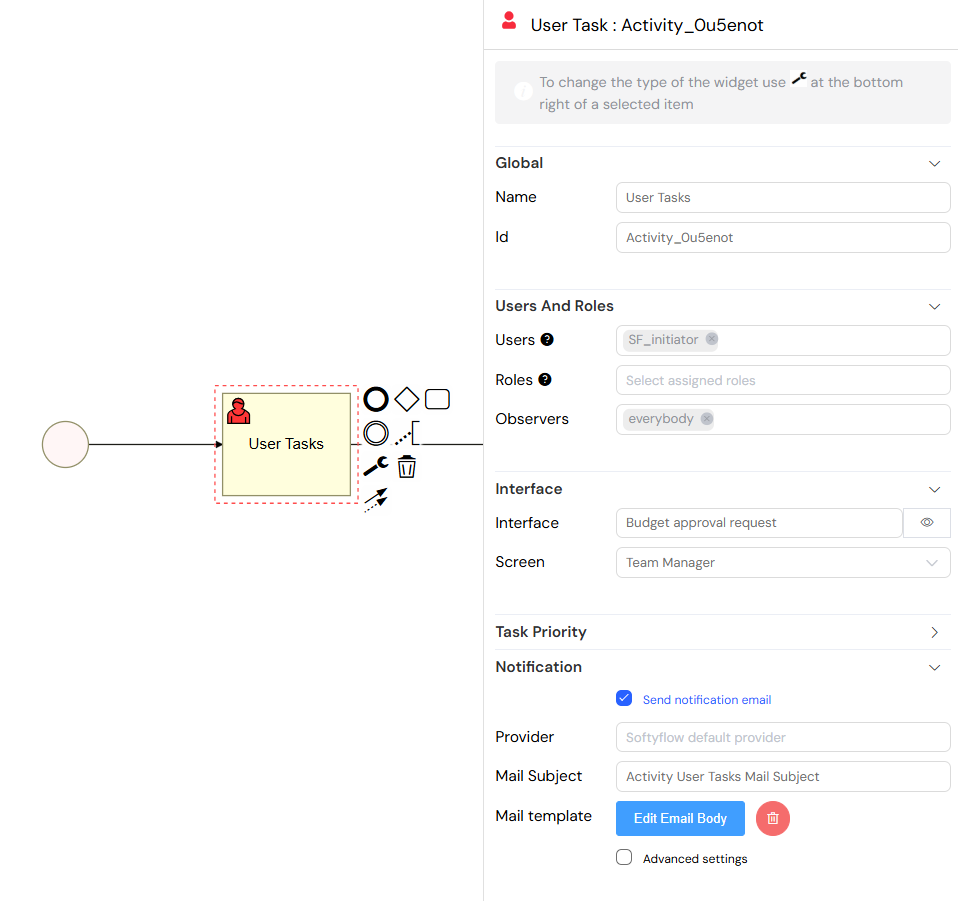
User Tasks, also known as Manual Tasks, represent work that must be performed by a human. When a process reaches a User Task, it creates an entry in the assigned user's task basket, where they can open the associated web interface, perform the required action, and complete the task to move the process forward.
Key Configuration Options:
- Assignment: You can assign tasks to specific users, to a group of users by assigning a role, or dynamically assign them based on process variables.
- Interface: Select the UI screen that the user will interact with to complete the task.
- Notifications: Configure email notifications to be sent when a task is assigned, with fully customizable email templates and a Mail priority (see Email Notifications).
- Due Dates: Set deadlines and priority levels for tasks to ensure timely completion.
- Observers: Grant read-only access to the task for specific users or roles who need to monitor progress without taking action.
1.2. Send Tasks (Email Tasks)Direct link to 1.2. Send Tasks (Email Tasks)
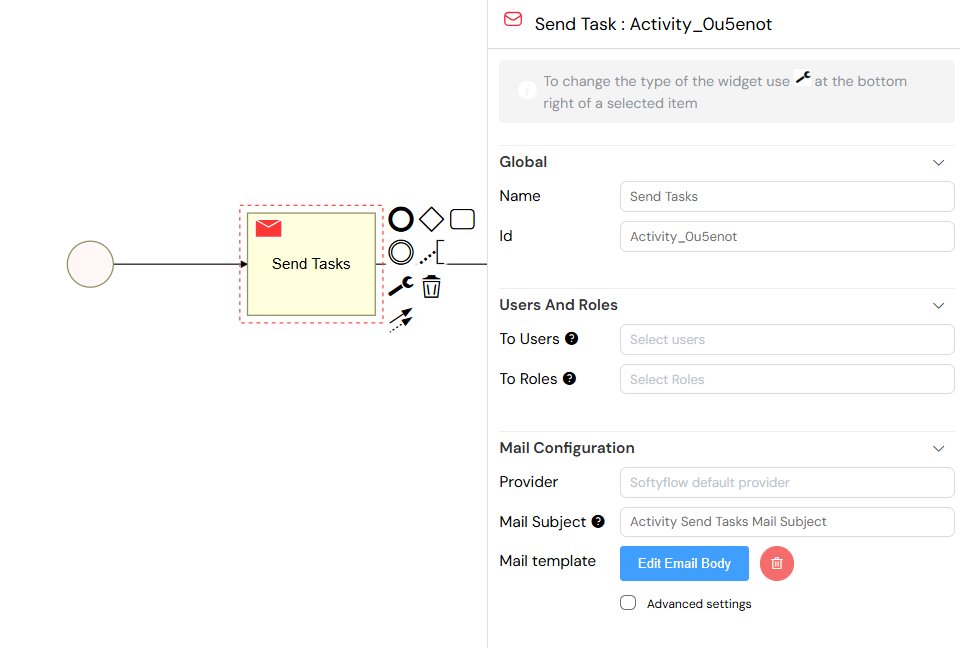
Send Tasks are used to send automated emails without any human intervention. This is perfect for sending notifications, confirmations, or alerts at specific points in your process.
Key Configuration Options:
- Recipients: Define who receives the email. This can be a static list of users, a role, or dynamically determined from a process variable.
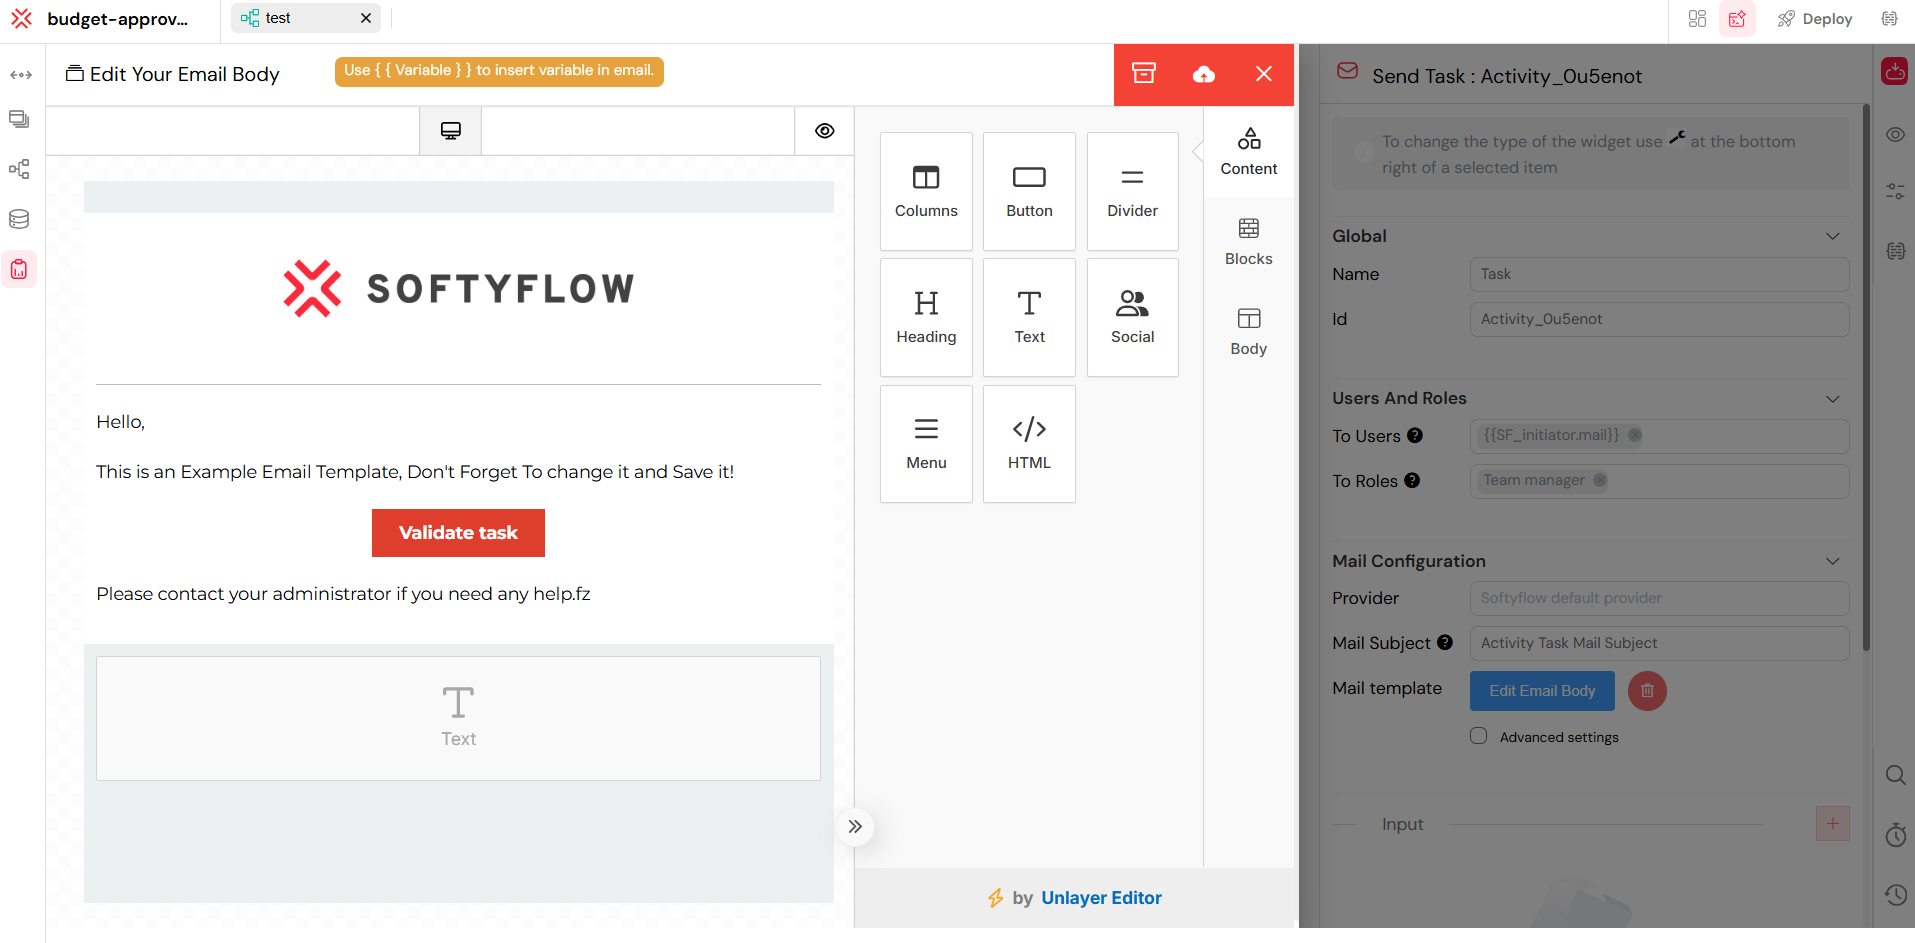
- Templates: Use a rich visual email editor to create beautiful and professional email templates. You can easily include process variables to personalize the content.
- Providers: Softyflow supports multiple email service providers, allowing you to choose the one that best fits your needs.
- Attachments: Attach files to your emails, sourced from your project's resources.
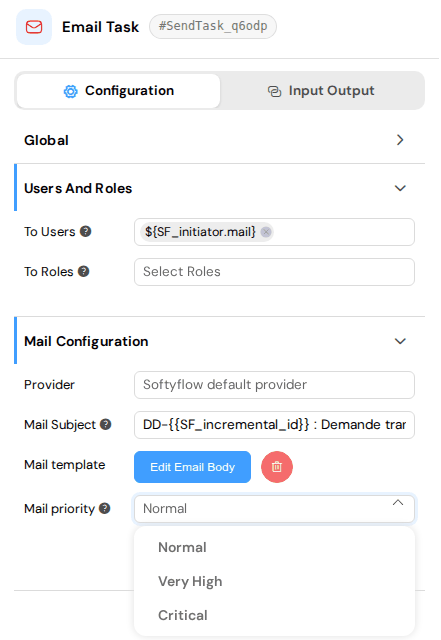
- Mail priority: Normal, Very High or Critical (or a variable). Very High and Critical emails are always sent at once, even to users who receive their emails grouped in a digest (see Email Notifications).
1.3. Normal TasksDirect link to 1.3. Normal Tasks
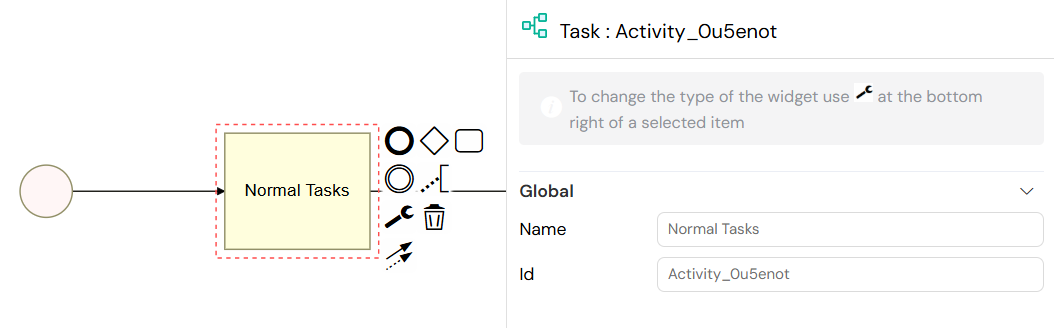
Normal Tasks are automated system tasks that execute server-side logic without requiring user interaction or sending an email. They are ideal for performing background operations such as data processing, calculations, or calling external services. The logic for a Normal Task is defined using Input/Output parameters, where you can write scripts or use actions to perform the desired operations. Select the task and open its Input Output tab: it lists the inputs (evaluated when the step starts) and the outputs (evaluated when it completes); + or a click on a variable opens the Inputs & Outputs drawer (see Input/Output Parameters).
1.4. Sub ProcessesDirect link to 1.4. Sub Processes
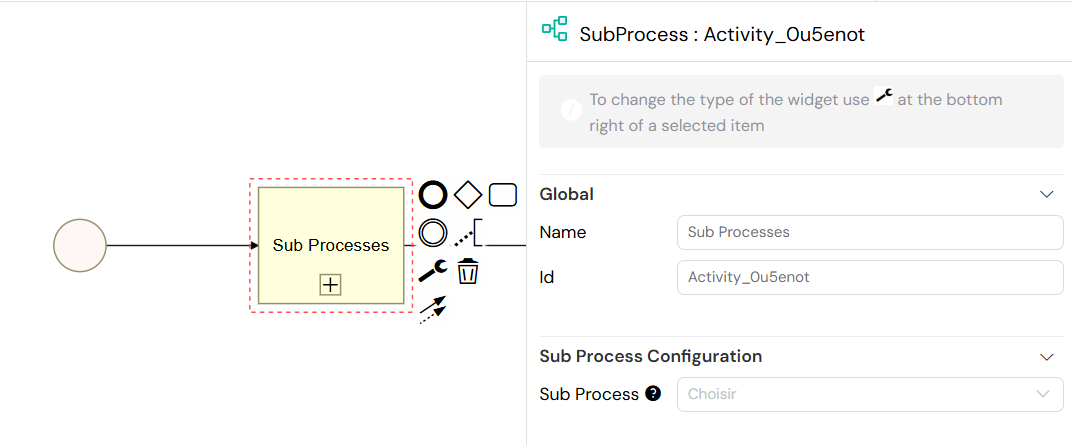
Sub Processes allow you to encapsulate a part of your process and reuse it, or to call another existing process from within your current workflow. This is a powerful feature for creating modular, readable, and maintainable process models.
Key Features:
- Process Selection: Easily choose any other process from your project to be executed as a sub-process.
- Variable Passing: Variables from the parent process are automatically inherited by the sub-process, ensuring a seamless flow of data.
- Parallel Execution: You can run multiple instances of a sub-process in parallel, for example, by iterating over an array of data.
- Result Collection: When running in parallel, the results from all instances can be collected and aggregated for further processing in the parent process.
2. Gateways & Flow ControlDirect link to 2. Gateways & Flow Control
Gateways are essential for controlling the path of execution in your process. They allow you to implement decision points, create parallel flows, and manage complex business logic.
2.1. Exclusive Gateway (XOR)Direct link to 2.1. Exclusive Gateway (XOR)
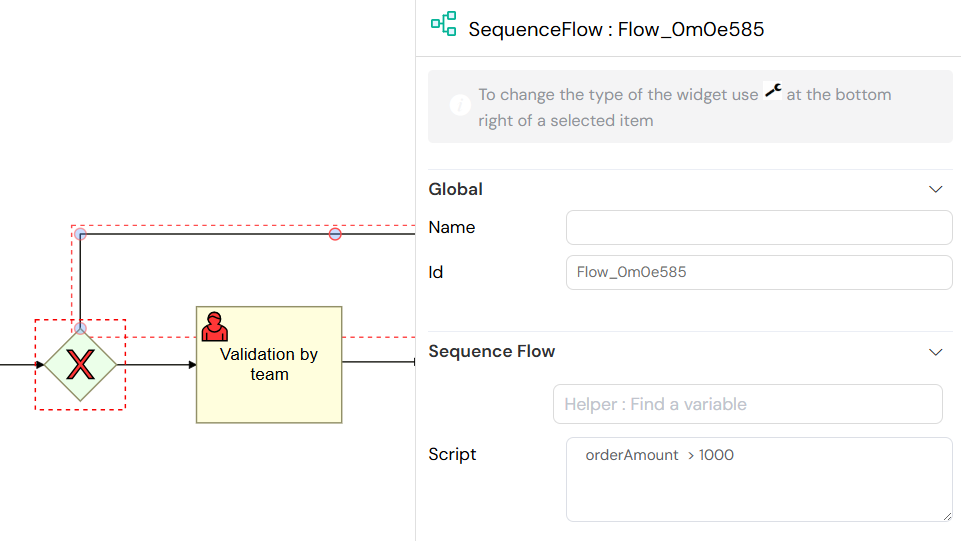
The Exclusive Gateway (often called XOR gateway) creates a decision point in your process where only one of the possible outgoing paths can be taken. The choice of path is determined by conditions you define on the sequence flows connected to the gateway. The first condition that evaluates to true will determine the path taken.
2.2. Parallel GatewayDirect link to 2.2. Parallel Gateway
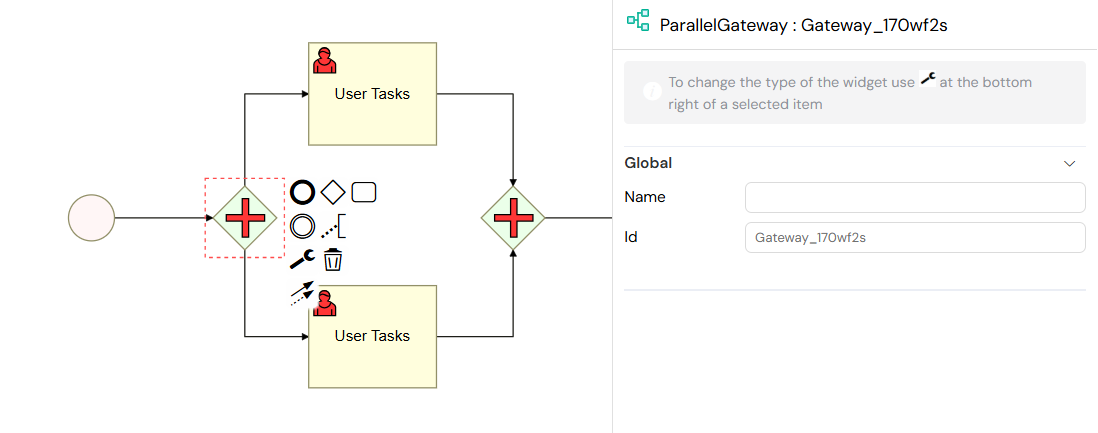
The Parallel Gateway is used to split the process flow into multiple paths that will execute simultaneously, or to join multiple parallel paths back into one. This is useful when you have several tasks that can be performed at the same time.
Common Use Cases:
- Simultaneous Task Execution: Allow multiple users or systems to work on different tasks at the same time.
- Parallel Approvals: Request approvals from multiple departments simultaneously and wait for all of them to respond.
- Multi-step Processing: Perform several independent data processing steps in parallel to save time.
3. Input/Output ParametersDirect link to 3. Input/Output Parameters
Input/Output parameters are a powerful feature that allows you to configure data transformations before and after a task is executed. This is where you can define the core logic of your automated tasks. This feature is available for User Tasks, Send Tasks, Normal Tasks, and Sub Processes. For a detailed guide, see our Input/Output Parameters guide.
Select a step, open its Input Output tab and click + (or a variable of the list): the Inputs & Outputs drawer opens, with the name of the step under its title.
- On the left, Input ("Evaluated when the step starts") and Output ("Evaluated when the step completes"), with their number of variables. + Script, + Expression and + Action add a variable; drag the handle of a variable to change the order; the cross removes it.
- On the right, the selected variable: its kind, its name, the Apply to all branches switch and Test (scripts and expressions, Ctrl + R). Save keeps the variable in the step (the process is not saved yet); Ctrl + S keeps it and saves the process (see Saving the Process).
- Helper : Find a variable, at the top, searches the variables used in the project.

3.1. Parameter TypesDirect link to 3.1. Parameter Types
3.1.1. Scripts (JavaScript)Direct link to 3.1.1. Scripts (JavaScript)
Scripts allow you to write complex server-side logic using JavaScript. You have full access to the Softyflow SDK, which enables you to interact with the platform's core features, manipulate data, and perform advanced calculations. The value returned by the script is assigned to the variable.
To try a script without starting an instance, add Test variables (a name and a JSON value, for example SF_initiator and {"firstName": "Jean", "lastName": "Dupont"}) and click Test: the Result shows the returned value.
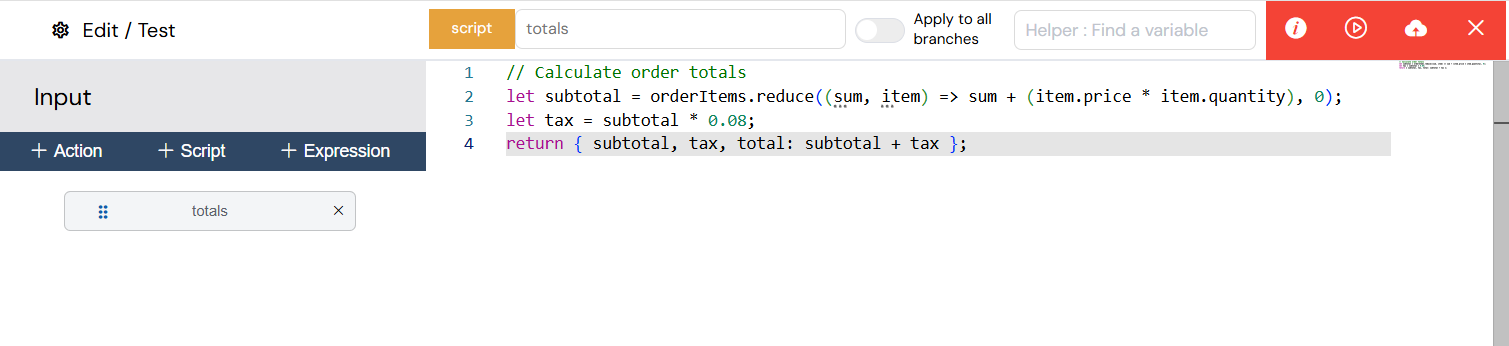
Available SDK Functions:
The SDK provides a rich set of functions to interact with your Softyflow environment. Type SF. in the editor to list its namespaces (collection, file, instance, report, sql, task, user, utils, volt…), then a namespace and a dot to list its functions.
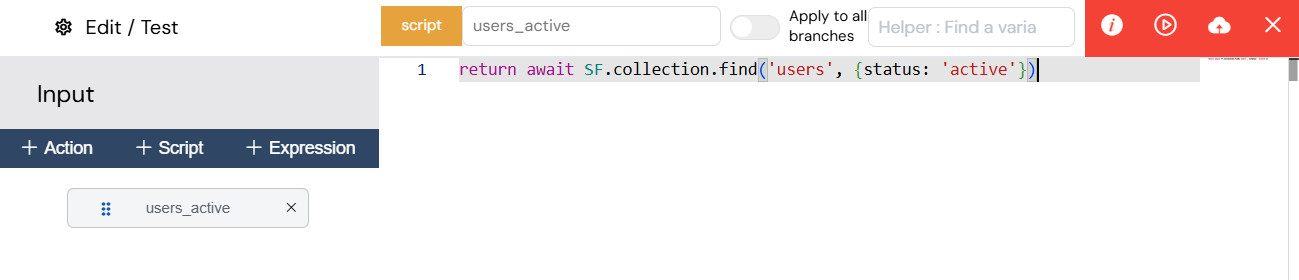
To learn more about the full capabilities of the SDK, please refer to our Node.js SDK reference.
3.1.2. ExpressionsDirect link to 3.1.2. Expressions
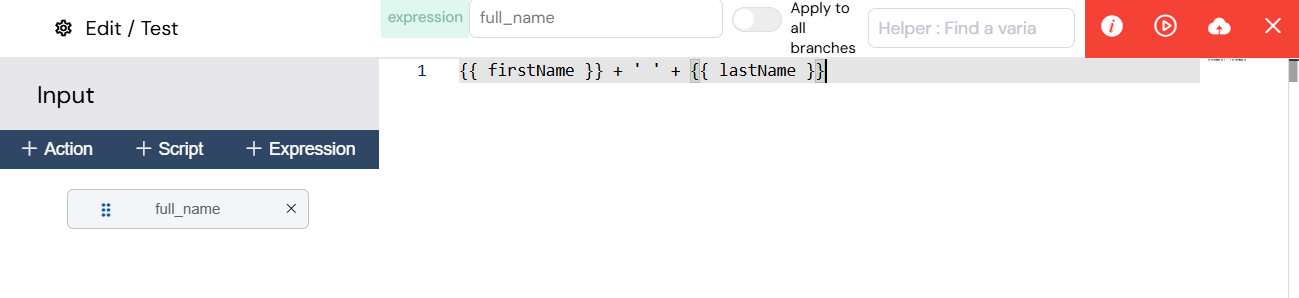
Expressions are used for simple data manipulations, such as assigning values to variables or performing basic string operations. They are a quick and easy way to manage data flow without writing full scripts.
3.1.3. ActionsDirect link to 3.1.3. Actions
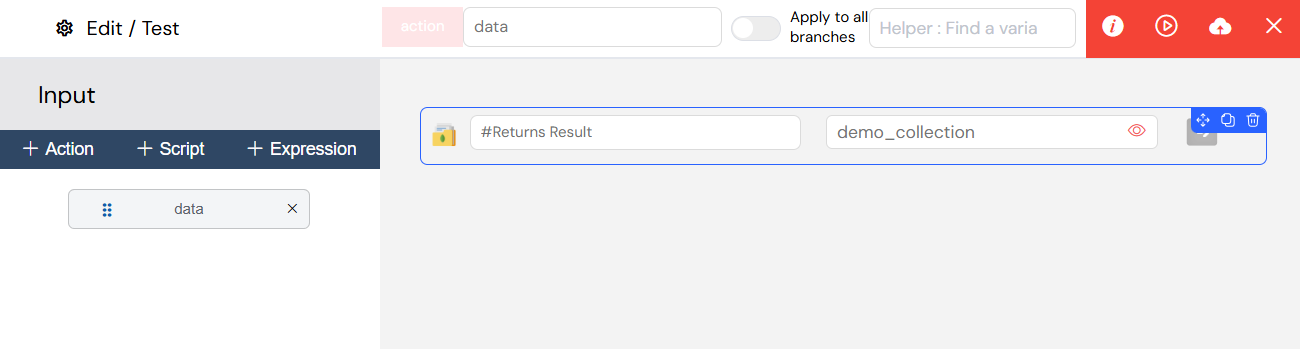
Actions provide a visual, no-code function builder for performing common operations like UI manipulations and database queries. This allows non-developers to build powerful logic without writing any code.
Available Actions:
- Database Operations: Easily find, insert, update, or delete records from your database.
- Process Management: Launch new processes, validate tasks, or retrieve task information.
- User Management: Find users, update their metadata, and manage roles.
- Utilities: A wide range of utilities are available, such as Generate PDF, Send email, and making API calls.
For detailed Input/Output configuration, see the Input/Output Parameters guide.
4. Scheduled Tasks & TimersDirect link to 4. Scheduled Tasks & Timers
4.1. Scheduled TasksDirect link to 4.1. Scheduled Tasks
The Scheduled Tasks feature starts a process automatically, at a chosen date and time and then at regular intervals, in TEST, UAT or PROD. This is perfect for recurring tasks like generating daily reports or performing nightly data synchronization.
You can manage the schedules in two places:
- In the process builder: Scheduling Tasks on the rail (stopwatch) opens the Scheduled tasks drawer, "The automatic starts of this process". It lists the schedules of this process (Start AT, Repeated each, Updated At, Last modified by, Mode). The + button adds a schedule for this process: choose the Mode (TEST, UAT or PROD), the Start Date And Time, the Delay between repetitions (Days, Hours, Minutes or Cron) and Repeat Every (or the Cron expression).
- In the workspace: the Scheduled tasks page gathers the schedules of all your projects. In the navigation dock, open Resources › Scheduled tasks (shortcut G then T), or go to
/ide/schedulingtasks.
A process can have only one schedule per environment: delete the existing one before adding another (otherwise the schedule is refused with an error).
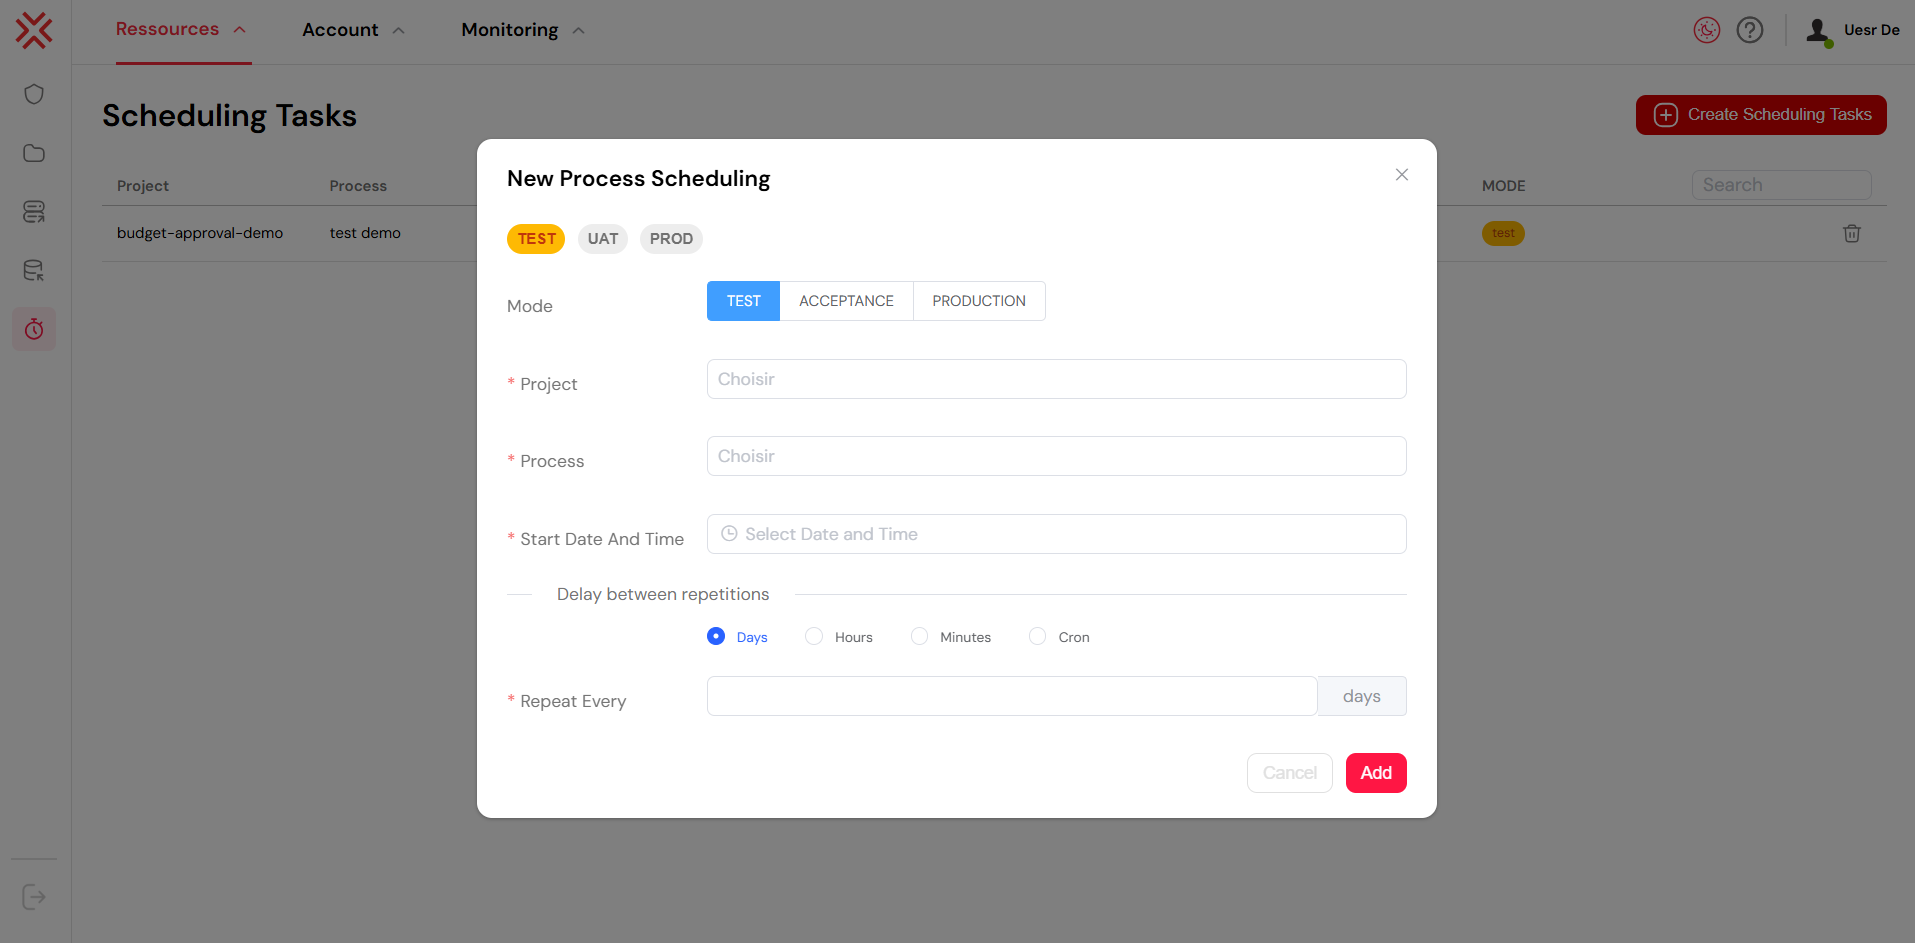
4.1.1. Creating a New Scheduled TaskDirect link to 4.1.1. Creating a New Scheduled Task
On the Scheduled tasks page, click Create Scheduling Task. The New Process Scheduling dialog opens ("The process starts automatically, at the chosen date and then at each repetition").
4.1.2. Fields in the FormDirect link to 4.1.2. Fields in the Form
| Field | Description |
|---|---|
| Environment | The environment where the process will run: TEST, UAT or PROD. |
| Project | The project that contains the process you want to schedule. |
| Process | The process to start (the list shows the processes of the chosen project). |
| Start Date And Time | The date and time of the first start. |
| Recurrence | The unit of the repetition: Days, Hours, Minutes or Cron. |
| Repeat Every | The number of days, hours or minutes between two starts. With Cron, this field becomes Cron: the expression. |
Click Add to create the schedule. The list shows each schedule with its process and project, its Recurrence, its First trigger and its Environment.
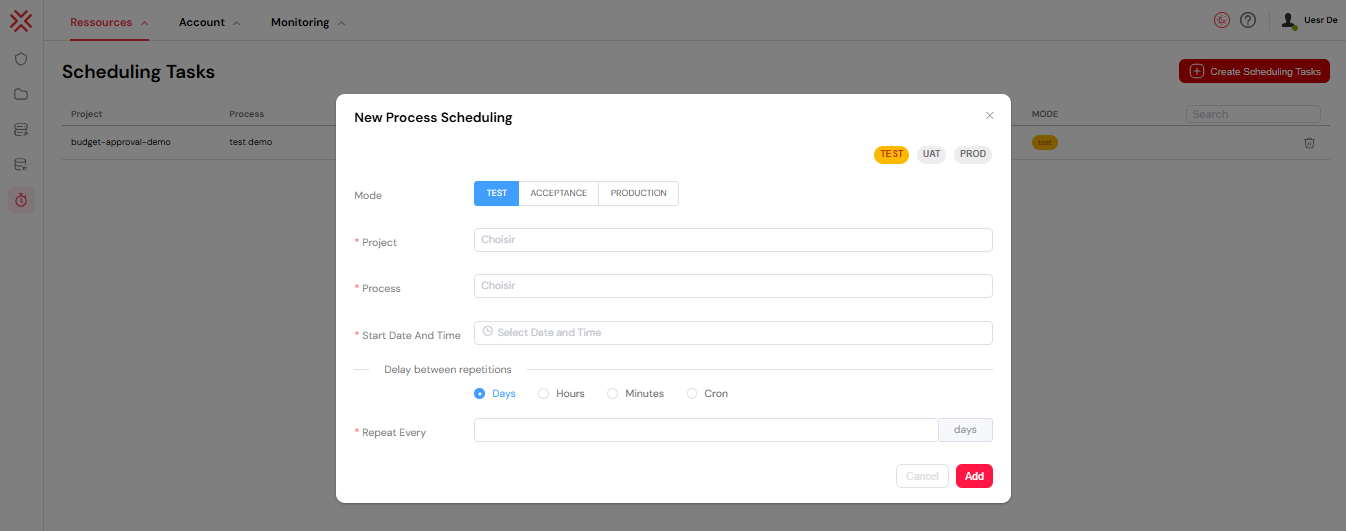
4.1.3. Recurrence OptionsDirect link to 4.1.3. Recurrence Options
- Days, Hours or Minutes: the process starts at the Start Date And Time, then again after each interval (for example Hours and
2: every 2 hours). - Cron: for advanced patterns. The expression has five fields: minute, hour, day of month, month and day of week (
0and7are Sunday). For example0 7 * * 1runs every Monday at 7 am. The info button next to the field (Learn The Syntax) opens the Cron Syntax help.
For the details (monitoring, errors, examples), see Schedule Management.
4.2. Timer EventsDirect link to 4.2. Timer Events
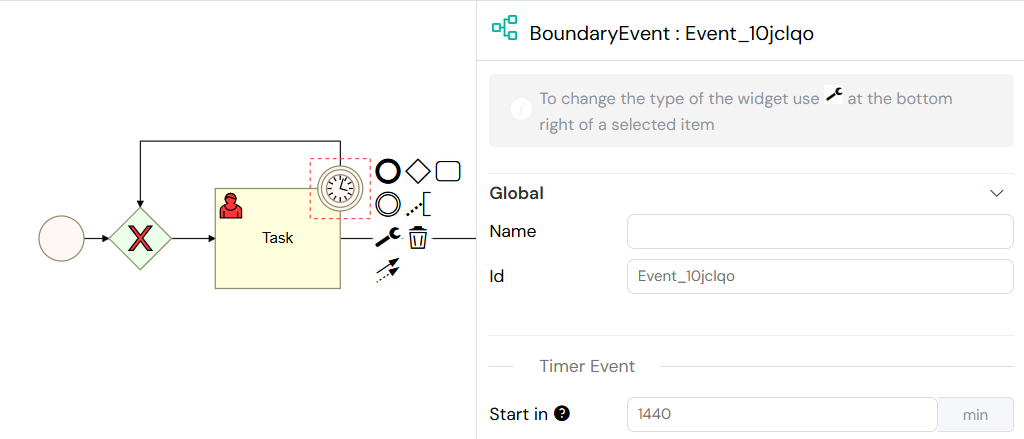
Timer Events can be attached to activities to handle timeouts. If a task is not completed within a specified time, the timer event will trigger an alternative path in the process. This is crucial for handling escalations or ensuring that processes do not get stuck.
- Start in: The delay before the timer is triggered (in minutes). It can contain a variable, for example
{{delai}}. - Action: When the timer triggers, it interrupts the main activity and follows the alternative path defined in the process model.
5. Email NotificationsDirect link to 5. Email Notifications
Email notifications are a key part of keeping users and stakeholders informed. They can be configured through Send Tasks for fully automated emails, or as part of a User Task's notification settings.
Key Email Features:
- Variable Integration: Personalize your emails by dynamically inserting process variables into the subject and body.
- Template Editor: Use a visual drag-and-drop editor to design professional and responsive email templates.
- Multi-Provider: Softyflow supports various email service providers, giving you the flexibility to use your preferred service.
- Attachment Support: Attach files from your project's resources to your emails.
- Mail Priority (new in 8.6): in the Notification section of a user task (under Send notification email) and in the Mail Configuration of a Send task, choose Normal, Very High or Critical, or type a variable such as
{{mailPriority}}to decide for each instance. When the field is empty, a user task uses its own Priority (Task Priority section) and a Send task is Normal.
5.1. Email Digest and Urgent EmailsDirect link to 5.1. Email Digest and Urgent Emails
Process emails are not always delivered one by one. When the platform turns on Individual sending and digest (Settings › Emails, off by default), each recipient receives their own email, and every user can choose to receive their process emails grouped in a digest, every day, every N days or on some days of the week, at the time they choose:
- users set it themselves in the applications portal: My settings › Email notifications;
- administrators set it for any account in the IDE: Users › the user › Notifications tab.
The digest only holds the process emails of the PROD environment. These emails are always sent at once, even to users who receive a digest:
- emails whose Mail priority is Very High or Critical (or, when the field is empty, the notification of a user task whose Priority is Very High or Critical);
- emails of the TEST and UAT environments;
- emails sent to an address that has no SoftyFlow account.
So give a Very High or Critical mail priority to the notifications that cannot wait (an urgent approval, a deadline): they never wait for a digest. See Process Emails and the Email Digest for the full rules, Notifications (Email Digest) for the user settings, and the process components for the fields of the email steps.
5.2. Notification StrategiesDirect link to 5.2. Notification Strategies
- Task Assignment: Notify users as soon as a new task is assigned to them.
- Status Updates: Keep stakeholders informed about the progress of a process.
- Error Alerts: Automatically send notifications to your technical team when an error occurs.
- Escalation: Implement time-based escalation rules to send reminder emails or reassign tasks if they are not completed on time.
6. Measures & KPIsDirect link to 6. Measures & KPIs
Process measures are used to track Key Performance Indicators (KPIs) in real-time. They allow you to perform calculations during process execution and store the results, which can then be used for creating insightful reports.
6.1. Measure ConfigurationDirect link to 6.1. Measure Configuration
Click Measures on the rail of the process builder. The Measures drawer opens: "Values computed on every instance, for reports, tables and filters". Each row is one measure:
- Name: the name of the measure. It is the column name in reports and the field name in the queries of tables. Prefer letters, digits and
_. - Type: String, Boolean, Number, Date or Any. A Number measure is stored as a number and a Date measure as a date, so that filters and sorts work on them.
- Value: "The value is a JavaScript string; insert a variable with:
{{ }}". Each{{ }}is replaced by the value of a process variable, or of a JavaScript expression on the variables.
Add a measure adds a row and the bin (Delete the measure) removes one. Click Save the measures to save them: the measures are saved apart from the diagram, with their own button.

SoftyFlow computes the measures at each step of every instance. A new or changed measure only applies to the next steps: to compute it again on the existing instances, use Measures in the Run mode of the project (see Recalculating the Measures).
6.2. Calculation ExamplesDirect link to 6.2. Calculation Examples
| Name | Type | Value | Result for an instance |
|---|---|---|---|
requestor_name | String | {{SF_initiator.firstName}} {{SF_initiator.lastName}} | Jean Dupont |
montant_total | Number | {{total_general}} | 7800 |
montant_ttc | Number | {{total_general * 1.2}} | 9360 |
urgent | String | {{urgence == "Haute" ? "Oui" : "Non"}} | Oui |
date_besoin | Date | {{date_besoin}} | the date of the field |
If a variable used in the value does not exist yet in the instance, the measure is empty.
6.3. System MeasuresDirect link to 6.3. System Measures
Softyflow automatically provides a set of system measures for every process instance:
SF_last_activity_name: The name of the current activity.SF_involved_users: A list of all users who have participated in the process.SF_status: The current status of the instance:Running,End,ErrororPause(shown as Running, Completed, Error and Paused in the Run pages).SF_createdAt: The timestamp when the process instance was started.
For more details, see the Measures documentation.
7. Error HandlingDirect link to 7. Error Handling
Robust error handling is crucial for building reliable applications. Softyflow provides mechanisms to catch and handle errors that may occur during process execution.
7.1. Error Boundary EventsDirect link to 7.1. Error Boundary Events
Error Boundary Events can be attached to activities to catch errors that occur within them. When an error is caught, the normal flow is interrupted, and the process follows an alternative path, allowing you to implement recovery logic.
Configuration:
- Attach to Activities: You can attach error events to User Tasks, Send Tasks, Normal Tasks, and Sub Processes.
- Error Types: The error event has no setting of its own (its panel only shows ERROR EVENT): it catches any error of the step it is attached to.
- Recovery Actions: Define an alternative execution path to handle the error, such as notifying an administrator, retrying the task, or gracefully terminating the process.
7.2. Error Handling StrategiesDirect link to 7.2. Error Handling Strategies
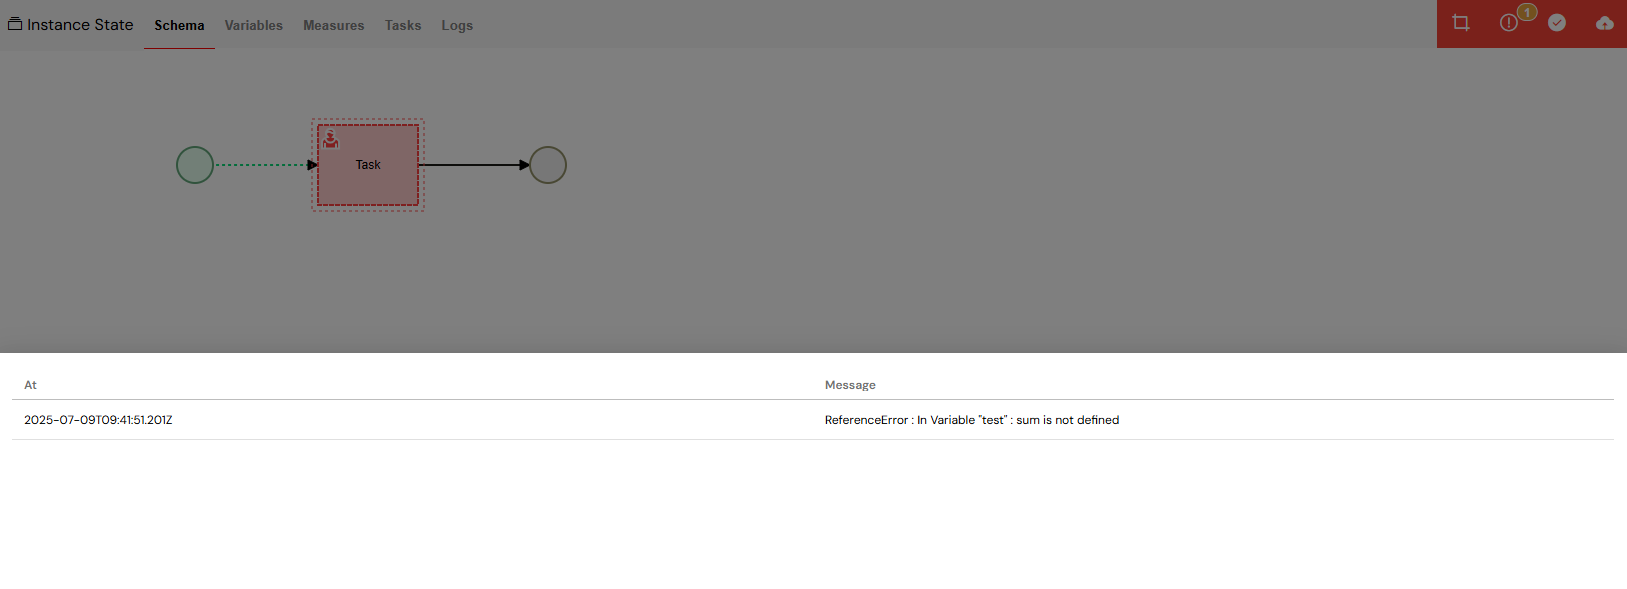
An error boundary event sits on the border of an activity (see Boundary Events). When the step fails (a script error, an email that cannot be sent…), the instance follows the flow of the error event instead of stopping in Error.
Best Practices for Error Handling:
- Always provide fallback paths for critical processes to ensure they don't get stuck.
- Log all errors with detailed information for easier debugging and monitoring.
- Implement retry mechanisms for transient failures, such as temporary network issues.
- Use timeout events in conjunction with error handling for long-running operations.
8. Security & Access ControlDirect link to 8. Security & Access Control
Security is a top priority, and Softyflow provides granular control over who can do what within your processes.
8.1. Task-Level SecurityDirect link to 8.1. Task-Level Security
- User Assignment: Assign tasks directly to a user or a role.
- Observers: Grant read-only access to users who need to monitor a task's progress.
- reCAPTCHA: Protect public-facing tasks from spam and abuse.
- Dynamic Assignment: Use process variables to implement complex, data-driven security rules.
8.2. Process-Level SecurityDirect link to 8.2. Process-Level Security
- Role Restrictions: Use role management to control who can start, view, or manage processes.
- View Permissions: Separate the permissions for viewing process instances from the rights to execute tasks.
- Variable Security: Protect sensitive data stored in process variables by controlling who can see or modify it.
8.3. Security Best PracticesDirect link to 8.3. Security Best Practices
- Principle of Least Privilege: Only grant users the permissions they absolutely need to perform their duties.
- Role Hierarchies: Implement a clear and logical role hierarchy that reflects your organizational structure.
- Auditing: Regularly audit process access and modifications to detect any unauthorized activity.
- Secure Credentials: Securely manage all sensitive variables and API credentials.
- Input Validation: Always validate all user inputs in your scripts and expressions to prevent injection attacks.
9. Best PracticesDirect link to 9. Best Practices
9.1. Process DesignDirect link to 9.1. Process Design
- Modularity: Break down large, complex processes into smaller, reusable sub-processes. This makes your models easier to read, maintain, and test.
- Error Handling: Always design for failure. Provide clear error paths and timeouts for any task that could potentially fail.
- Performance: Be mindful of performance. Avoid running complex calculations or queries in the critical path of your process if they can be done asynchronously.
- Documentation: Use descriptive names for your activities and variables, and add comments to your model to explain complex logic.
9.2. Variable ManagementDirect link to 9.2. Variable Management
- Naming Conventions: Adopt a consistent and descriptive naming convention for your variables (e.g., camelCase).
- Type Safety: Ensure that your expressions and scripts handle different data types correctly to avoid runtime errors.
- Null Checking: Always check if a variable exists before trying to use it, especially if it comes from an external system.
- Security: Be careful not to expose sensitive data in logs or to users who should not have access to it.
9.3. Testing & ValidationDirect link to 9.3. Testing & Validation
- Unit Testing: Test each component of your process, such as individual scripts or sub-processes, in isolation.
- End-to-End Testing: Validate the entire process flow from start to finish to ensure all integrations work as expected.
- Performance Testing: Monitor the execution times and resource usage of your processes under load to identify any bottlenecks.
- User Acceptance Testing (UAT): Involve your business users in the testing process to ensure the final application meets their needs and expectations.
Next StepsDirect link to Next Steps
Now that you have a solid understanding of process design, you can continue building out the rest of your application:
- Web Interface Design - Create the UI screens that will connect to your processes.
- Database Integration - Connect your processes to your data sources.
- Integration - Connect your application with external APIs and services.
- Reporting - Create insightful reports from your process data.
- Test & Deploy - Learn how to test and deploy your processes across different environments.
- Monitor & Run - Find out how to monitor and manage your running process instances.
For a more hands-on experience, we highly recommend trying our step-by-step tutorials or watching our process and reports video tutorials.
For more advanced topics, you can explore our detailed documentation on Process Components, Input/Output Parameters, Measures, and Sub Processes.