A Developer's Guide to Web Interface Actions
Actions are the engine of your Softyflow web interface. They are the powerful, executable commands that bring your application to life, turning static pages into dynamic, interactive experiences. By linking actions to user interactions (like a button click) or system events (like a page loading), you can orchestrate complex, logic-driven workflows without needing to write extensive code.
This guide provides a comprehensive walkthrough of every action available in the web modeler. We'll explore their parameters, share practical examples, and offer best practices to help you build robust and user-friendly applications.
SF_input: Your Context-Aware HelperWhen an action is triggered by a form element (e.g., a Dropdown, Text Input, or Checkbox), Softyflow automatically provides a special variable called SF_input. This variable is a treasure trove of contextual information about the element that triggered the event.
The SF_input object gives you access to:
value: The primary value of the input element. For a text field, it's the text content; for a dropdown, it's the selected value.SF_data: An object containing the full data record associated with the selected item. This is incredibly useful for dropdowns or radio buttons populated from a data source. It gives you access to all fields of the selected record, not just the singlevalue.SF_currentIndex: An integer representing the zero-based index of the element within a loop. This is essential when working with repeating elements, like rows in a dynamic table.
Action Catalog
Find the action you need quickly using the links below.
| Category | Actions |
|---|---|
| UI Manipulation | show • hide • toggleVisibility • setRequired • setDisable • disableForm • refreshWidget • fillForm • clearForm • confirm • alertMessage |
| Data & Variables | setModel • setVariable • pushToArray |
| Logic & Flow Control | if • repeat (loop) • loopArray |
| Process & Workflow | startProcess • OpenNextTask • update • save • openInstance • redirect |
| Database (Collections) | addToCollection • addManyToCollection • updateCollection • getCollection • getDocument • deleteDocument • AggregateCollection |
| External Databases (EDS) | insertTable • updateTables • findMany • exectuteStatement |
| API & Integration | invokeApi • sendEmail • previewPDF |
1. UI Manipulation: Crafting a Responsive User Experience
These actions dynamically alter the appearance and state of UI elements, allowing you to create a fluid and intuitive interface for your users.
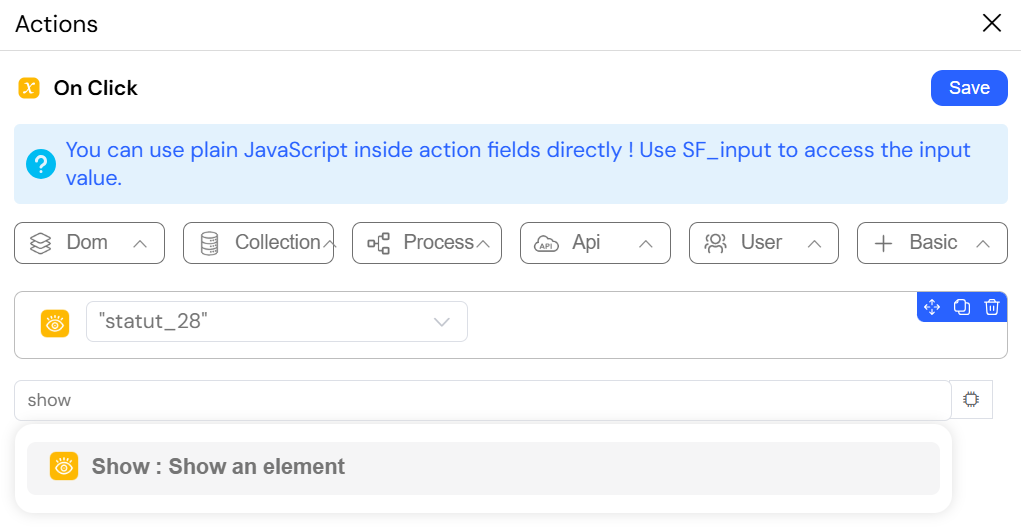
1.1. show: Revealing Hidden Elements
The show action modifies an element's visibility, changing its CSS display property from none to its default value, effectively making it appear on the page. This action is fundamental for creating responsive and dynamic forms. You can design interfaces that hide complex or conditional sections by default, revealing them only when a user's input makes them relevant. This declutters the UI and guides the user through the workflow.
Configuration
- Element ID (
string): The unique identifier of the DOM element you want to make visible.
Example Scenario
Imagine a registration form where a checkbox asks, "Are you registering as a business?". If the user checks this box, you want to display a field for their VAT number.
- Trigger: The
onClickevent of the "Are you registering as a business?" checkbox. - Action: A
showaction is configured with the Element ID of the container holding the VAT number input field. - Result: When the box is checked, the VAT number field instantly appears. When unchecked (using a corresponding
hideaction), it disappears, keeping the form clean and relevant to the user's context.
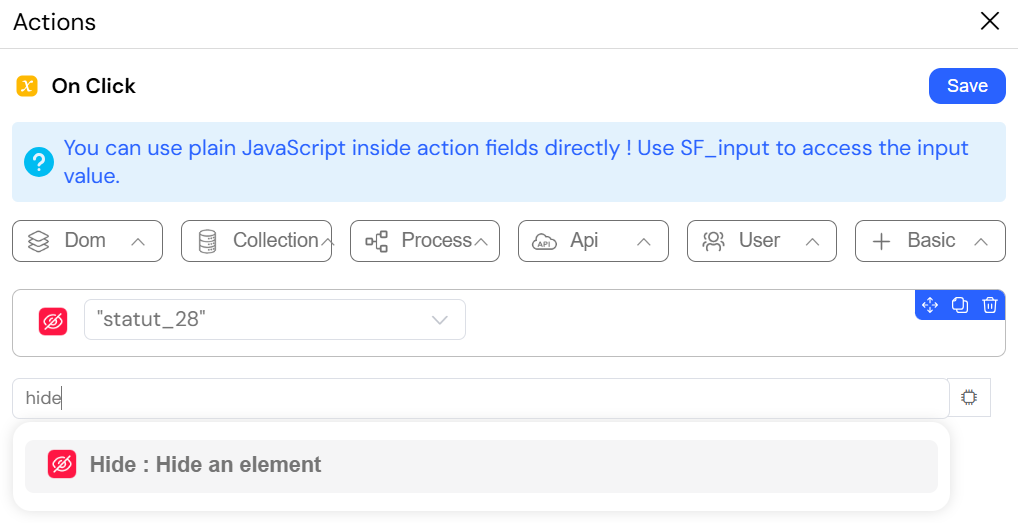
1.2. hide: Concealing Elements
The hide action sets an element's CSS display property to none, effectively removing it from the user's view and the page layout. This is the direct counterpart to the show action. It's essential for cleaning up the interface by hiding controls, messages, or sections that are no longer relevant to the user's current context. It is frequently used within the else block of an if action to create toggling effects.
Configuration
- Element ID (
string): The unique identifier of the DOM element you want to hide.
Example Scenario
Example Scenario (Focus on hide)
In a registration form, a checkbox asks: "Are you registering as a business?"
The VAT Number field should only be visible when this checkbox is checked.
- Trigger: The
onClickevent of the "Are you registering as a business?" checkbox. - Condition: An
ifaction checks whether the checkbox is unchecked (false). - Action: A
hideaction is configured with the Element ID of the container holding the VAT Number input field. - Result: When the user removes the check, the VAT Number field is immediately hidden.
This ensures the form stays clean and only displays fields relevant to non-business users.
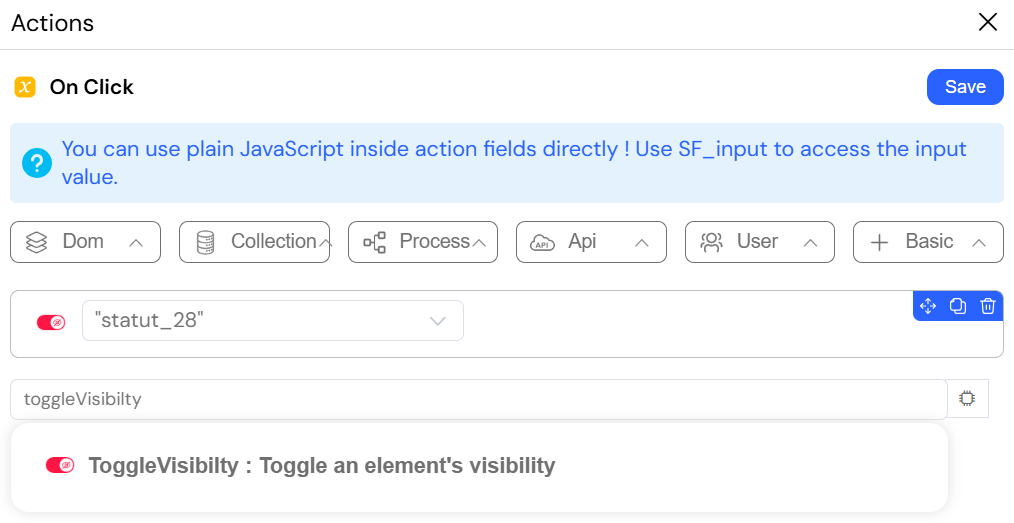
1.3. toggleVisibility: Switching Between Visible and Hidden
The toggleVisibility action provides a convenient way to switch an element's visibility. It automatically checks if an element is currently shown or hidden and applies the opposite state. This action is perfect for creating interactive UI elements that a user can open and close repeatedly. It simplifies the logic for features like "Read More" expanders, collapsible panels, FAQ accordions, or dropdown menus, as you don't need to manage the state with separate show and hide actions.
Configuration
- Element ID (
string): The unique identifier of the DOM element to toggle.
Example Scenario
You have a "Show Details" button that reveals an advanced configuration panel. By attaching the toggleVisibility action to the button's onClick event and targeting the panel's ID, you can create the entire show/hide functionality with a single action. The first click shows the panel, the second hides it, the third shows it again, and so on.
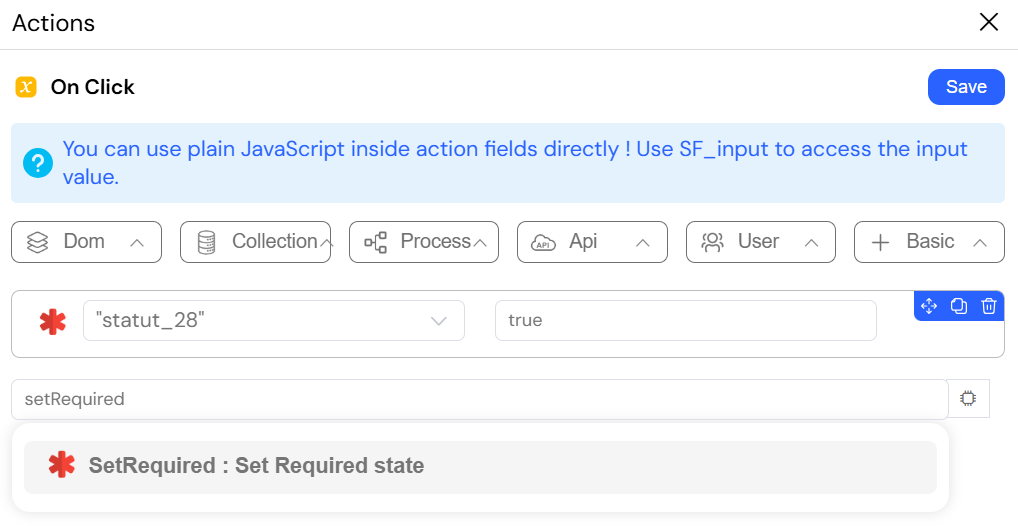
1.4. setRequired: Dynamically Enforcing Rules
The setRequired action programmatically adds or removes the required HTML attribute on a form field. This fully integrates with Softyflow's built-in form validation, allowing you to enforce rules dynamically based on user input. This action allows you to build intelligent, adaptive forms. Instead of overwhelming users with validation errors for fields that may not apply to them, you can make fields required only when they become relevant, guiding the user to fill out the form correctly.
Configuration
- Element ID (
string): The ID of the target form element (e.g., a text input, dropdown, or checkbox). - Value (
boolean): Set totrueto make the field required, orfalseto make it optional.
Example Scenario
In a feedback form, if a user selects a rating of "1 Star" or "2 Stars" from a dropdown, you want to require them to leave a comment.
- Trigger: The
onChangeevent of the star rating dropdown. - Action: An
ifaction checks ifSF_input.value <= 2. - Logic:
- If
true, asetRequiredaction targets the "Comments" textarea with a Value oftrue. - In the
elsebranch, anothersetRequiredaction targets the same textarea with a Value offalse, making it optional for higher ratings.
- If
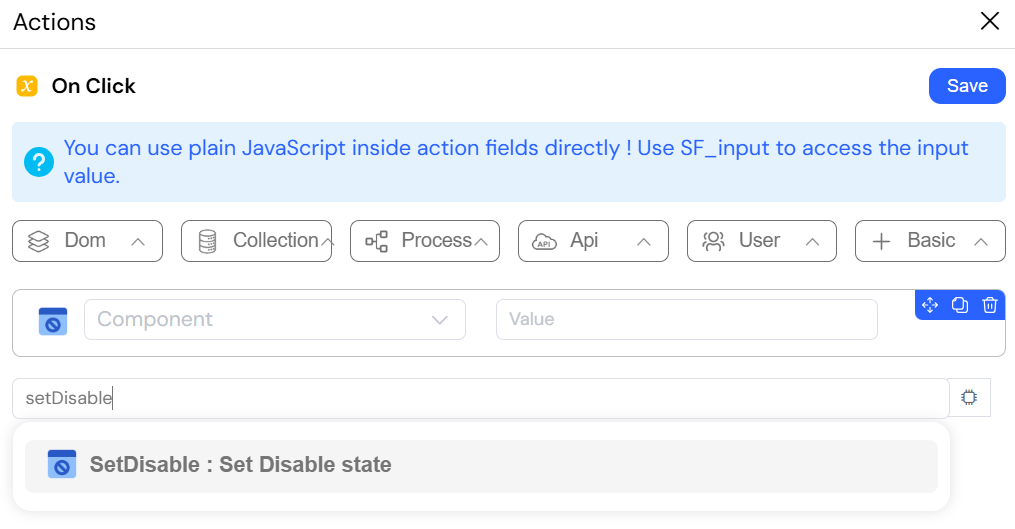
1.5. setDisable: Controlling User Interaction
The setDisable action gives you programmatic control over the disabled state of a form element, allowing you to enable or disable it on the fly. A disabled element is visible but read-only and cannot be interacted with. Use this to prevent users from editing certain fields based on their permissions, the application's state, or a choice they've made elsewhere on the form. It provides a clear visual indicator that a field's value is fixed and not open for modification.
Configuration
- Element ID (
string): The ID of the form element to control. - Value (
boolean): Set totrueto disable the element, orfalseto enable it.
Example Scenario
On an "Edit Profile" page, the user's email address is initially disabled to prevent accidental modification. A button labeled "Edit Email" is added next to the email field. When the user clicks this button, a setDisable action is triggered with a Value of false, targeting the email input field. This unlocks the email field, allowing the user to update their address safely and intentionally
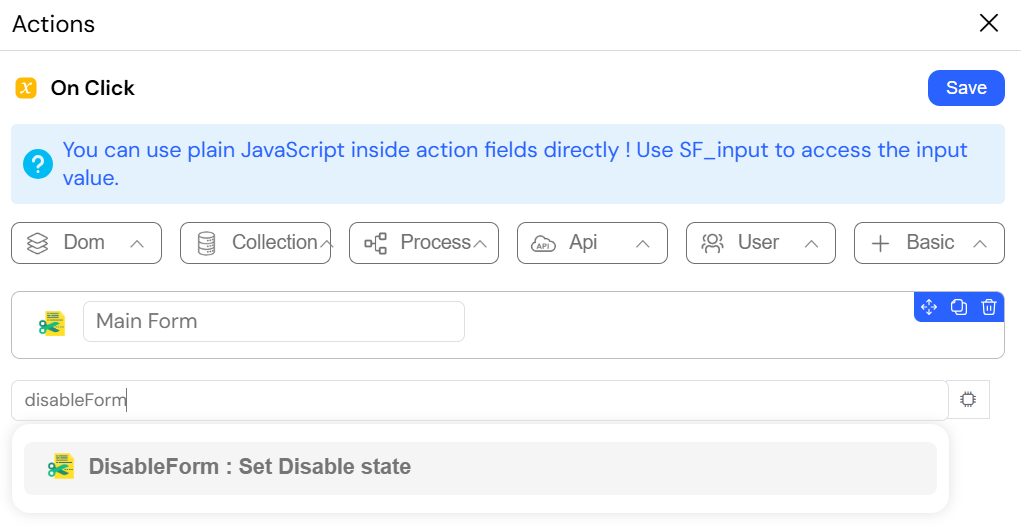
1.6. disableForm: Safeguarding Form Integrity
The disableForm action is a powerful utility that disables all interactive elements—including inputs, buttons, and dropdowns—within a specified form container in a single step. This is a crucial action for maintaining data integrity and providing clear user feedback during submission events. By disabling the form, you prevent users from accidentally clicking the "Submit" button multiple times or changing data while a background operation (like an API call or process update) is in progress.
Configuration
- Attach form (
object): A reference to the form container that holds all the elements to be disabled.
Example Scenario
When the user clicks the “Save” button inside the form:
The disableForm action is triggered immediately.
All fields and buttons inside the form become disabled so the user cannot change data or click multiple times.
Once the operation is finished, the form can either be re-enabled or the user can be redirected to another page.
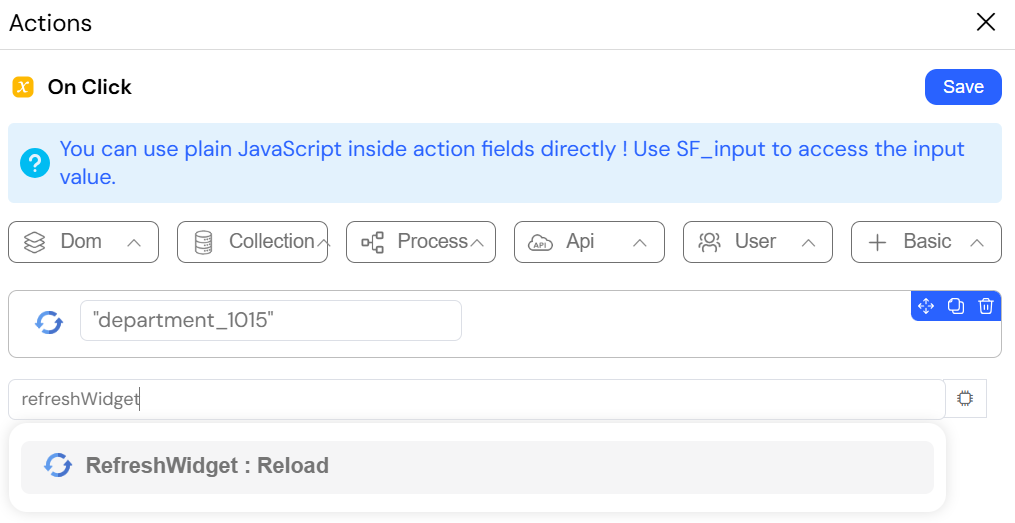
1.7. refreshWidget: Displaying Up-to-the-Minute Data
The refreshWidget action forces a specific widget (such as a List, Table, Chart, or Data Grid) to re-execute its data query and render itself with the most current information from its data source. This action is essential for creating a real-time, dynamic user experience. After any action that creates, updates, or deletes data displayed in a widget, you must call refreshWidget to ensure the user immediately sees the result of their action without needing to manually reload the page.
Configuration
- Element ID (
string): The ID of the widget you want to refresh.
Example Scenario
A user is managing a list of company departments. They want to add a new department using a modal form.
- The modal's "Add Department" button triggers an
addToCollectionaction to save the new department in the Departments collection. - Immediately after, a
hideaction closes the modal window. - The final action is
refreshWidget, targeting the main Departments list widget. Once the modal closes, the user sees the newly added department appear instantly in the list.

1.8. fillForm: Populating Forms with Data
The fillForm action efficiently populates an entire form's fields with data from a single JSON object. It works by matching the keys in the object to the id attributes of the corresponding form fields. This is a massive time-saver for any "edit" or "view details" functionality. When a user selects an item from a list to edit, you can use getDocument to fetch the item's complete data object, then pass it directly to fillForm to instantly and completely populate the editing form.
Configuration
- Attach form (
object): The form container to be filled. - Form model (
object): A JSON object containing the key-value pairs to populate the form with.
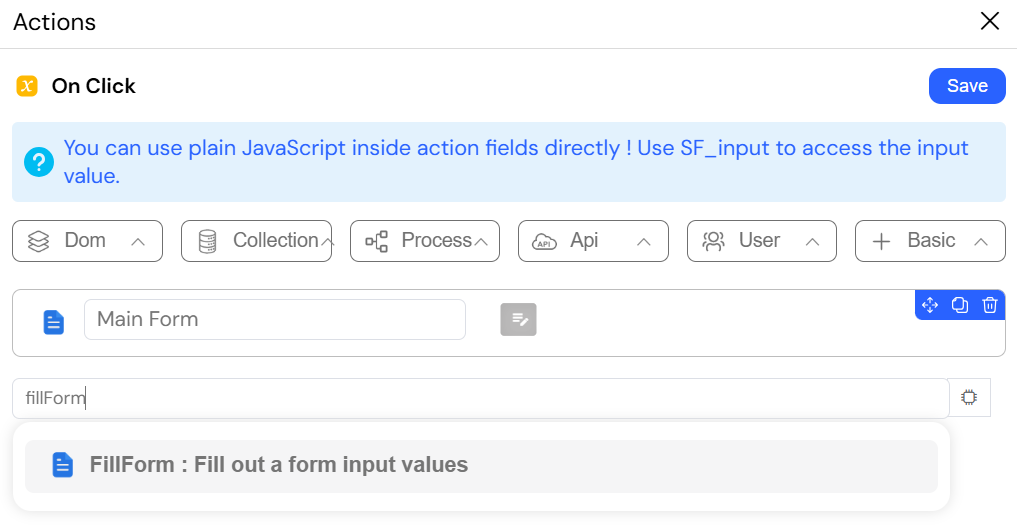
Example Scenario
In a company management application, a user clicks the “Edit” icon next to a department’s name in a table.
- The
onClickevent on the icon triggers an action that opens a popup. - Populate Form
The next action isfillForm, which targets the “Edit Department” form and uses theSF_inputvariable as the Form Model. - Show Form
Finally, ashowaction displays the “Edit Department” form, now fully populated with the department’s data.
1.9. clearForm: Resetting User Input
The clearForm action provides a simple way to reset all fields within a specified form container to their original, empty state. This is a quality-of-life feature for improving user experience on complex forms. It's typically attached to a "Reset" or "Clear" button, giving users a one-click method to start over without the tedious task of manually clearing each input field.
Configuration
- Attach form (
object): The form container whose fields are to be cleared.
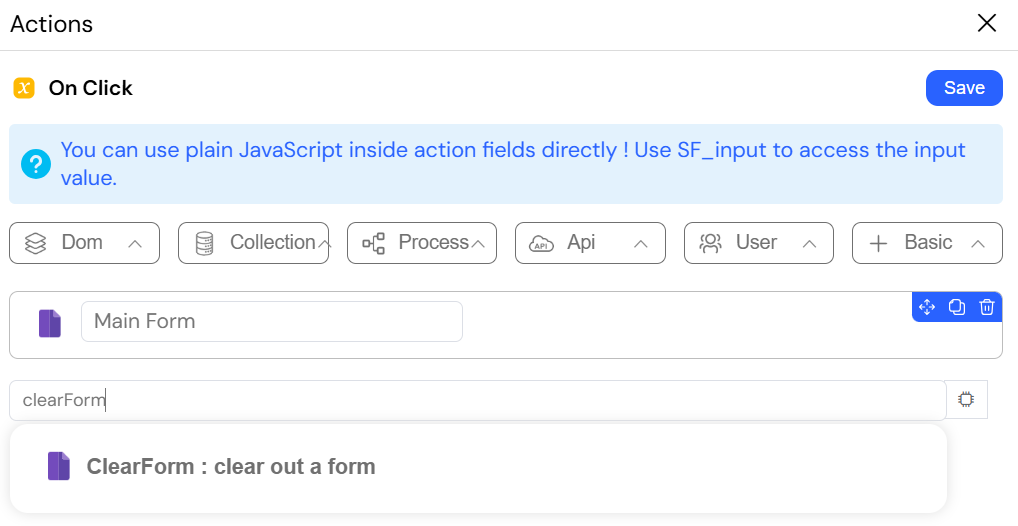
Example Scenario
A user is filling out a search form. All input fields are placed inside the same form container.
In the clearForm action, the developer selects the form by choosing its ID in the Attach form field.
When the "Reset" button (also inside the form) is clicked, the clearForm action runs and clears all the inputs in that form, returning it to an empty state.
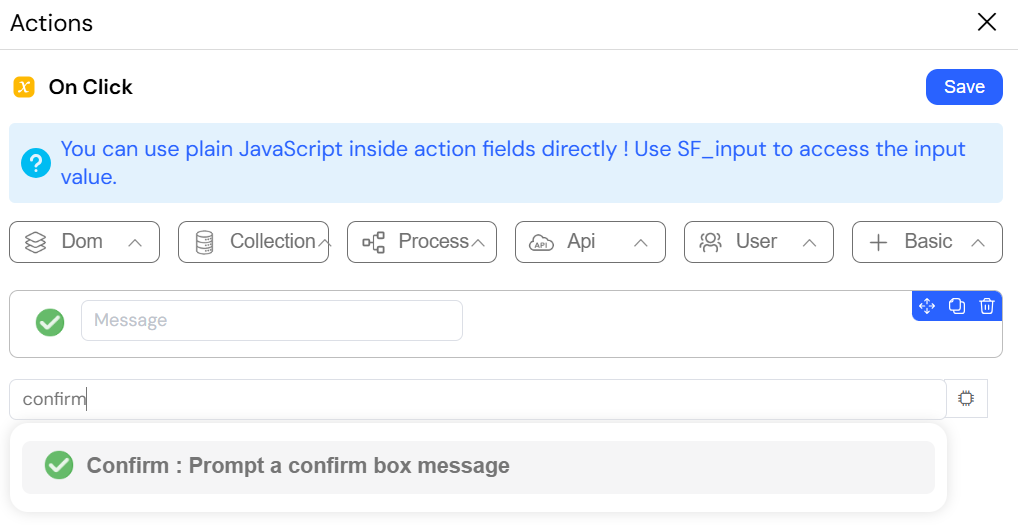
1.10. confirm: Asking for User Confirmation
The confirm action displays a native browser confirmation dialog with a custom message. It is a modal action that halts the execution of subsequent actions until the user clicks "OK" or "Cancel". This is a critical safety mechanism that should always be used before any destructive or irreversible operation. Use it to prevent accidental data loss when a user tries to delete a record, abandon unsaved changes, or submit a final application.
Returns
- Output (
boolean): The most important feature of this action is its boolean output. It returnstrueif the user clicks "OK" andfalseif they click "Cancel". This output should be used as the condition for a subsequentifaction to control the workflow.
Configuration
- Message (
string): The question or warning to display in the confirmation box (e.g., "Are you sure you want to permanently delete this invoice?").
Example Scenario
A user is filling out a form and has already entered several values. Inside the form, there is a "Reset" button that clears all fields using the clearForm action.
To avoid losing data by mistake, the first action triggered by the button is confirm, with a message like:
"Are you sure you want to reset the form?"
- If the user clicks "OK", the
confirmaction returnstrue, and the workflow continues to the next action, which isclearForm, clearing all inputs in the form. - If the user clicks "Cancel", the
confirmaction returnsfalse, and the workflow stops — the form remains unchanged.
This ensures the user does not accidentally lose their input.
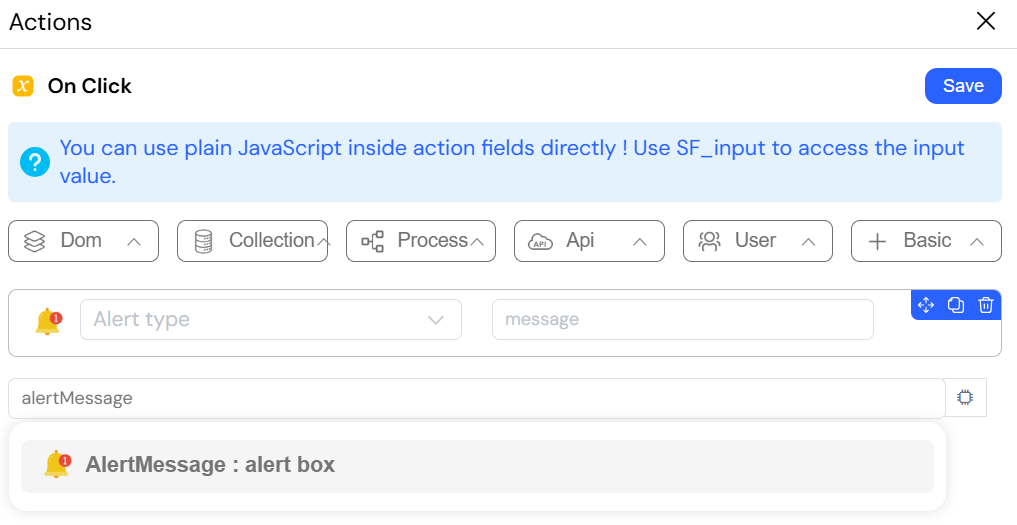
1.11. alertMessage: Providing Clear User Feedback
The alertMessage action displays a small, non-blocking notification pop-up (often called a "toast") to provide immediate and contextual feedback to the user. This is the standard and best way to communicate the result of a background operation. It informs the user about the success or failure of their action without interrupting their workflow, unlike a standard browser alert.
Configuration
- Type : Defines the style and color of the alert. Valid options are
info,success,warning, anderror. - Message (
string): The text content to display in the notification. This can be static text or include dynamic values from variables.
Example Scenario
A user selects a date from a date picker.
An if condition checks whether the selected date is today or a future date.
- If
selected_date >= today, the condition returns true, and analertMessagewith Type: success is displayed: "Date is valid." - If
selected_date < today, the condition returns false, and analertMessagewith Type: Warning is displayed: "Invalid date: Please select today or a future date."
This gives the user immediate feedback while keeping the workflow smooth.
2. Data and Variable Management
These actions are the building blocks for managing state, handling data, and controlling the information that powers your application.
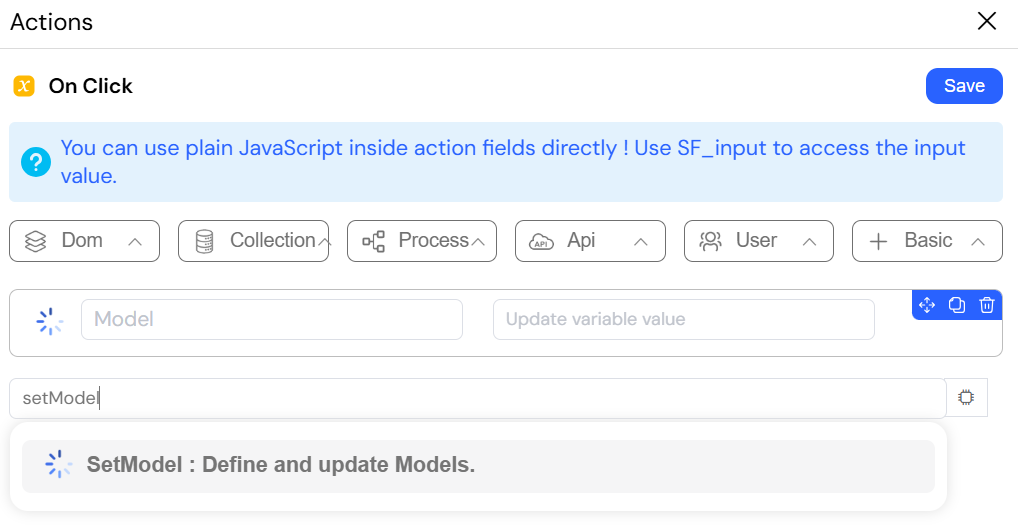
2.1. setModel: Managing Process Variables
The setModel action is used to define or update a process variable (also known as a model). These variables are the core data state of your application, are persistent within a given process instance, and can be passed to back-end processes. Use setModel to store and manipulate any data that is essential to your workflow's logic, such as a customer's ID, a calculated total, or the current status of an application. This data acts as the "memory" of your process from one step to the next.
Configuration
- Name (
string): The name of the model variable (e.g.,invoice_data). - Update variable value (
any): The new value for the variable. This can be a static value, or data from another element or variable.
Example Scenario
A user fills out a purchase form where they select a product price and enter a quantity.
A calculation is performed to determine the total amount to pay.
- The expression
{{ price }} * {{ quantity }}is evaluated. - A
setModelaction stores the result in a process variable calledtotal_amount.
For example, if the price is 100 and the quantity is 3, the calculated value 300 is automatically saved into total_amount.
This allows the total amount to be reused later in the workflow, such as displaying it in the UI or sending it to the back-end during order submission.
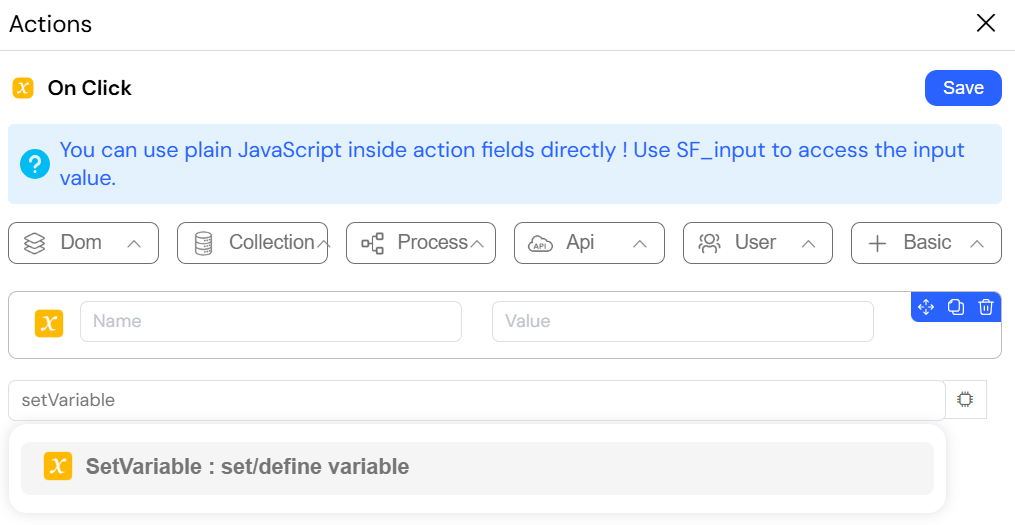
2.2. setVariable: Handling Page-Level Variables
The setVariable action defines or updates a global, temporary variable that is accessible anywhere on the current page. Unlike models, these variables are non-persistent and are reset if the page is reloaded. setVariable is perfect for storing temporary UI state that doesn't need to be saved with the process instance data. This is useful for tracking UI-specific information like flags, counters, temporary user selections, or whether an animation has already played.
Configuration
- Name (
string): The name of the global page variable (e.g.,is_details_panel_visible). - Value (
any): The value to assign to the variable.
Example Scenario
A page contains an input field and a button.
- The user types a message into an input field.
- When the click enter, a
setVariableaction stores the input value in a page variable namedvar_alert. - An
alertaction is then triggered and displays a dynamic message using the variable:vm.var_alert.
Result:
The alert shows the exact value entered by the user. The data is temporary and will be cleared if the page is refreshed.
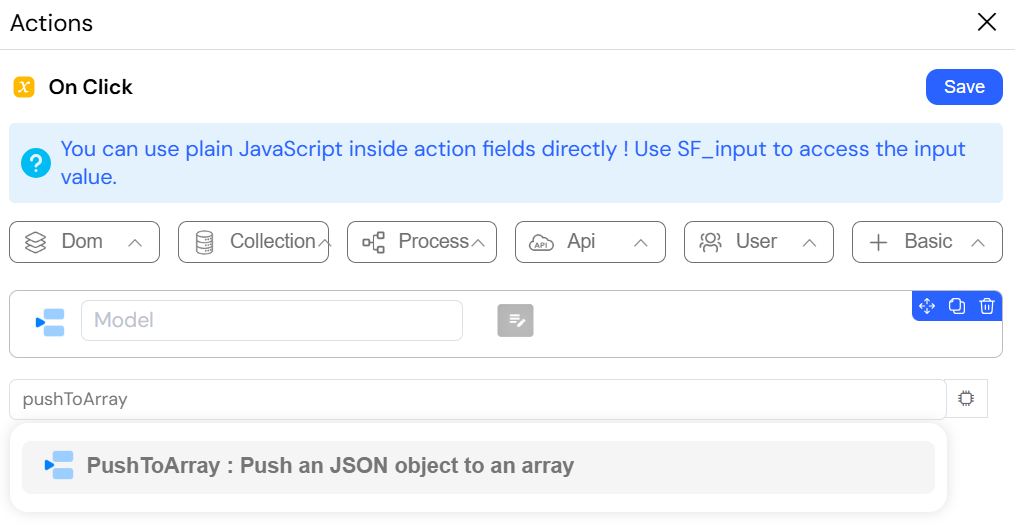
2.3. pushToArray: Dynamically Building Lists
The pushToArray action adds a new element (typically a JSON object) to an array stored in a model or a page variable. If the specified array doesn't exist, this action will create it first before adding the element. This action is invaluable for any feature where a user needs to dynamically build a list of items. It is the core mechanism behind shopping carts, adding line items to an invoice, attaching multiple files, or adding invitees to an event list.
Configuration
- Array Name (
string): The name of the model or variable array you want to add to (e.g.,invoice_items). - Json Object (
object): The object to be added as a new element to the array.
Example Scenario
In an invoice creation form, there is a sub-form for adding a single line item (with fields for description, quantity, and price). When the user clicks an "Add Item" button:
- A
pushToArrayaction is triggered. - The Array Name is set to
table_invoice_items. - The Json Object is constructed from the sub-form's fields:
{ "desc": "Wireless Mouse", "qty": "2", "price": "19.99" }. - Finally, a
refreshWidgetaction updates the invoice line items list to display the newly added item.
3. Logic and Flow Control
Control the execution flow of your actions with conditional logic and loops, enabling you to build complex and responsive behaviors.
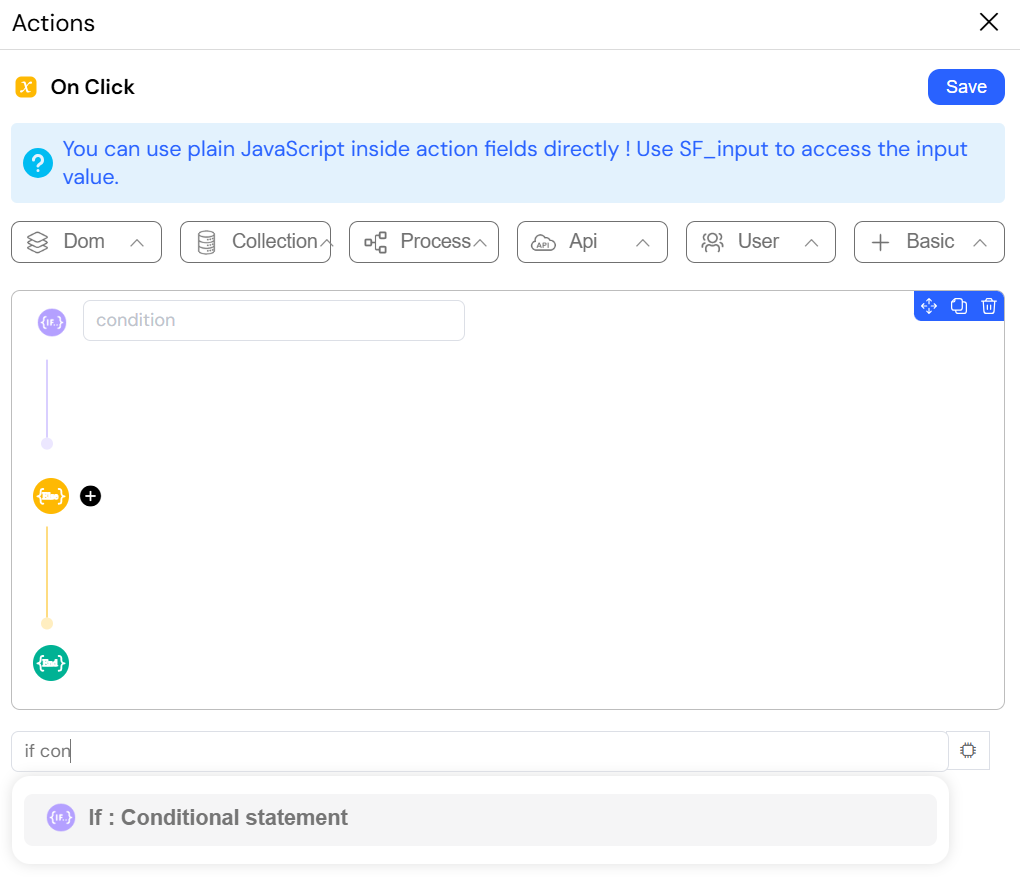
3.1. if: Making Decisions in Your Logic
The if action is the cornerstone of decision-making in Softyflow. It allows you to execute different sets of nested actions based on whether a given condition evaluates to true or false. It supports if, else if, and else branches for building out complex logic. This action is fundamental for almost any non-trivial workflow. It's used for validating form inputs, checking user roles and permissions, responding to user selections, handling different API responses, and creating any kind of conditional logic path.
Configuration
- condition (
boolean): An expression that must resolve to a booleantrueorfalse. You can write complex conditions using JavaScript. - actions: Separate nested action blocks for the
if,else if, andelsebranches.
Example Scenario
In a business approval form, a user must choose one option: Approve or Reject.
- The user selects an option and clicks the "Submit" button.
- An
ifaction checks the selected decision with the condition:{{ decision }} == 'approve' - If the condition is true (Approve selected): An
alertMessageis displayed: "The request has been approved successfully." - Else (Reject selected): An
alertMessageis displayed: "The request has been rejected."
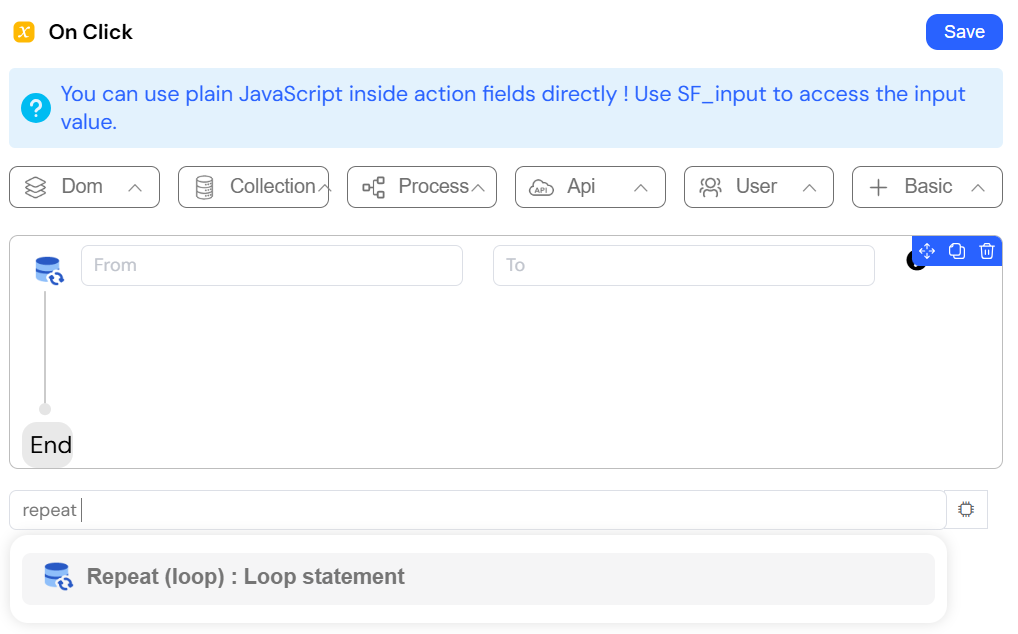
3.2. repeat (loop): Executing Actions Multiple Times
The repeat action creates a simple loop that executes a set of nested actions a specified number of times. It provides a special SF_loop.currentIndex variable that you can access within the loop to know the current iteration number (starting from the "From" value). This is useful for performing repetitive tasks that are not based on iterating over a data collection. Examples include creating a set number of default records, running a calculation several times with incremental changes, or generating placeholder data for testing.
Configuration
- From (
number): The starting index of the loop (inclusive). - To (
number): The ending index of the loop (inclusive).
Example Scenario
A page contains a button labeled Generate Messages.
- When the user clicks the button, a
repeataction is triggered. - The loop is configured with From
1and To4. - Inside the loop, an
alertaction displays a dynamic message usingMessage number ${Sf_loop_index}.
Result:
Three alerts are shown sequentially:
- Message number 1
- Message number 2
- Message number 3
This demonstrates how the repeat action can execute the same action multiple times using the loop index.
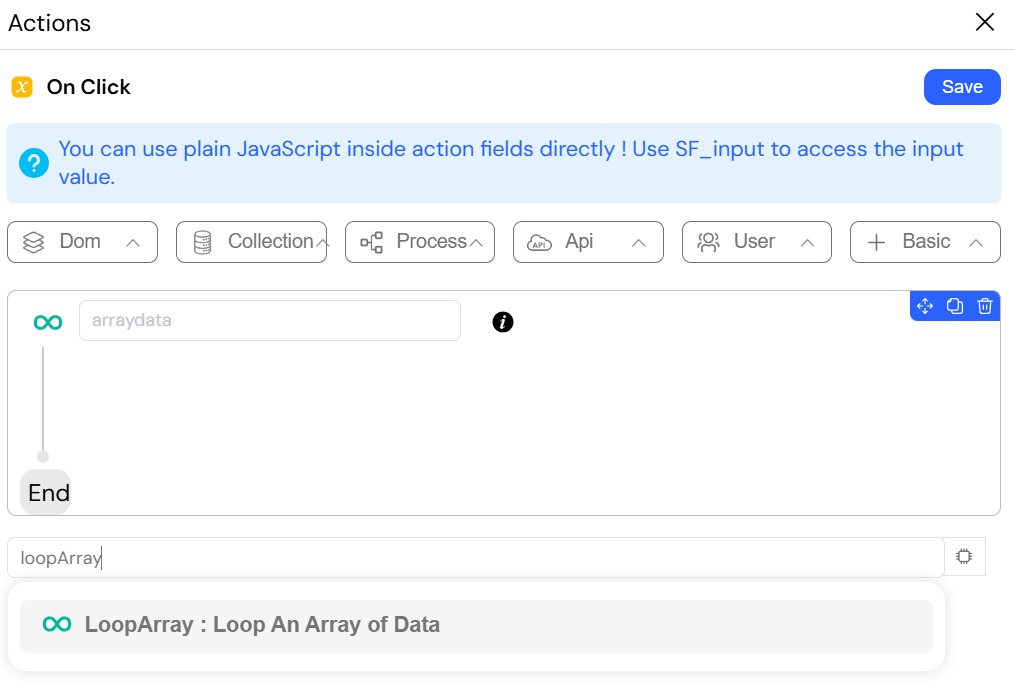
3.3. loopArray: Iterating Over Data Collections
The loopArray action iterates over a given array of data (from a model, variable, or API response), executing a block of nested actions for each element in that array. It is the equivalent of a forEach or for...of loop in programming. This is one of the most powerful actions for batch data processing. It is essential for updating multiple database records, calling an API for each item in a list, performing calculations on each row of a shopping cart, or sending customized emails to a list of users.
Contextual Variables
Inside the loop, you gain access to two special, context-aware variables:
SF_loop.currentItem: The full object or value for the current iteration.SF_loop.currentIndex: The zero-based index of the current item in the array.
Configuration
- arraydata (
array): The array you want to iterate over. - actions (
array): The block of actions to execute for each element.
Example Scenario
A page contains a button and a list of messages stored in a variable array.
- The page has a page variable named
messageswith the following value:["Hello", "Welcome", "Goodbye"] - When the user clicks the button, a
loopArrayaction is triggered. - The arraydata is set to
{{ variables.messages }}. - Inside the loop, an
alertaction displays a dynamic message using{{ SF_loop.currentItem }}.
Result:
An alert is shown for each message in the array:
- Hello
- Welcome
- Goodbye
This shows how loopArray processes each item in an array one by one and uses the current item dynamically.
4. Process and Workflow Actions
Manage business processes, control task progression, and handle user navigation within your application.
4.1. startProcess: Initiating a New Workflow
The startProcess action formally initiates a new instance of a Softyflow process model. This is the starting point for any structured business process in your application. This action is triggered when a user takes an action that should kick off a workflow, such as clicking "Submit Application," "Create New Order," or "Begin Onboarding." It creates a new entry in the process engine that can then be tracked, monitored, and progressed.
Returns
- This action can optionally store the
instanceIdof the newly created process into a model or page variable. This ID is the unique identifier for this specific workflow instance and is crucial for tracking or navigating to it later.
Configuration
- instanceIdVar (
string, optional): The name of a variable to store the ID of the new process instance. - process : A reference to the process model you want to start.

4.2. OpenNextTask: Guiding Users Through Workflows
The OpenNextTask action is a smart navigation utility that improves user experience by automatically guiding them to their next piece of work. It inspects a process instance for the next available human task and immediately redirects the user to the correct form. Use this to create a seamless, guided workflow. For example, after a manager approves one request, OpenNextTask can check if another approval is pending in their queue and take them there directly, saving them from having to return to a dashboard and manually find their next task.
Configuration
- instanceId (
string): The ID of the process instance to check for a next task. - Fallback Redirect url (
string): A URL to redirect the user to if no subsequent task is found (e.g., because the process has ended or the next step is an automated task).

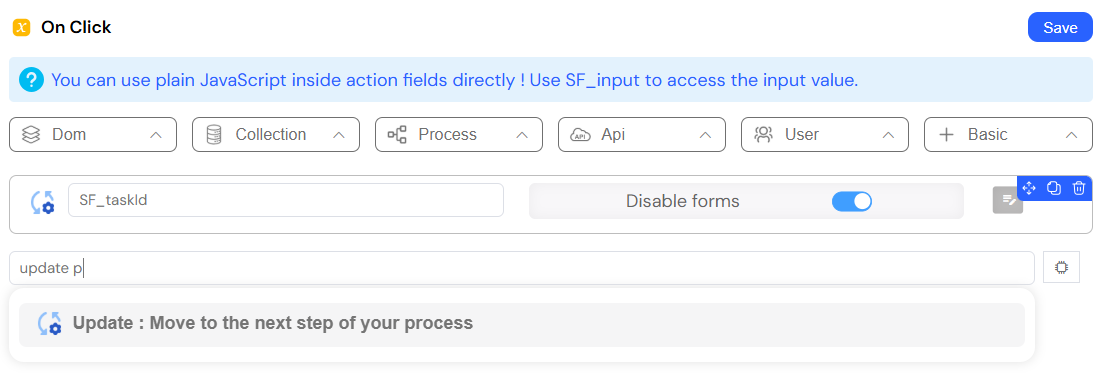
4.3. update: Completing a Task and Advancing the Process
The update action signals to the Softyflow process engine that the current human task is complete. This is the primary mechanism for advancing a workflow from one step to the next as defined in your process model. This action should be attached to the main concluding action on a task form, such as an "Approve," "Reject," "Submit," or "Complete" button. Triggering it completes the task and allows the process to evaluate the next step in the flow.
Configuration
- Task Id (
string): The ID of the current task being completed. This is often available in the page context. - Measures (
object, optional): An object of key-value data that you want to pass from this task to the subsequent steps of the workflow. This is how you pass decisions (e.g.,{ "approval_status": "rejected" }) or data downstream.
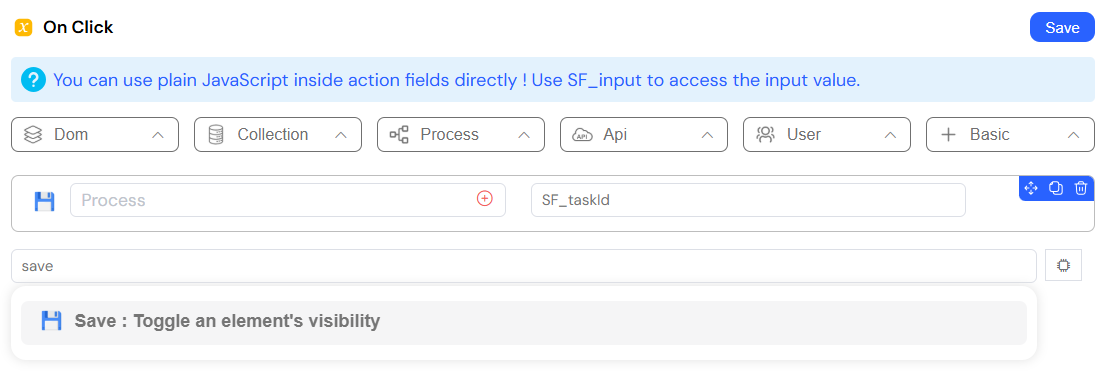
4.4. save: Saving a Draft
The save action saves the current data and state of a task form without completing the task or advancing the process. This is a crucial user experience feature for long or complex forms where a user might need to gather information over time. It allows them to save a draft of their work and return to it later. The task remains assigned to them, and the workflow does not progress.
Configuration
- Task Id (
string): The ID of the current task whose data you want to save. This is typically available in the page context.
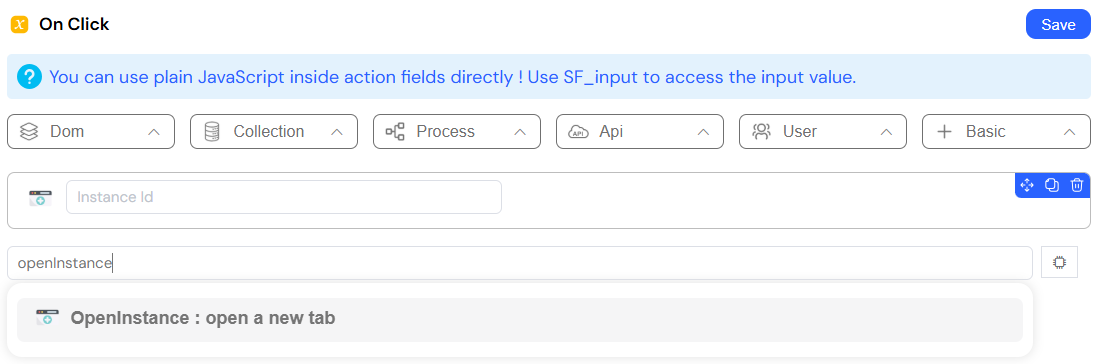
4.5. openInstance: Viewing Process Details
The openInstance action navigates the user to the detailed "Instance View" for a given process instance, typically opening it in a new browser tab. This view provides a complete audit trail, showing the process history, current status, associated data, and any errors. This is perfect for providing "drill-down" capabilities from dashboards, reports, or list views. When a user sees a summary of many process instances, this action lets them click on a specific one to investigate its full history and details.
Configuration
- Instance Id (
string): The unique ID of the process instance you want to open.
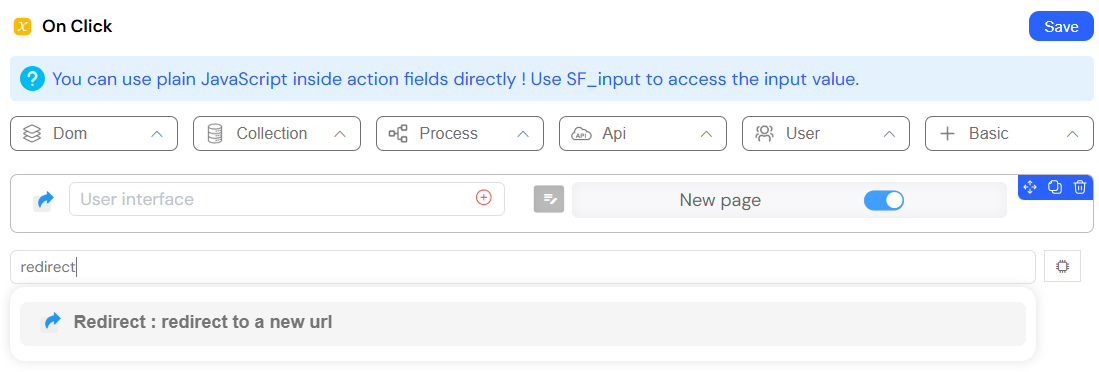
4.6. redirect: Navigating Through Your Application
The redirect action programmatically navigates the user's browser to a new URL, either within your application or to an external site. This is a fundamental action for controlling application flow and navigation. It is used to send users to a "Thank You" page after a submission, to a login page if they are not authenticated, or to a specific dashboard based on their role.
Configuration
- Redirect url (
string): The destination URL. - params (
object, optional): An object of key-value pairs that will be appended to the URL as query string parameters (e.g.,{ "id": 123 }becomes?id=123). - New page: If set to
true, the URL will open in a new browser tab. Defaults tofalse.
5. Collection (Database) Operations
Perform CRUD (Create, Read, Update, Delete) operations directly on your Softyflow database collections.
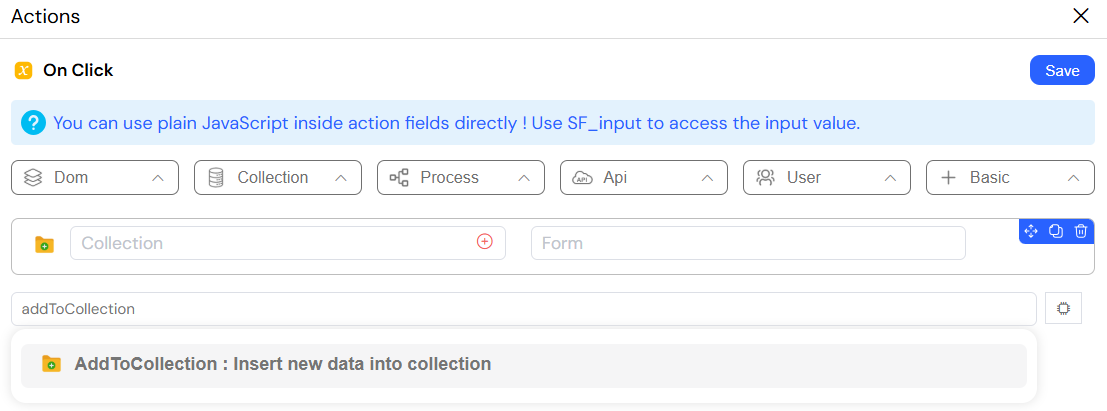
5.1. addToCollection: Creating New Database Records
The addToCollection action inserts a single new document into a specified database collection. This is the primary action for creating new records in your application's database. It's used whenever a user saves a new entity, such as creating a new contact, submitting a new form, or logging a new event.
Configuration
- Collection (
object): A reference to the target database collection. - Data model (
object): A JSON object representing the document to be inserted.
Example Scenario
A page contains a simple form with two input fields: Name and Email, and a Submit button.
The user fills in the Name and Email fields.
When the user clicks the Submit button, an
addToCollectionaction is triggered.The Collection is set to
Users_demo.The Data model is defined as:
{
  "name": "{{ name }}",
  "email": "{{ email }}"
}
After the record is created, a
refreshaction reloads the table’s data source.
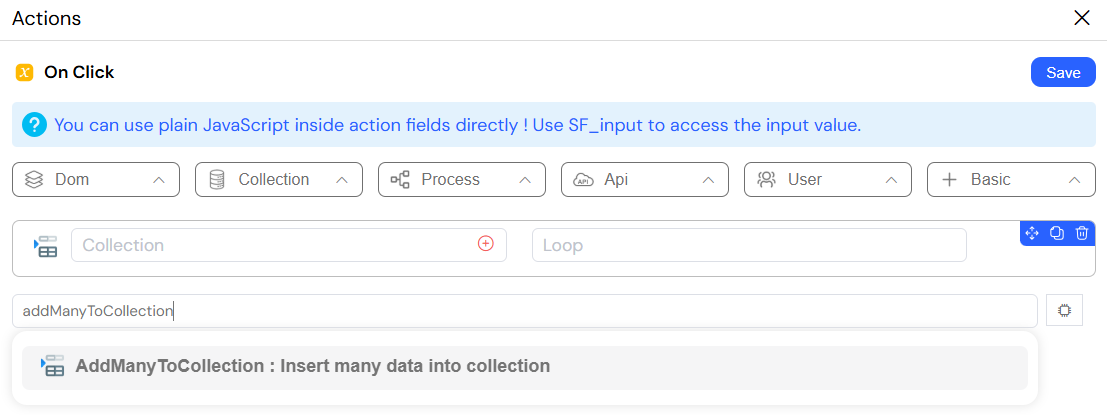
5.2. addManyToCollection: Bulk-Inserting Data
The addManyToCollection action inserts an entire array of documents into a collection in a single, high-performance database operation. This is the most efficient way to perform bulk data imports or create multiple records at once. It's ideal for scenarios like uploading and processing a CSV file of contacts, migrating data from another system, or generating a large set of default data.
Configuration
- Collection : The target collection.
- Data model (
array): An array of JSON objects, where each object represents a new document to be inserted.
Example Scenario
A page contains a button labeled Import Products.
- A page variable named
data_listcontains an array of products:
[
  { "name": "Laptop", "price": 1200 },
  { "name": "Mouse", "price": 25 },
  { "name": "Keyboard", "price": 80 }
]
- When the user clicks the Import Products button, an addManyToCollection action is triggered.
- The Collection is set to Products.
- The Data variable is set to
data_list. - After the record is created, a
refreshaction reloads the table’s data source.
Result: All products in the array are inserted into the Products collection in a single operation, making the import fast and efficient.
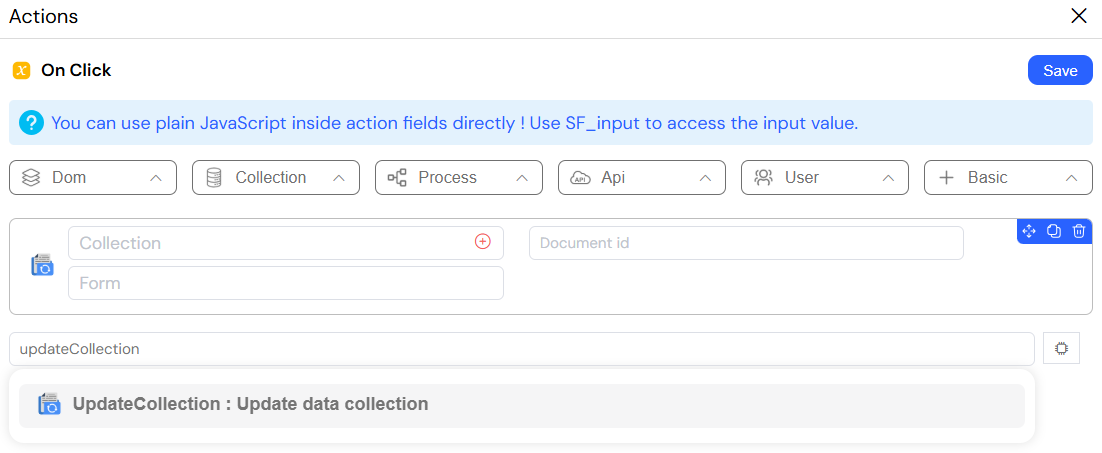
5.3. updateCollection: Modifying Existing Records
The updateCollection action finds an existing document in a collection by its unique _id and updates it with new data. This is the standard action for any "edit" or "update" functionality. It's used when a user saves changes to their profile, modifies an existing order, or changes the status of a project.
Configuration
- Collection : The target collection.
- Document id (
string): The_idof the document you want to update. - Data model (
object): An object containing only the fields you want to change and their new values.
Example Scenario:
You already have a user management backoffice with a table that displays users.
The administrator clicks the Edit button on a user row in the table.
A popup is displayed, and the selected user’s
_idis stored in a page variable namededitid.The current user data (name and email) is loaded into the form input fields.
The administrator modifies the Name and/or Email fields.
When the administrator clicks Update, an
updateCollectionaction is triggered.The Collection is set to
Users_demo.The Document id is set to
editid.The form data is attached from the form section:
{
  "name": "{{ data_form.name }}",
  "email": "{{ data_form.email }}"
}
After the update, a show action refreshes the users table to display the updated information.
Result: The selected user record is updated in the database, and the changes are immediately reflected in the backoffice table.
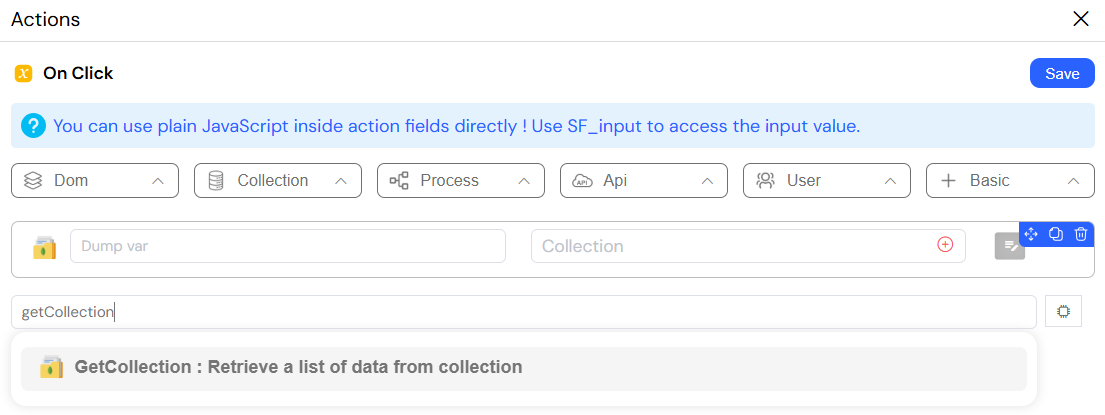
5.4. getCollection: Querying for Multiple Documents
The getCollection action retrieves a list of documents from a collection that match a given query. It supports powerful filtering, sorting, and pagination capabilities using MongoDB's query syntax. This is the most common way to fetch the data needed to populate your application's UI. It is used for filling lists, data grids, dropdown selections, and chart data.
Returns
- Output (
array): The action dumps the resulting array of matching documents into a specified variable for use in widgets or other actions.
Configuration
- Dump var (
string): The name of the variable where the array of results will be stored. - Collection : The collection to query.
- Criteria (
json, optional): A MongoDB-style query object to filter ({ "status": "active" }), sort ({ "sort": { "createdAt": -1 } }), and limit the results.
Example Scenario:
A page contains a button labeled Get Users and a hidden users table.
- When the user clicks the Get Users button, a
getCollectionaction is triggered. - The Collection is set to
Users_demo. - The Dump var is set to
users_list. - No criteria are defined, so all users are retrieved.
- The retrieved data is stored in the
users_listvariable. - A
showaction is used to display the users table. - The table uses
users_listas its data source.
Result:
By clicking the button, all users are fetched from the database and displayed in the table.
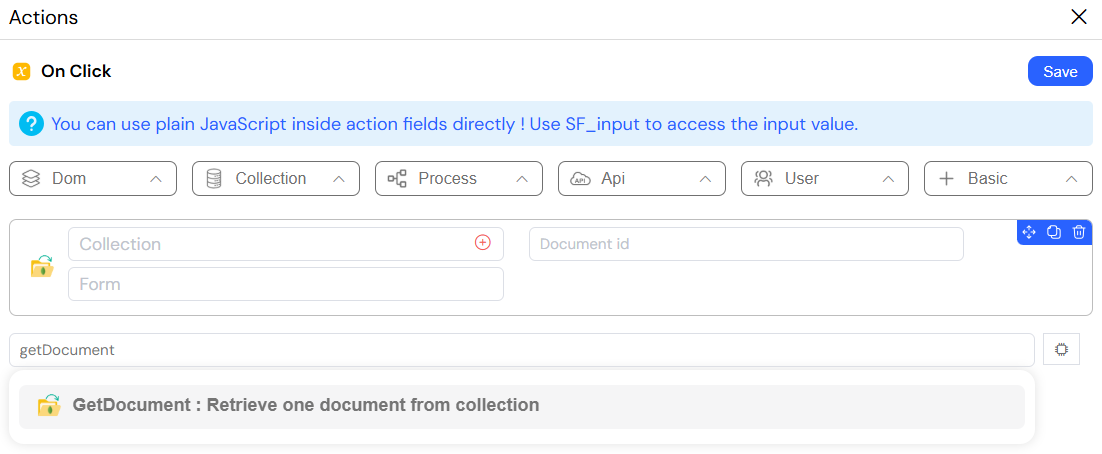
5.5. getDocument: Fetching a Single Document
The getDocument action retrieves one single, complete document from a collection by its unique _id. This action is used whenever you need to fetch the full details of a specific item. It is typically triggered when a user clicks on an item in a list, which then prepares the data for an "edit" form or a "details" view.
Returns
- Output (
object): The action dumps the complete document object into a specified variable.
Configuration
- Collection : The collection to query.
- Document id (
string): The_idof the document to retrieve. - Dump var (
string): The name of the variable where the resulting document will be stored.
Example Scenario:
A page displays a table of users with a Edit button for each row.
- The user clicks the Edit button on a specific user row.
- The selected user’s
_idis stored in a page variable namededitid. - A
getDocumentaction is triggered. - The Collection is set to
Users_demo. - The Document id is set to
editid. - The Dump var is set to
data_form. - The retrieved user data is automatically available in the page.
- A
showaction opens a popup or displays a form populated with:{{ data_form.name }}{{ data_form.email }}
Result:
The full user document is fetched from the database and displayed, allowing the user to view or edit the selected user’s details.
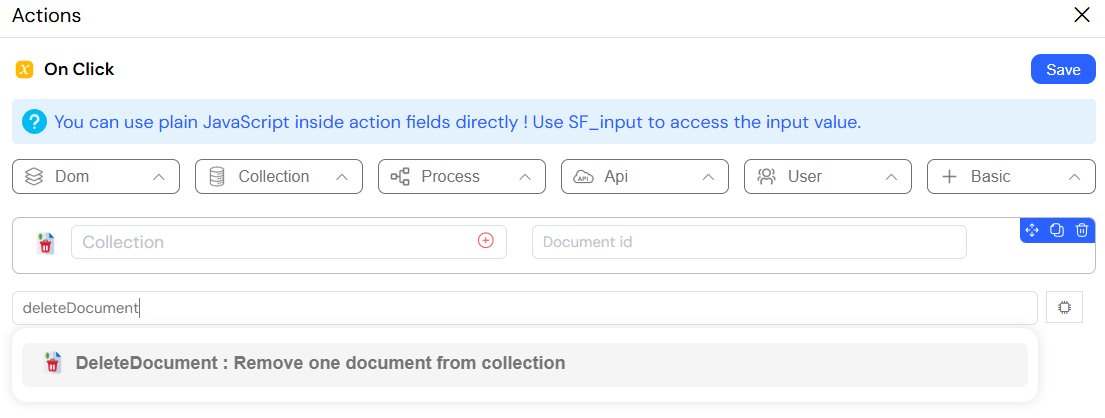
5.6. deleteDocument: Removing Data
The deleteDocument action permanently deletes a single document from a collection, identified by its unique _id. This action is used to remove records from the. Because it is a destructive and irreversible action, it should always be protected by a confirm action to prevent accidental data loss.
This action permanently removes data from your database. It cannot be undone. It is highly recommended to always pair it with a confirm action to prevent accidental data loss from user error.
Configuration
- Collection (
object): The collection to delete from. - Document id (
string): The_idof the document to be deleted.
Example Scenario:
A page displays a table of users with a Delete button for each row.
- The user clicks the Delete button on a specific user row.
- A
confirmaction is displayed asking the user to confirm the deletion. - If the user confirms, the selected user’s
_idis stored in a page variable nameddelete_id. - A
deleteDocumentaction is triggered. - The Collection is set to
Users_demo. - The Document id is set to
{{ variables.delete_id }}. - After deletion, a
showaction refreshes the users table.
Result:
The selected user is permanently removed from the database, and the table is updated to reflect the change.
5.7. AggregateCollection: Performing Advanced Database Queries
The aggregateCollection action executes a powerful MongoDB aggregation pipeline, which allows for multi-stage data processing, transformation, and analysis directly within the database for maximum efficiency. Use this for advanced reporting and data analysis that goes beyond simple filtering. It's perfect for grouping data, calculating sums and averages (e.g., for a dashboard), reshaping document structures, joining data from related collections, and performing complex multi-stage queries.
Returns
- Output (
array): The action dumps the results of the final stage of the aggregation pipeline into a specified variable.
Configuration
- Dump var (
string): The variable to store the aggregation result. - Collection (
object): The collection to run the aggregation on. - Aggregation (
array): An array of MongoDB aggregation pipeline stages (e.g.,$match,$group,$sort,$lookup).

Example Scenario:
You want to display only active users in a backoffice table.
The user clicks a button labeled Show Active Users.
An
aggregateCollectionaction is triggered.The Collection is set to
Users_demo.The Dump var is set to
active_users.The Aggregation pipeline is defined as:
[{ "$match": { "status": "active" } }]The result of the aggregation is stored in the active_users variable.
A table widget uses {{ variables.active_users }} as its data source.
A show action displays the users table.
Result: Only users with a status of active are retrieved from the database and displayed in the table.
6. External Data Source (EDS) Actions
Integrate and interact with external databases (like SQL Server, PostgreSQL, MySQL) that you have configured as External Data Sources.
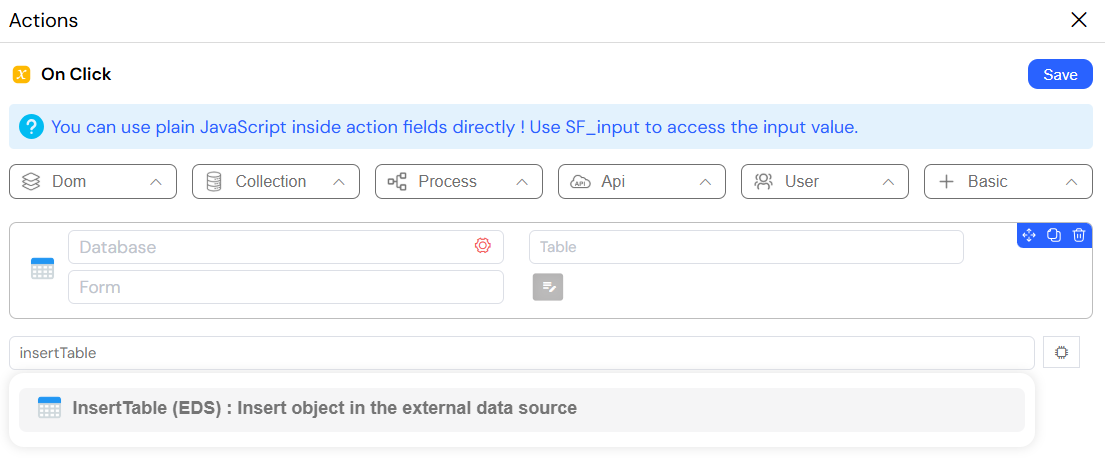
6.1. insertTable: Creating Records in External Systems
The insertTable action inserts a new row into a specified table in a configured external database. Use this to create records in external or legacy systems, ensuring data is synchronized between your Softyflow application and other parts of your company's IT infrastructure.
Configuration
- clientDatabase (
object): The configured EDS connection to use. - Table (
string): The name of the target table in the external database. - Statement (
object): An object where keys are the column names and values are the data to be inserted for the new row.
Example Scenario: Insert a User into an External Database (insertTable)
You want to save user data into an external SQL database in addition to your main application database.
A page contains a form with Name and Email input fields.
The user fills in the form and clicks the Save button.
An
insertTableaction is triggered.The clientDatabase is set to the configured external database connection (for example,
Main_SQL_DB).The Table is set to
users.The Statement is defined as:
{
  "name": "{{ form.name }}",
  "email": "{{ form.email }}"
}
After insertion, a show action displays a success message or updates the UI.
Result: A new row is inserted into the external users table, keeping the external system synchronized with the application data.
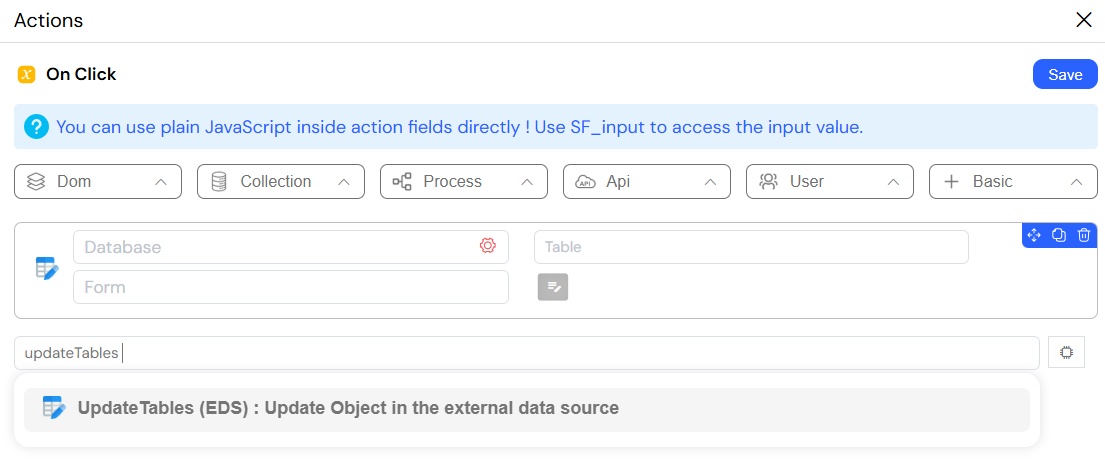
6.2. updateTables: Modifying Records in External Systems
The updateTables action updates one or more existing rows in an external database table that match a given where clause. Use this to modify data in your external systems when a corresponding event happens in your Softyflow application, keeping all your disparate systems in sync without manual intervention.
Configuration
- clientDatabase (
object): The EDS connection to use. - Table (
string): The name of the target table. - Find Table (
object): Thewhereclause to identify the row(s) to update (e.g.,{ "user_id": 123 }). - Updated Table (
object): An object containing the new column values to set.
Example Scenario:
You want to update a user’s status in an external SQL database when it changes in your application.
- A page displays a list of users with an Update button.
- The administrator clicks the button for a specific user.
- The selected user’s ID is stored in a page variable named
external_user_id. - An
updateTablesaction is triggered. - The clientDatabase is set to the configured external database connection (for example,
softyflow_test). - The Table is set to
my_table. - The Find Table (where clause) is defined as:
{
  "id": external_user_id
} - The Updated Table is defined as:
{"status": "active"} - After the update, a show action refreshes the users list or displays a success message.
Result: The matching user record in the external database is updated successfully, keeping the external system synchronized with the application state.
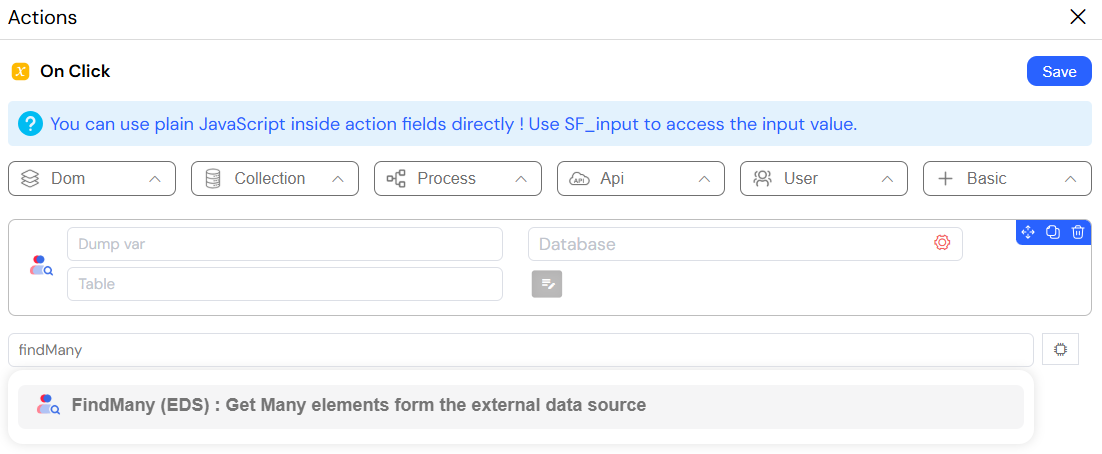
6.3. findMany: Querying External Data
The findMany action retrieves multiple rows from an external table that match a given query, similar to a SELECT ... WHERE statement in SQL. This action allows you to fetch and display data from external and legacy systems directly within your Softyflow application's UI, providing a unified, comprehensive view of all your relevant business data to the user.
Returns
- Output (
array): The action dumps an array of matching rows into a specified variable.
Configuration
- Dump var (
string): The variable to store the array of results. - clientDatabase (
object): The EDS connection to use. - Table (
string): The table name. - Find (
object, optional): Thewhereclause for the query.
Example Scenario:
You want to display a list of users coming from an external SQL database inside your application.
A page contains a button labeled Get Users.
When the user clicks the button, a
findManyaction is triggered.The clientDatabase is set to the configured external database connection .
The Table is set to
my_table.The Dump var is set to
external_users.(Optional) The Find clause is defined to load only active users:
{
  "status": "active"
}
The retrieved rows are stored in the external_users variable.
A table widget uses
external_usersas its data source.A show action displays the table.
Result: All matching users from the external database are fetched and displayed in the application interface.
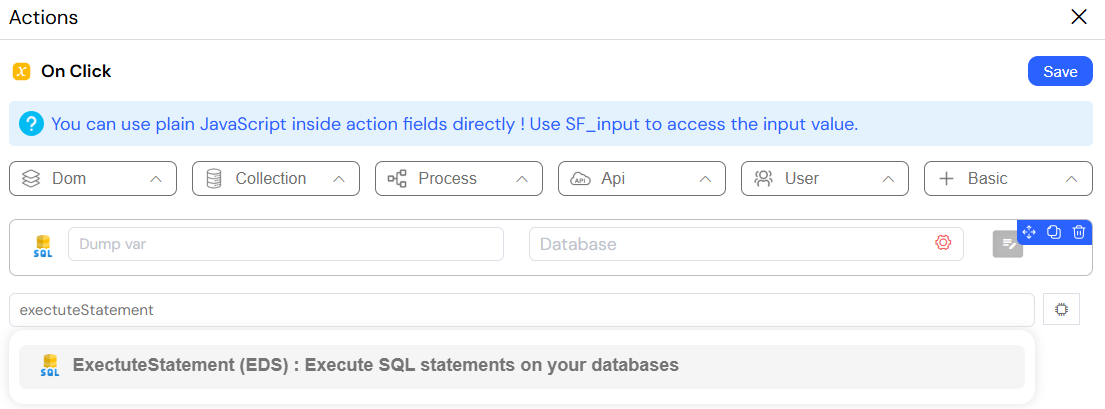
6.4. exectuteStatement: Unleashing the Power of Raw SQL
The exectuteStatement action provides a powerful but potentially dangerous ability to execute a raw SQL query string directly on an external database. This is your tool of last resort for ultimate flexibility. Use it for complex queries that involve multiple JOINs, calling stored procedures, or any other advanced SQL operation that is not easily covered by the standard, structured EDS actions.
This action provides direct, unabstracted access to your external database. You are responsible for writing correct, performant, and secure SQL. Be vigilant against SQL injection vulnerabilities by never directly concatenating user input into the query string; use parameterized queries if the syntax allows.
Returns
- Output (
array): The action dumps the results of the query into a specified variable.
Configuration
- Dump var (
string): The variable to store the results of the query. - clientDatabase (
object): The EDS connection. - Statement (
string): The raw SQL query to execute.
Example Scenario:
You need to run a complex SQL query on an external database that cannot be handled by standard EDS actions.
- A page contains a button labeled Run Custom Query.
- When the user clicks the button, an
exectuteStatementaction is triggered. - The clientDatabase is set to the configured external database connection (for example,
softyflow_test). - The Dump var is set to
sql_result. - The Statement is defined as:
SELECT id, name, mail, status
FROM my_table
WHERE status = 'active'
ORDER BY created_at DESC; - The query result is stored in the sql_result variable.
- A table widget uses
sql_resultas its data source. - A show action displays the results table.
Result: The application executes a raw SQL query on the external database and displays the list of active users sorted by creation date.
7. API and Integration Actions
Connect your Softyflow application to the world by integrating with external APIs and services.
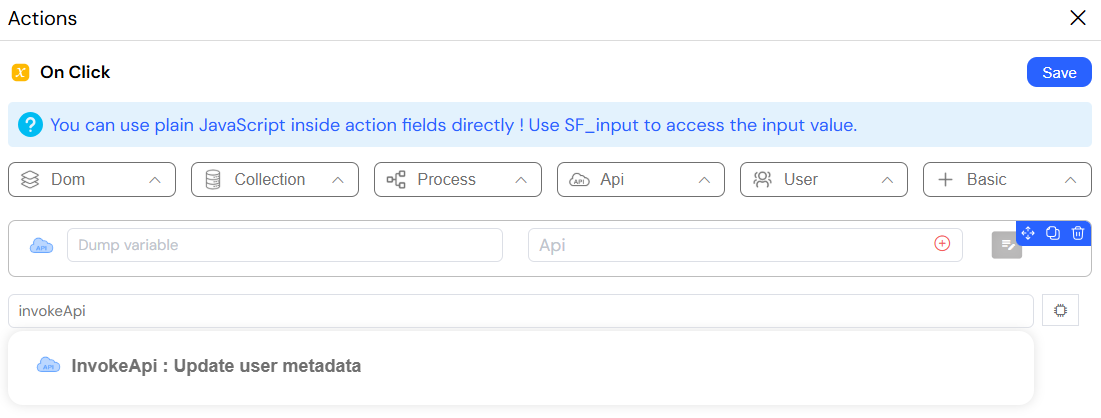
7.1. invokeApi: Connecting to Any API
The invokeApi action calls a pre-configured API endpoint and returns the full response. This action is your gateway to the outside world. Use it to integrate with any third-party service (e.g., payment gateways like Stripe, address validation services, currency converters) or to communicate with your own company's custom microservices.
Returns
- Output (
any): The action dumps the entire response from the API—including the body, headers, and status code—into a specified variable for you to process and use in your application.
Configuration
- Dump variable (
string): The variable to store the API's full response object. - Api endpoint (
object): The configured API endpoint to call. - params (
object, optional): Parameters to send with the API request, which can be mapped to the request body, query string, or headers depending on the endpoint's configuration.
Example Scenario: Load Users from an API (invokeApi)
You want to fetch a list of users from an external API and display it in your application.
- A page contains a button labeled Load Users.
- When the user clicks the button, an
invokeApiaction is triggered. - The Api endpoint is set to a pre-configured Users API (for example,
UsersAPI). - The Dump variable is set to
api_users. - (Optional) params can be added to filter or paginate users:
{
  "status": "active"
}
- The API response is stored in the api_users variable.
- A table widget uses
api_usersas its data source. - A show action displays the users table.
Result: The application retrieves a list of users from the external API and displays them in a table for easy viewing and management.
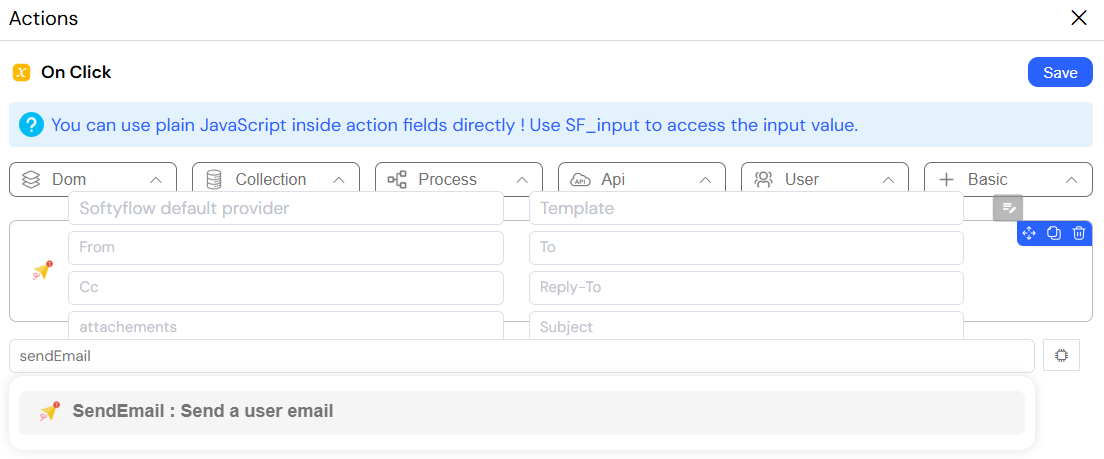
7.2. sendEmail: Communicating with Users
The sendEmail action sends an email to a recipient using a configured email provider (such as SendGrid or Mailgun) and a pre-defined, dynamic email template. This is essential for all automated user communication. It should be used for all transactional emails, such as welcome messages, password resets, order confirmations, and workflow status notifications.
Configuration
- Provider (
object): The email service provider to use for sending. - Template (
object): The pre-designed email template to use. - To (
string): The recipient's email address. - variables (
object, optional): An object of data used to populate the dynamic fields in your email template (e.g., providing a value for{{name}}or{{order_id}}).
Example Scenario: Send Email Using a Save Button (sendEmail)
You want to send an email when the user clicks a Save button.
- A page contains a form with Name and Email fields and a Save button.
- When the user clicks the Save button, a
sendEmailaction is triggered. - The Provider is set to the configured email service (for example,
SendGrid). - The Template is set to a pre-defined email template.
- The To field is set to
{{email}}. - A show action displays a success message after the email is sent.
Result: Clicking the Save button sends a personalized email to the specified recipient.
7.3. previewPDF: Generating Documents on the Fly
The previewPDF action dynamically generates a PDF document by merging a JSON data object with a pre-defined PDF template. Use this to create professional, printable documents on demand. This is perfect for generating invoices, reports, certificates of completion, shipping labels, contracts, and any other formatted document based on your application's data.
Returns
- Output (
object): The action dumps the generated PDF data (typically as a base64 string or a file object) into a specified variable. This can then be used to show a preview of the PDF to the user, allow them to download it, or attach it to an email.
Configuration
- Dump var (
string): A variable to store the generated PDF data. - Template (
object): The PDF template to use for generation. - Context (
object): The JSON data object containing the information to populate the template with.
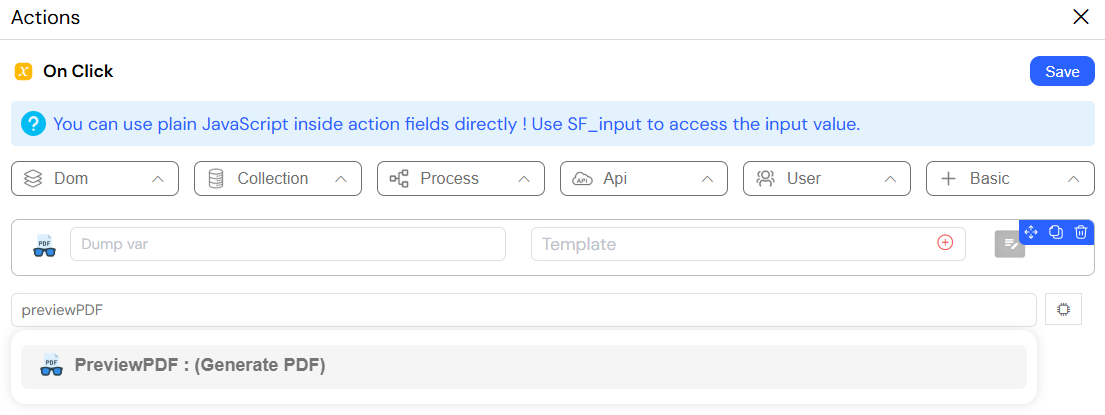
Example Scenario: Simple PDF Preview (previewPDF)
A page contains a button labeled Preview PDF.
When the user clicks the Preview PDF button, a
previewPDFaction is triggered.The Template is set to a simple demo PDF template.
The Dump var is set to
demo_pdf.The Context is defined as:
{
  "title": "Hello World",
  "message": "This is a simple PDF preview demo."
}
The generated PDF is stored in the demo_pdf variable.
A show action displays the PDF in a popup.
Result: A simple PDF is generated and previewed instantly when the button is clicked.
8. Best Practices for Building with Actions
Give your elements, variables, and models clear, descriptive names (e.g., customerName_input, isAdministrator_flag, invoiceData_model). Future you will be grateful.
A single button click can trigger a whole chain of actions. For example, a "Submit" button could:
disableFormto prevent double-clicks.- Run an
ifaction to validate input. - If valid,
invokeApito send the data. - On API success,
alertMessagewith a success toast. - Finally,
redirectthe user to a "Thank You" page.
Never leave the user guessing. Use alertMessage to confirm success or explain errors. Use show/hide to reveal loading spinners during long operations. An informed user is a happy user.
Always use the confirm action before deleteDocument or any other irreversible task. This simple step can prevent catastrophic data loss.
- Avoid fetching large datasets on page load if possible.
- Load data when it's needed (e.g., when a user clicks a button).
- Use
refreshWidgetto update only the parts of the UI that have changed, instead of reloading the entire page.
SF_input and SF_loop VariablesLeverage SF_input.SF_data to avoid extra database lookups when a user selects an item from a populated list. Use SF_loop.currentItem inside a loopArray action to efficiently process data.
By mastering these actions and adhering to these best practices, you can move beyond simple forms and build sophisticated, high-performance, and user-friendly web applications with Softyflow's powerful low-code platform.