Validation Rules
1. Introduction to Validation Rules
The Rules Manager is a cornerstone of the Web Modeler, empowering you to create dynamic and intelligent user interfaces. It allows you to define screen-specific rules that control the behavior of your components, leading to sophisticated forms that adapt in real-time to user input and application state.
By setting rules, you can control whether a component is available, visible, required, or disabled. This ensures that users are only presented with relevant information, guiding them through complex data entry processes and reducing errors.
2. The Four Fundamental Rules Explained
The Rules Manager operates on four fundamental properties that you can configure for any widget on a screen. Understanding each is key to building effective user experiences.
Available: Determines if the widget is loaded and exists within the page's data model for that screen. If a widget is not available, its data cannot be accessed, manipulated, or submitted.
- Practical Example: In an approval workflow, a "Manager's Justification" field is made
availableonly on the "Manager Review" screen, not on the initial "Submission" screen.
- Practical Example: In an approval workflow, a "Manager's Justification" field is made
Visible: Controls whether the user can see the widget. A component can be available (holding data) but hidden from view.
- Practical Example: A "Shipping Address" form is hidden until the user checks a "Ship to a different address" box. This simplifies the initial view while keeping the data fields ready.
Required: Marks an input field as mandatory. The form cannot be submitted if a required field is empty.
- Practical Example: An "Email Address" field in a user registration form is marked as
requiredto ensure essential contact information is always collected.
- Practical Example: An "Email Address" field in a user registration form is marked as
Disabled: Determines if a user can interact with a widget. A disabled widget is visible but "grayed out" and cannot be edited. Its value is still part of the form's data.
- Practical Example: A "Submit" button remains
disableduntil all required fields are correctly filled out, preventing incomplete submissions.
- Practical Example: A "Submit" button remains
3. Navigating the Rules Manager Interface
The Rules Manager provides a centralized table to configure these rules for each component on a specific screen, enabling you to dynamically control what users see and do.
3.1. Interface Breakdown
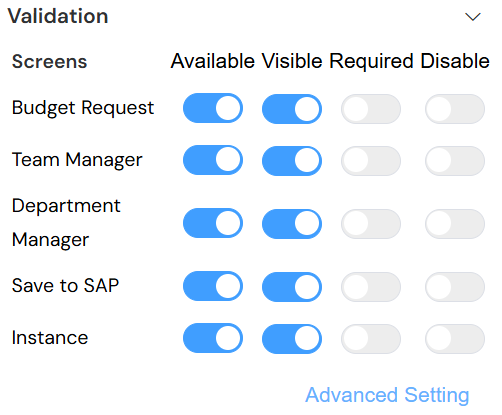
The interface is a grid where each row represents a screen in your application and columns correspond to the four fundamental rules.
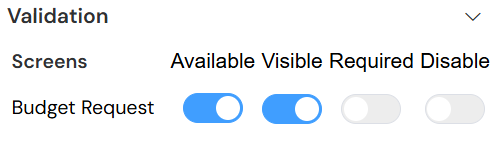
- Screens: Lists all application screens where the selected component can be configured (e.g., "Budget Request," "Team Manager").
- Available / Visible / Required / Disabled Toggles: Simple on/off switches for enabling or disabling a rule unconditionally.
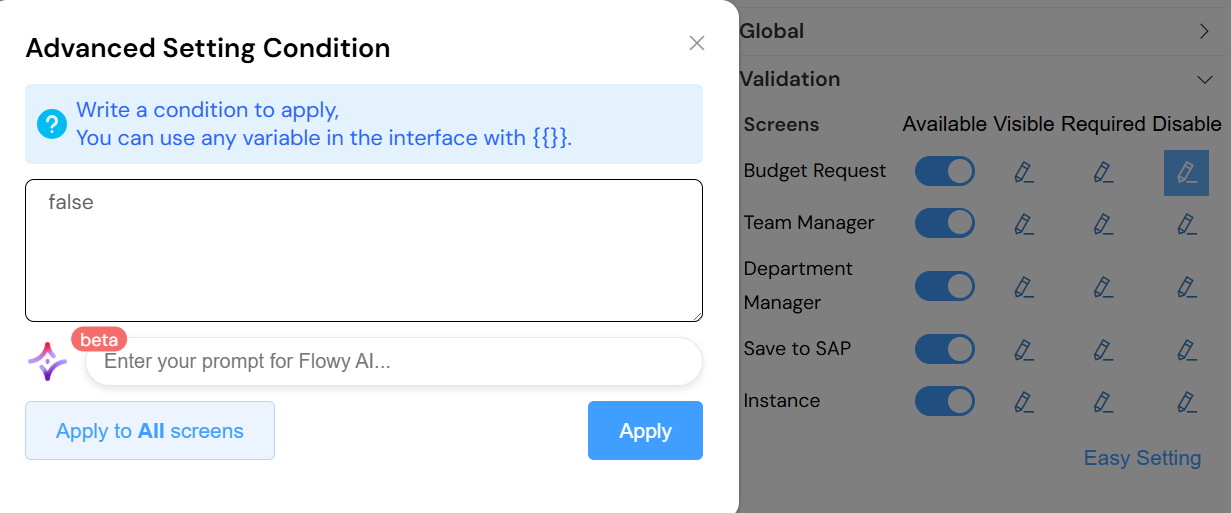
- Advanced Setting (Gear Icon): Clicking the gear icon opens the Condition Editor, where you can write JavaScript-based expressions to apply logic dynamically.
4. Building Dynamic Forms with Conditional Logic
The true power of the Rules Manager is unlocked when you use conditional logic. By clicking the gear icon next to a rule, you can define a JavaScript expression that evaluates in real-time.
4.1. Example: Conditional Visibility
A classic use case is displaying a "State/Province" field only when the selected country requires it.
Scenario: We have two widgets:
- A dropdown menu with the model name
country. - A text input field with the model name
state.
- A dropdown menu with the model name
Goal: The
statefield should only be visible if the selectedcountryis "United States" or "Canada".Implementation:
- In the Web Modeler, select the
statewidget. - Open the Rules Manager for the relevant screen.
- In the row for the
statewidget, click the gear icon for the Visible property. - In the Condition Editor, enter the following JavaScript expression:
- In the Web Modeler, select the
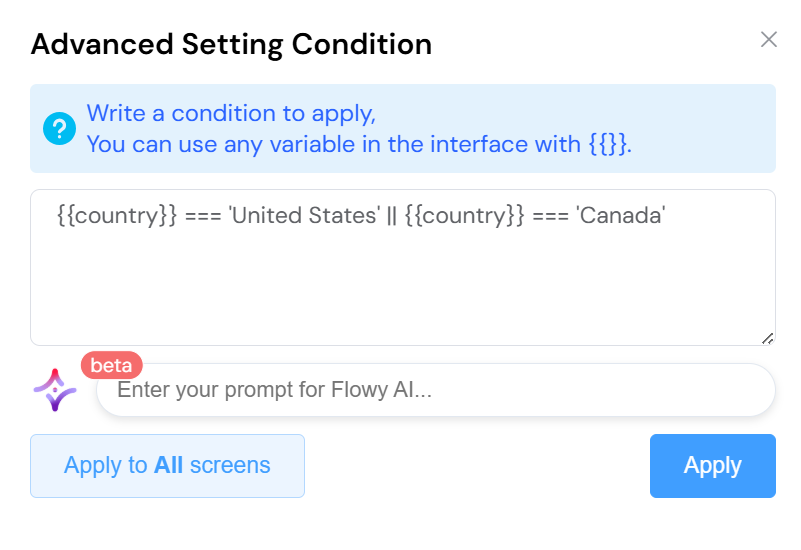
This expression tells the UI to show the state field only when the condition is met. For all other countries, it will remain hidden, creating a cleaner and more contextual form.
5. Troubleshooting Common Issues in Rules
If a rule isn't working as expected, these troubleshooting steps can help you diagnose the problem.
5.1. Check the Browser's Developer Console
This is your first and most important tool. Press F12 to open your browser's developer console. JavaScript errors, such as syntax mistakes in your conditions, will be reported here, often with a precise location.
5.2. Verify Widget Model Names
A common slip-up is a typo in a widget's model name. Model names are case-sensitive. Double-check the Model property in the widget's configuration to ensure it exactly matches the name used in your form object within the rule expression.
5.3. Beware of Data Type Mismatches
Ensure you are comparing values of the same data type. A value from a numeric input might be a string by default. You may need to explicitly convert it to a number for a mathematical comparison.
// INCORRECT: The value '5' is a string and may not compare correctly.
{{my_numeric_field}} > 10

// CORRECT: Convert the field's value to a Number before the comparison.
Number({{my_numeric_field}}) > 10
6. Best Practices for Writing and Maintaining Rules
Follow these guidelines to keep your rules clean, performant, and easy to debug.
- Keep Logic Simple and Focused: A rule should perform a single, clear check. If a condition becomes too complex, it's a sign that the logic should be refactored.
- Abstract Complexity into Functions: For rules that require multi-step logic (e.g., checking several fields, performing calculations), move that logic into a reusable function in the screen's
setupor a global utility. Your rule expression can then simply call that function, making it clean and readable. - Optimize for Performance: Rules execute frequently as the user interacts with the form. Avoid performance-heavy operations like complex loops or heavy data processing within a rule. Pre-calculate values whenever possible.
- Be Explicit with Data Types: As highlighted in troubleshooting, always be mindful of data types. Use
Number(),String(), and other casting functions to prevent unexpected behavior from automatic type coercion.
By mastering these techniques, you can build highly adaptive and user-friendly interfaces that streamline data collection and improve the overall user experience.