User Management
Users Management Description
User management in Softyflow gives you full control over how people access and interact with the platform. You can create, update, or remove users, assign them roles, define custom metadata, and configure delegation rules to ensure business continuity.
Before managing users, make sure you understand the authentication system and have configured your platform settings.

Available Licences
Softyflow uses a user-based licensing system. Each time you create a new user, one license is consumed. The Licence Number indicator, visible at the top of the Users page (under Account → Users), shows how many active user licences are in use from your total quota.
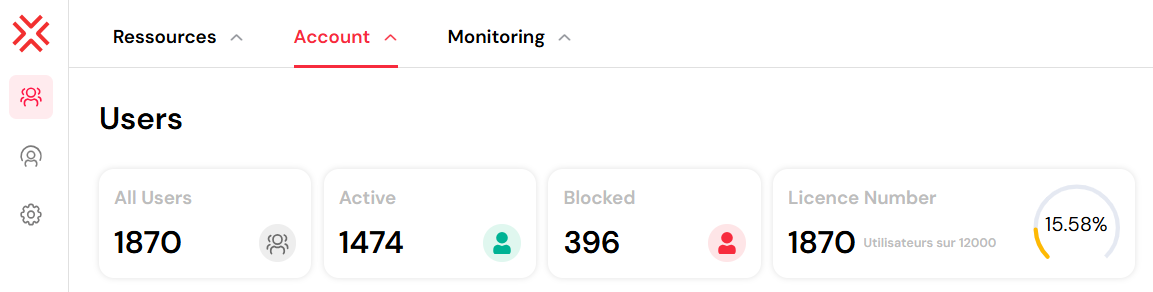
Example: If you have 1870 users and a global license capacity of 12,000, the usage indicator will show 15.58%.
You can:
- Monitor the number of active, blocked, and total users directly from the dashboard.
- View real-time license usage under the Licence Number section.
⚠️ To optimize license usage, we recommend deleting or deactivating unused accounts instead of simply blocking them, as blocked users may still count against your quota depending on the configuration.
Create a User
To create a new user:
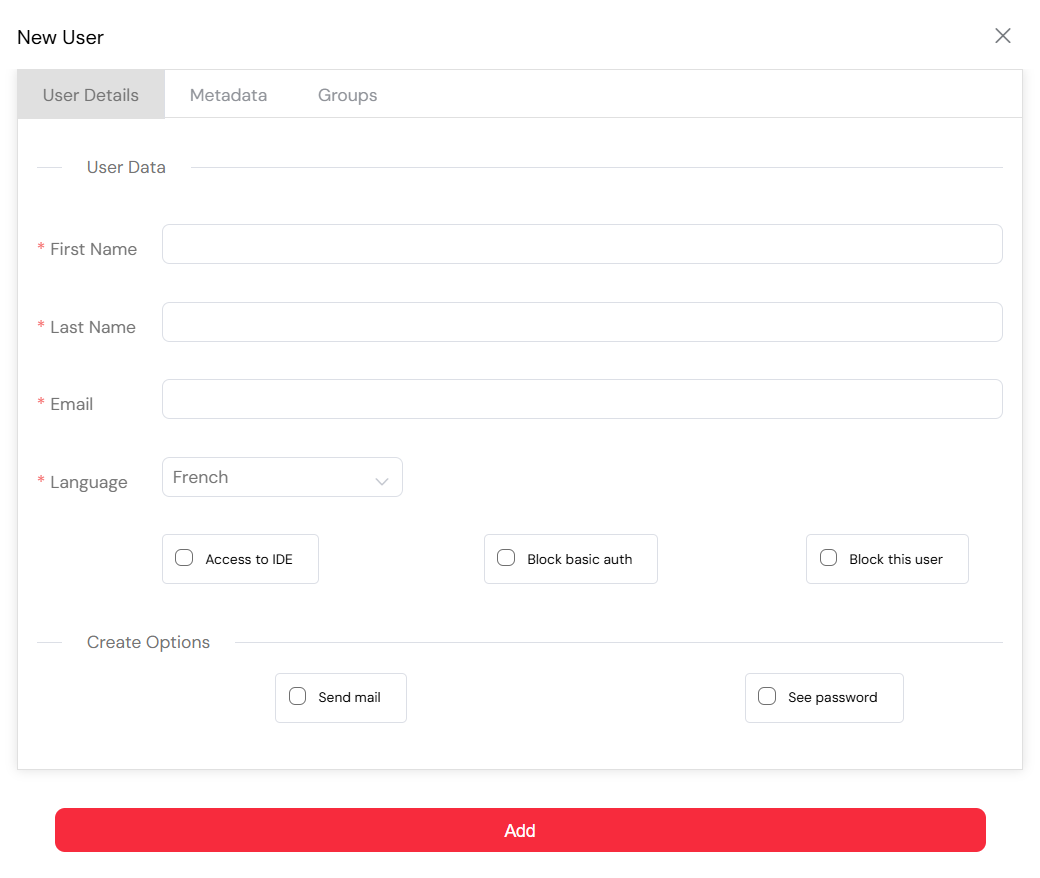
Click on Create a User at the top right of the Users page. This opens a form for defining user-specific settings.
Fill in the User Details tab:
- Email (acts as the unique identifier)
- First Name / Last Name
- Default Language
- Access to IDE (allows access to project development tools)
- Block User (optional)
- Send Welcome Email (uses configured mail providers)
- View Password
Use the additional tabs:
- Metadata: Custom fields configured in platform settings (e.g., department, role, region)
- Groups: Assign to predefined user groups
Click Add to finalize creation. The new user will appear in the global list and can start accessing web interfaces and processes based on their assigned roles.
View & Search for Users
From the user management interface available at /ide/users, you can view, filter, and manage all registered accounts in your workspace.
The list displays useful attributes such as user name, email, access to IDE, status (active, blocked), and last login information. This allows administrators to monitor activity and quickly identify inactive or misconfigured accounts.
Use the search bar and column filters to locate users by first name, last name, email. The filter system supports multi-criteria queries, making it easier to perform targeted audits or group-based reviews.
Click on any user row to open the profile in a side panel. From there, you can update user information, assign roles or groups, or configure delegations.
This centralized and dynamic view makes it simple to track user status, perform audits, or onboard new collaborators efficiently. User activities are also tracked in system logs for comprehensive audit trails.

Update a User
Updating a user in Softyflow is a straightforward process that allows administrators to modify various aspects of the user's profile. To update a user, follow these steps:
Locate the user you wish to update in the user management interface. This can be done by navigating to the relevant section, such as /ide/users.
Click on the user's profile to open the slider associated with their account. This slider provides a comprehensive view of the user's information and settings.
Within the user slider, you will find different sections for updating specific aspects of the user's profile:
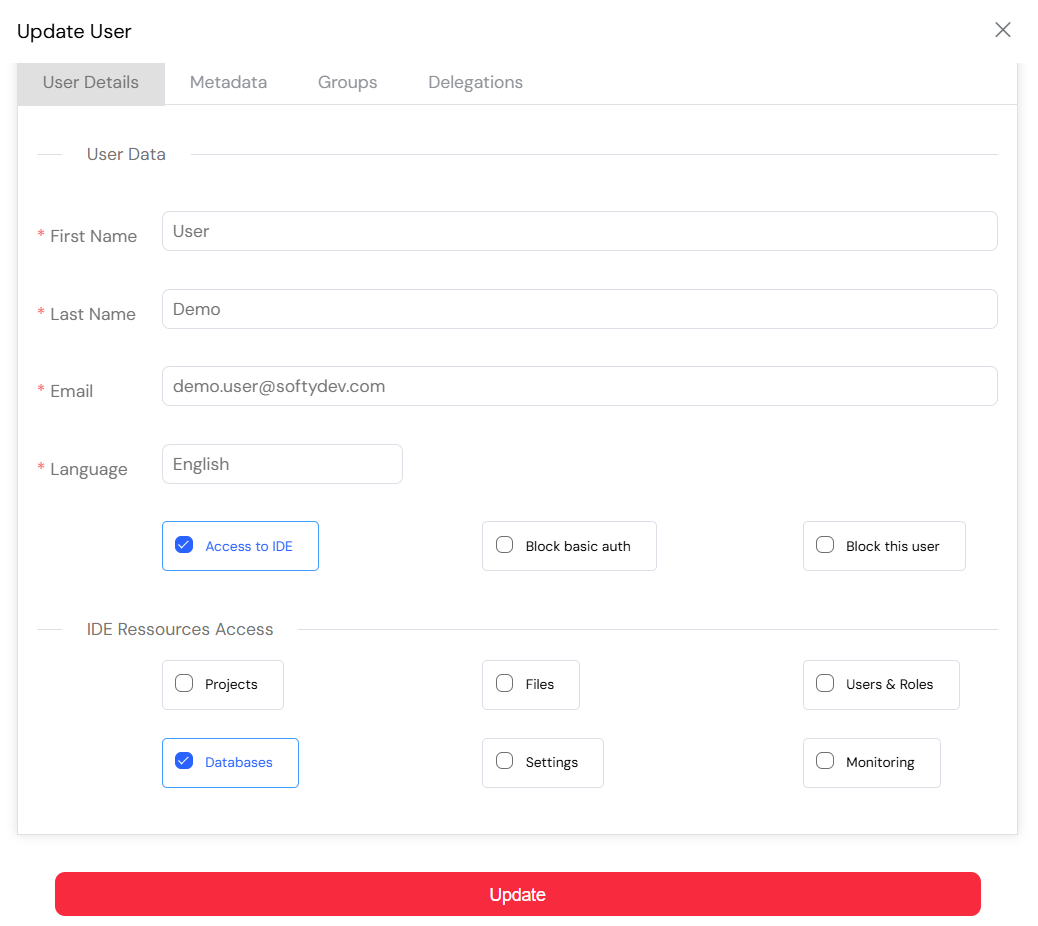
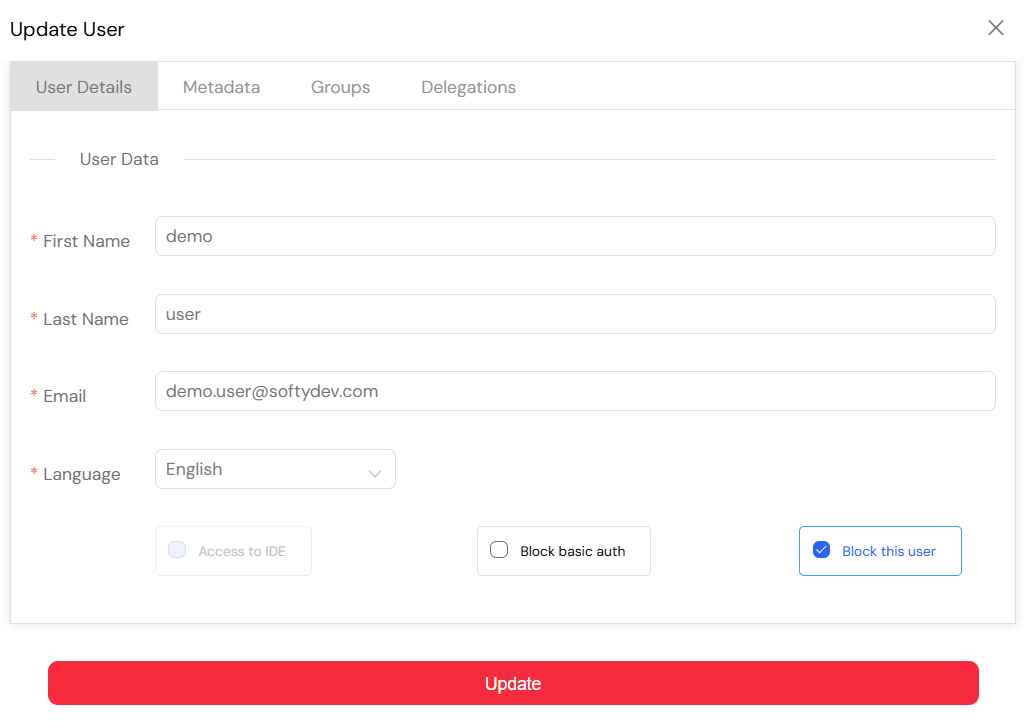
a. General Information
Edit the user's basic details such as:
Email address (must remain unique and is used for authentication)
First and Last Name (used for display across forms and processes)
Default language for platform localization
This section ensures the user profile is consistent with internal directory or HR information.
b. Metadata
Add or update custom metadata attributes like:
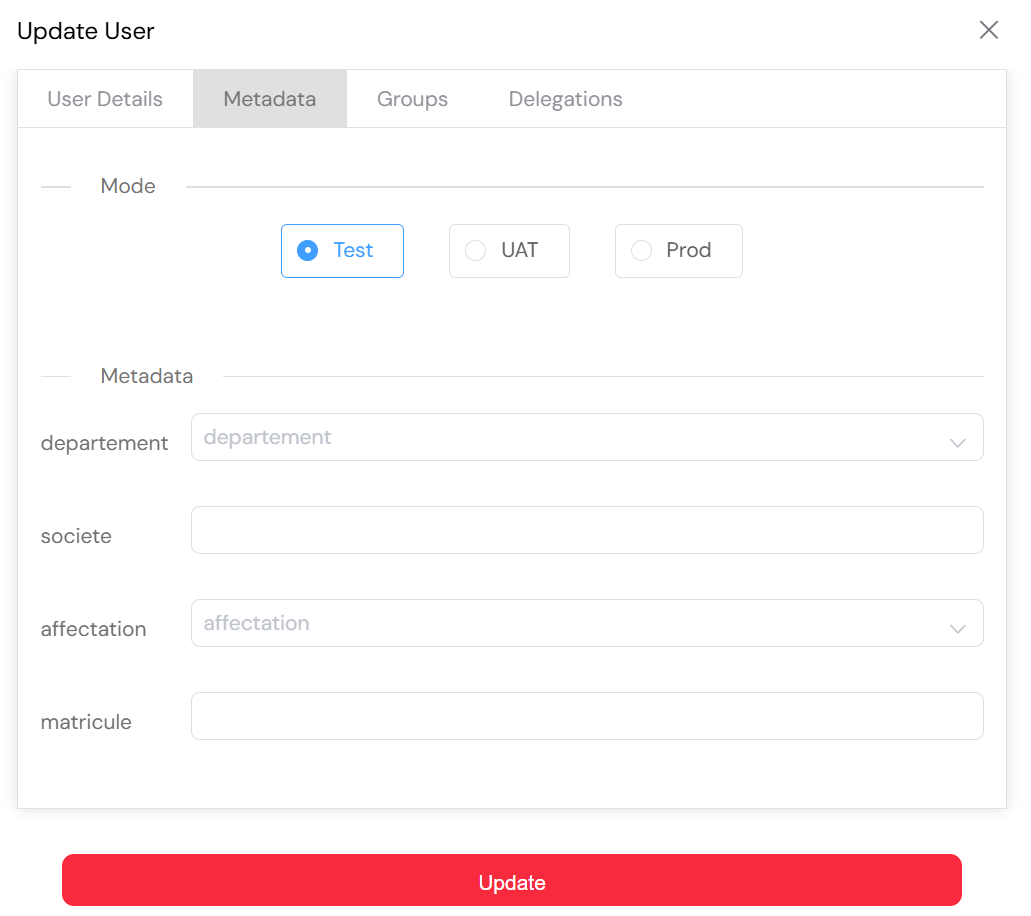
Department, Company, Assignment, or Employee ID
Values can be used for filtering data, restricting access, or driving conditional logic in web interfaces and process workflows
Metadata values are scoped by environment (TEST, UAT, PROD) for deployment management
Admins can define metadata types and values in Settings → Metadata. Go to metadata settings
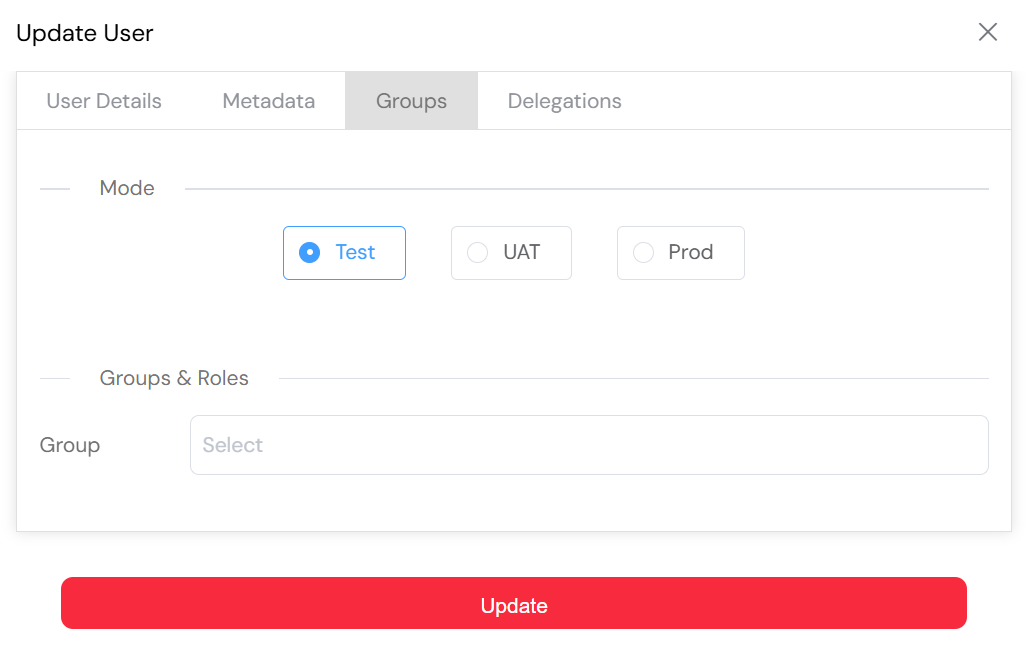
c. Roles or Groups
Assign the user to one or more roles or groups:
Roles define what the user is allowed to do (permissions, visibility)
Roles allow you to assign and manage user access to applications.
Both are environment-dependent and can differ between TEST, UAT, and PROD
This configuration is key to tailoring the user experience and enforcing internal governance policies.
d. Delegations
Delegation in Softyflow enables you to maintain process continuity when a user is unavailable, absent, or needs to transfer responsibilities temporarily. Instead of manually reassigning every task in monitoring, you can configure automated delegation rules to redirect actions to designated substitutes.
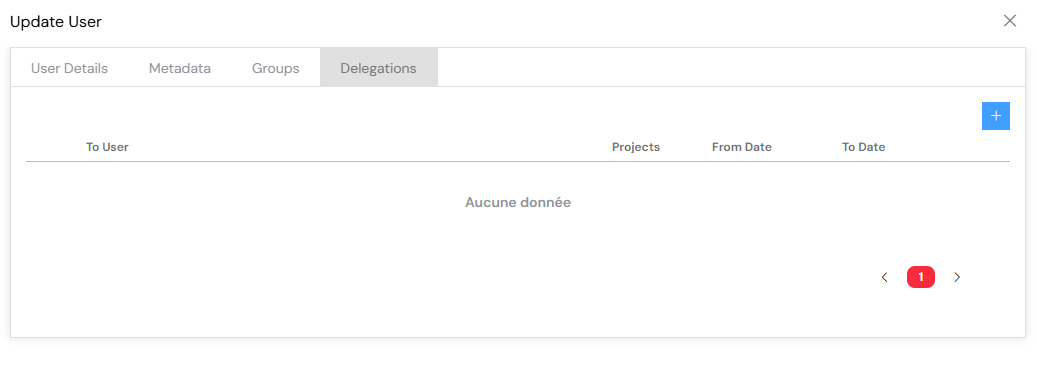
Delegation settings are configured per user and can be customized with the following controls:
Delegate to another user: Choose a substitute who will take over the user's assigned tasks during the delegation period.
Effective dates: Define a start and end date to restrict the delegation window (useful for planned absences, vacations, etc.)
Delegated scope: You can choose whether the delegation applies to all processes or only selected workflows.
Example: A team manager on leave delegates approval rights to their deputy for the "Leave Request" process only, from August 10 to August 20.
Delegations can be created or updated from the user profile view (tab: Delegation). Once configured, they are automatically enforced by the engine during process execution and tracked in monitoring logs.
This mechanism improves business resilience, ensures timely task handling, and avoids bottlenecks in critical workflows.
After making updates to a user's delegation settings, click Save to apply the changes and activate the delegation rule.
Deleting a User
When a user no longer needs access to Softyflow, you can remove their account through a secure and structured process.
⚠️ Before deleting a user, always configure a delegation to transfer any pending tasks, approvals, or responsibilities. This prevents process disruption and ensures business continuity.
To delete a user:
Go to /ide/users and locate the account you wish to remove.
Click on the user's profile to open the side panel.
Block the user to immediately revoke access and prevent login or changes during the transition.
Review and configure delegation if not already done — especially if the user owns active process instances.
Once verified, click the Delete User button to initiate removal.

Confirm the action when prompted.
The user account and associated access rights will be permanently deleted. This action is recorded in system logs for audit purposes.
Deleting users should be done with care. It's best practice to block the user first, transfer responsibilities, and ensure that all tasks are either reassigned or closed before finalizing the deletion.
This approach keeps your workflows secure and guarantees that operational handovers are smooth and traceable.
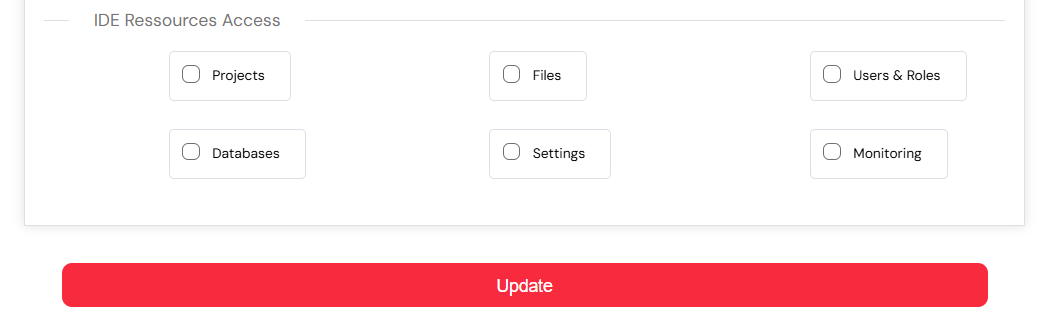
IDE Rights
Softyflow uses a user-based licensing system, where each license corresponds to a single user account. When you create a new user and grant access to the IDE, granting IDE access allows the user to interact with the application builder; however, you still need to specify which parts of the IDE they can access (e.g., Projects, Files, Databases, Monitoring, etc.).
This configuration is defined in the "IDE Resources Access" section during user creation or editing, by navigating through:
Users → Create a User → Access to IDE → IDE Resources Access
Next Steps
Now that you understand user management, continue with platform administration:
- Role Management - Create and manage user roles and groups
- Authentication & SSO - Configure login methods and security policies
- Settings - Configure platform settings, metadata, and branding
- Mail Management - Set up email providers and templates
- System Logs - Monitor user activities and system events
- Home Redirection - Configure personalized user home pages
- Run & Instance Management - Monitor and manage process instances
For development integration, explore how users interact with:
- Web Interface Design - Create user-facing interfaces
- Process Design - Design workflows users will execute
- Test & Deploy - Deploy applications for user testing
- Monitor & Run - Monitor user activities and process execution