Role Management
1. Roles Management Description
Managing roles is essential to controlling what users can see and do across the Softyflow platform. Roles define access to features, applications within the platform, and specific data based on permissions. You can assign roles to individual users or groups to apply consistent rules across environments (TEST, UAT, PROD) for deployment management.
Roles work closely with authentication systems and user metadata to provide fine-grained access control across web interfaces and process workflows.
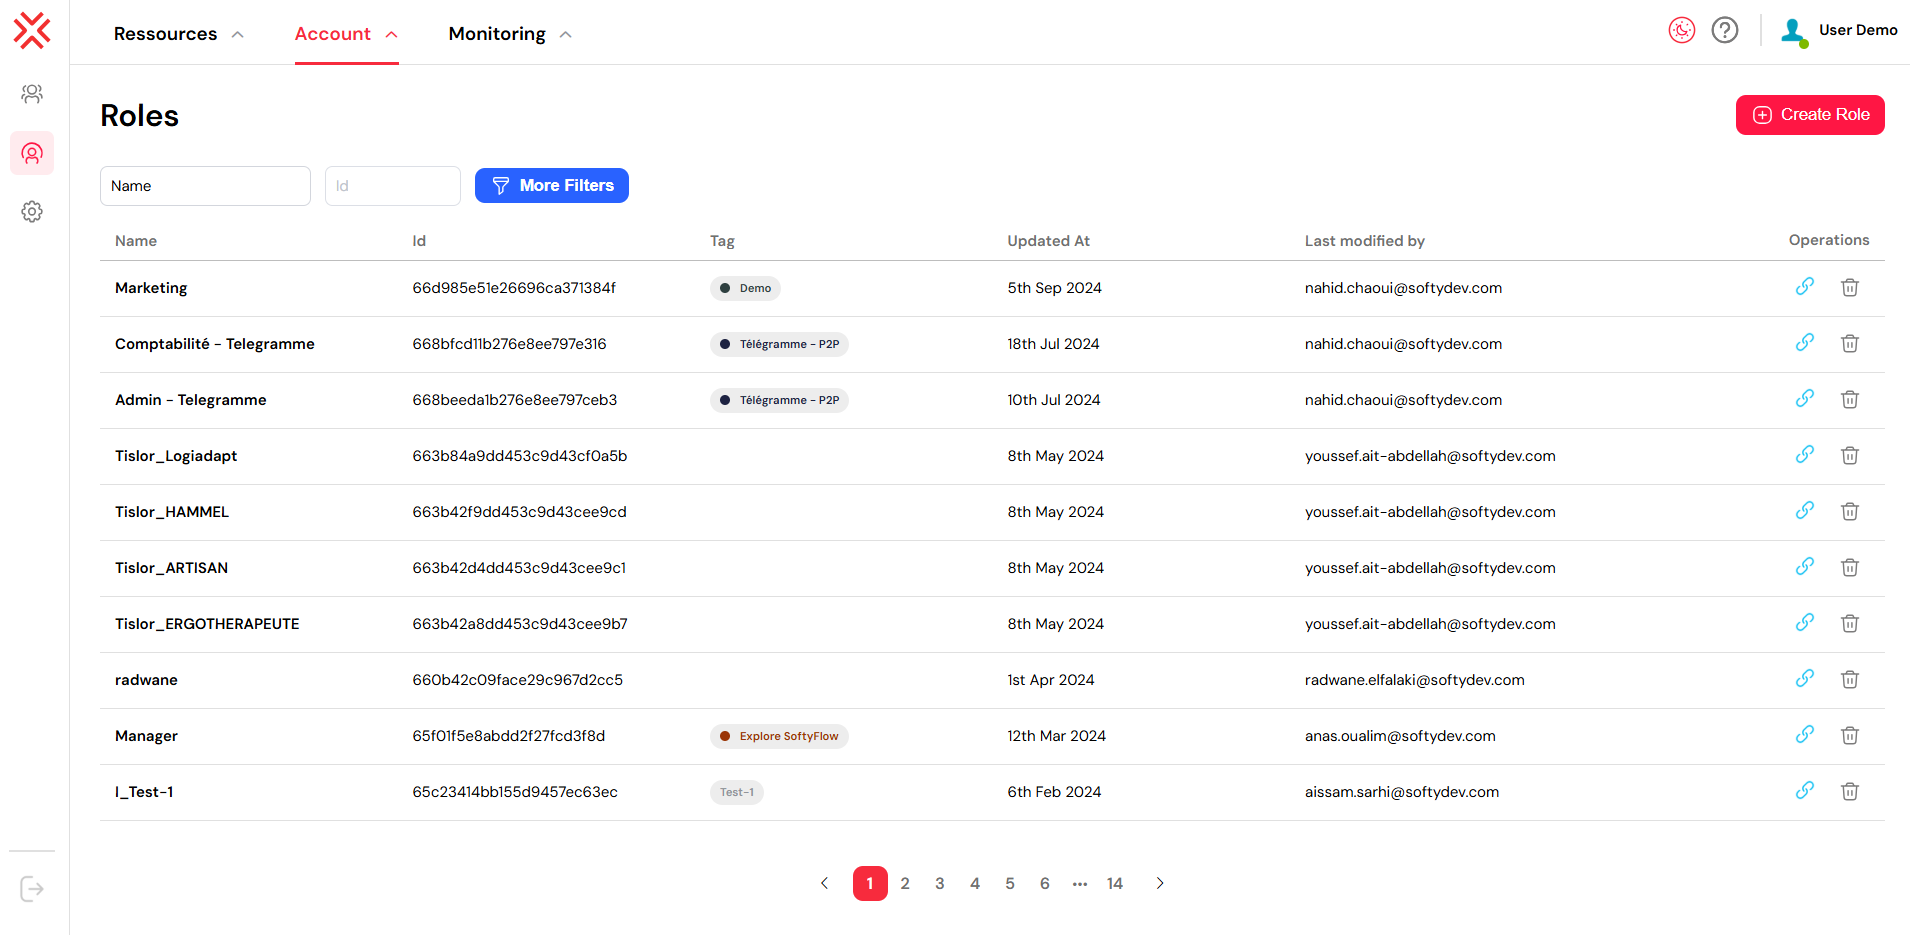
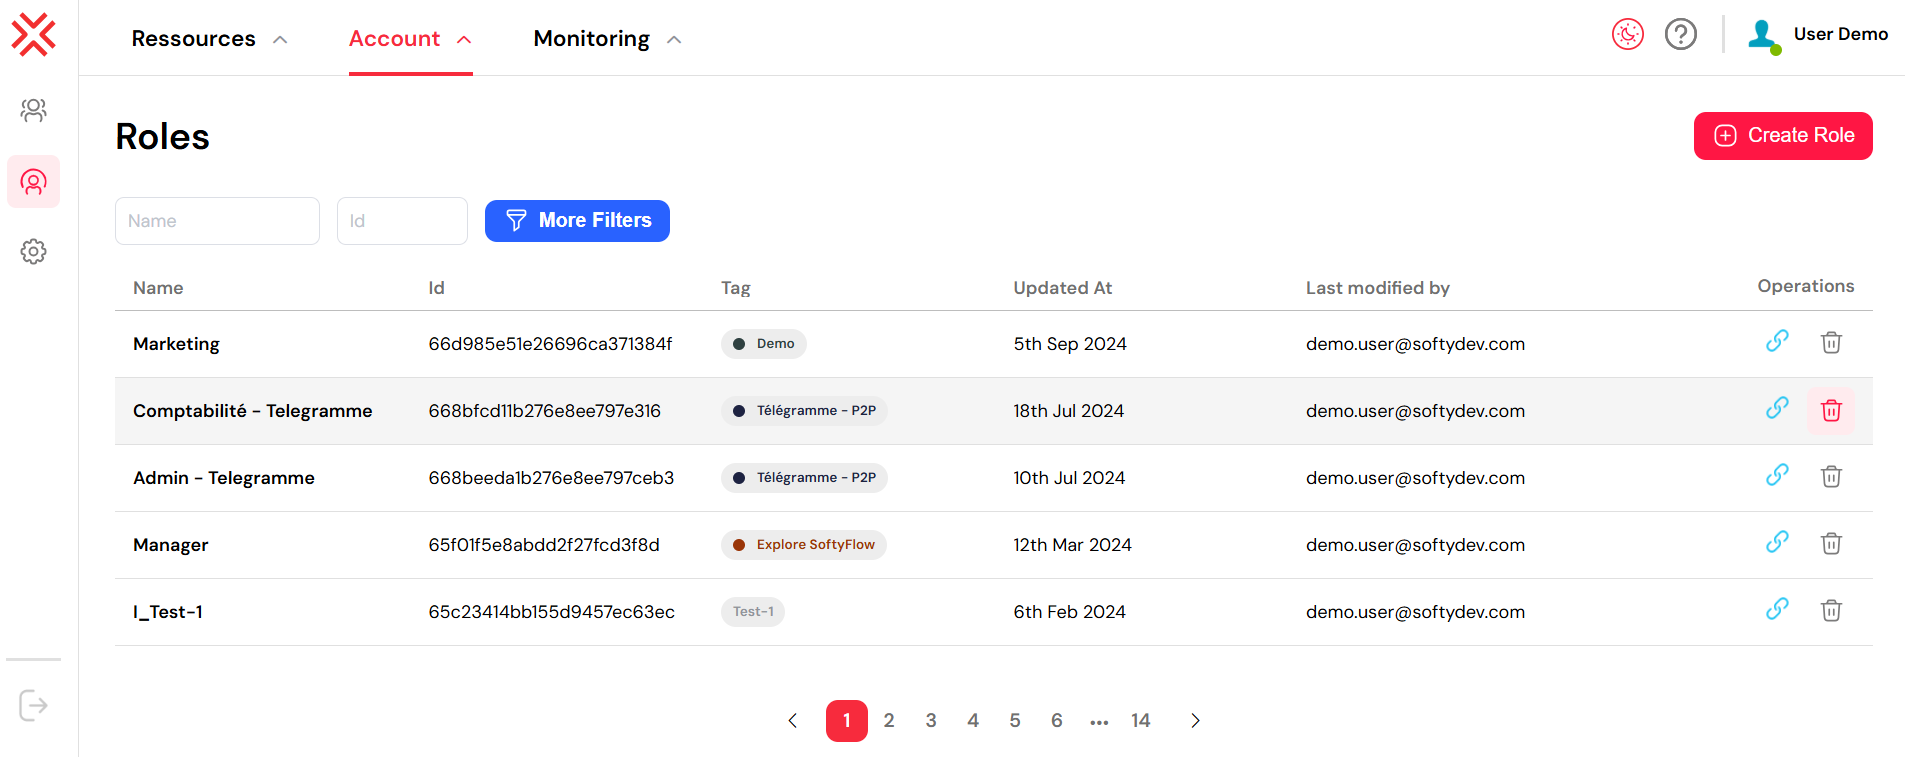
To access role management, go to the top menu and click Account, then select Roles. This will open the full list of defined roles along with relevant details such as their tag, creation date, last editor, and associated operations (edit, view ID, or delete).
Accessing the Roles Interface
To manage roles:
From the top navigation menu, click on Account.
Select Roles.
You'll land on a centralized dashboard listing all existing roles, their IDs, tags, last modification dates, and the user who last modified them.
This is also where you can perform role actions like viewing, editing, or deleting.
2. Create a Role
To define a new role:
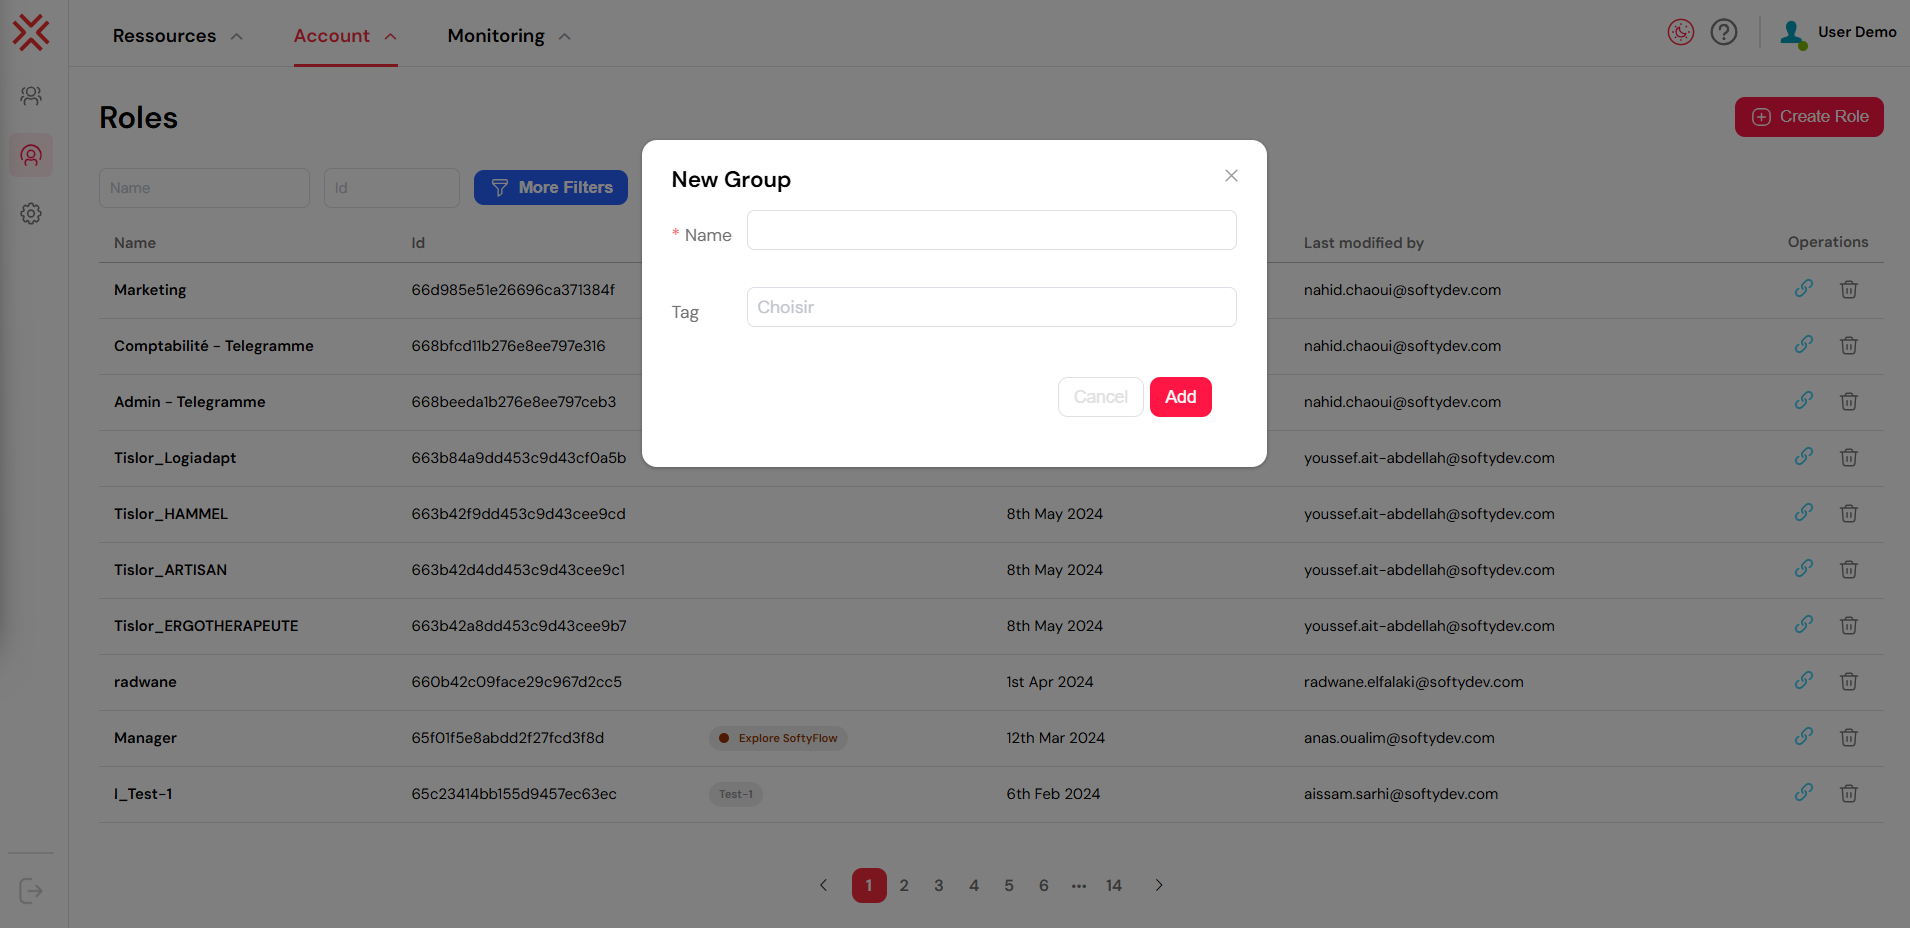
Click the red Create Role button in the top right corner.
In the form that appears:
Enter a role name that clearly describes its purpose (e.g., HR_Manager, Process_Admin).
Optionally add a tag or description to classify the role (e.g., "Telegram P2P", "Demo Access").
- Click Add to confirm creation.
Once the role is created, a unique system-generated Role ID is assigned. This ID can be used for internal references, integration scripts, or home page redirections. You can copy it by clicking the link icon in the list.
✅ Tip: Use naming conventions for better maintenance. For example: TeamName_Function_ENV (e.g., Finance_Approver_PROD).
Upon the creation of a new role, a system generated number known as the role or group ID is allocated as a distinctive identifier exclusively assigned to that particular role. To retrieve the role or group ID, you can access the comprehensive list of all roles by following the designated path /ide/roles, locate the desired group within the list, and subsequently click on the link icon button.
3. Assigning Users to Roles
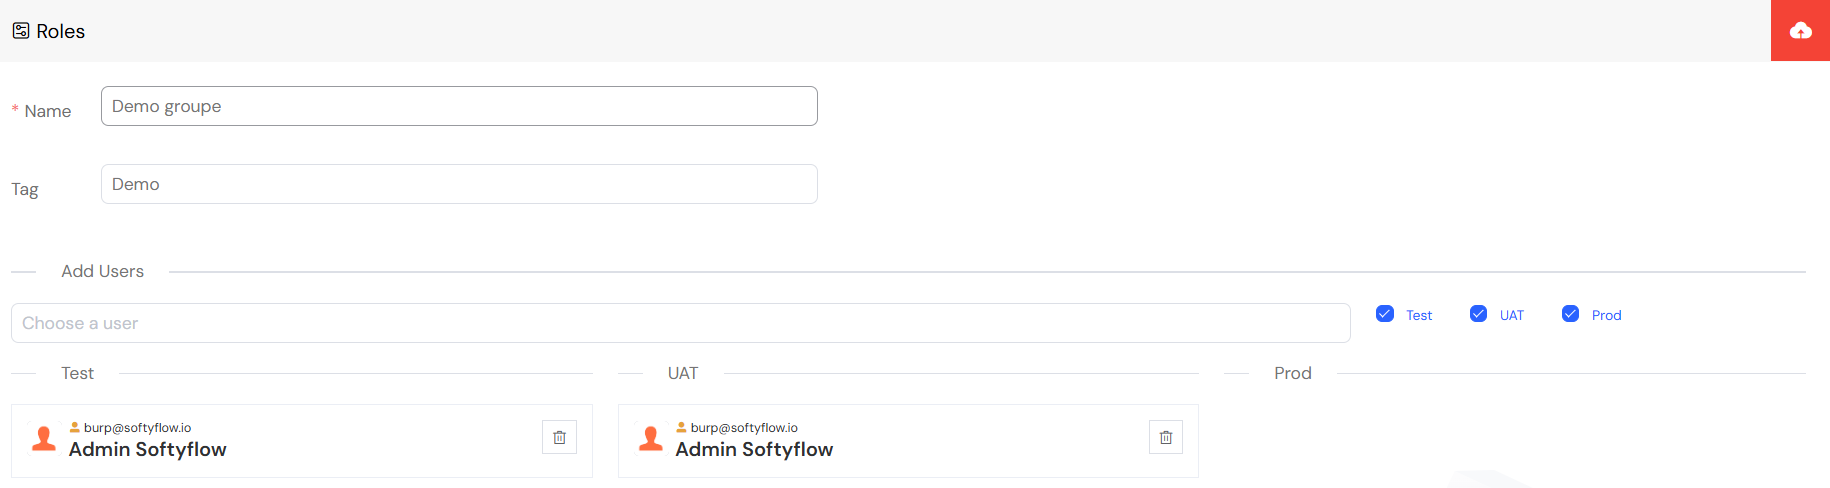
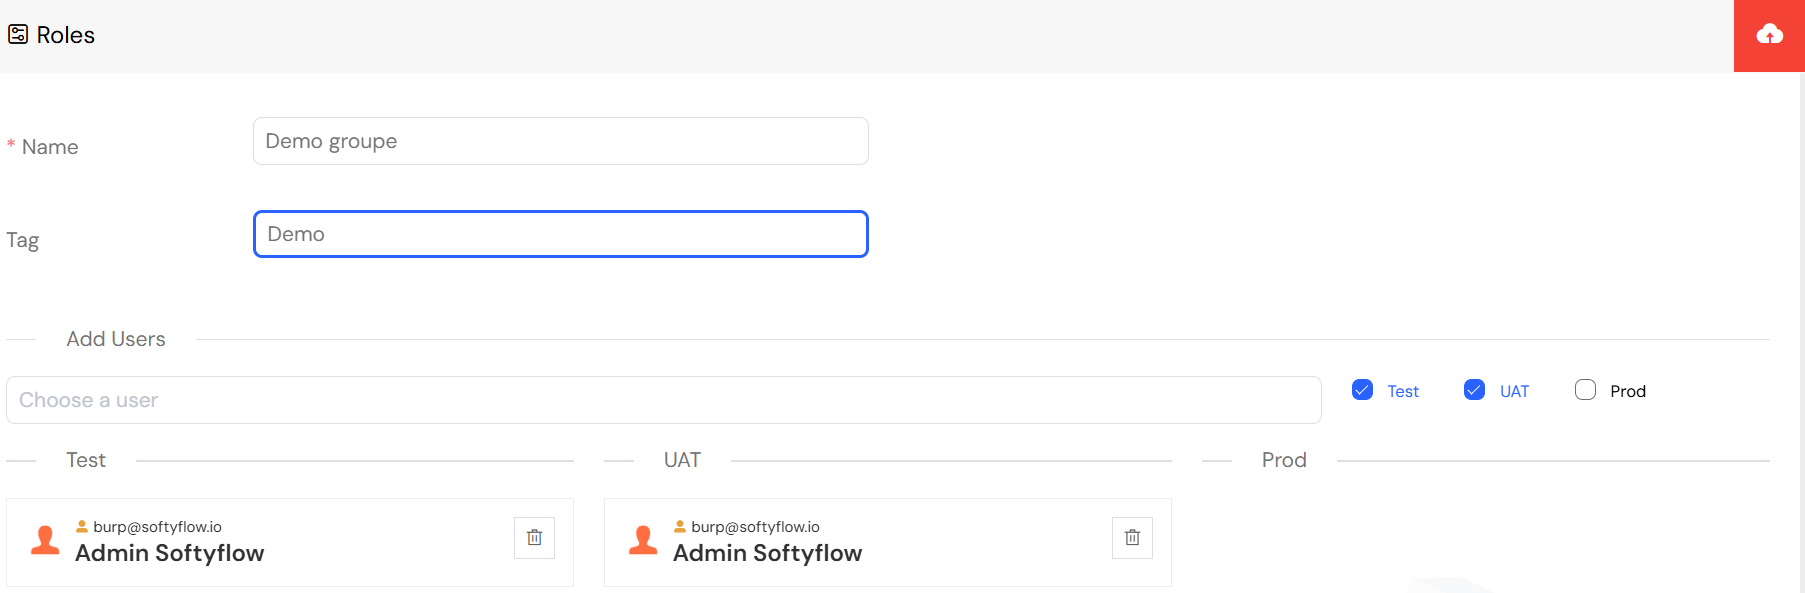
Once a role exists, you need to associate it with users so they inherit the permissions linked to it:
From the Roles list, click on the role's name or anywhere on the role's row.
Switch to the Users tab inside the role editor.
Click on Add Users, and select from the available list of users.
You can filter users by name, email, or access status.
Assignments can be defined for each environment separately (e.g., only give PROD access to senior profiles) to match your deployment strategy.
Each user can be assigned multiple roles, which allows you to combine access rights flexibly across web interfaces and process executions.
⚠️ Assign roles carefully — especially in PROD to avoid giving unnecessary administrative power.
4. Update a Role
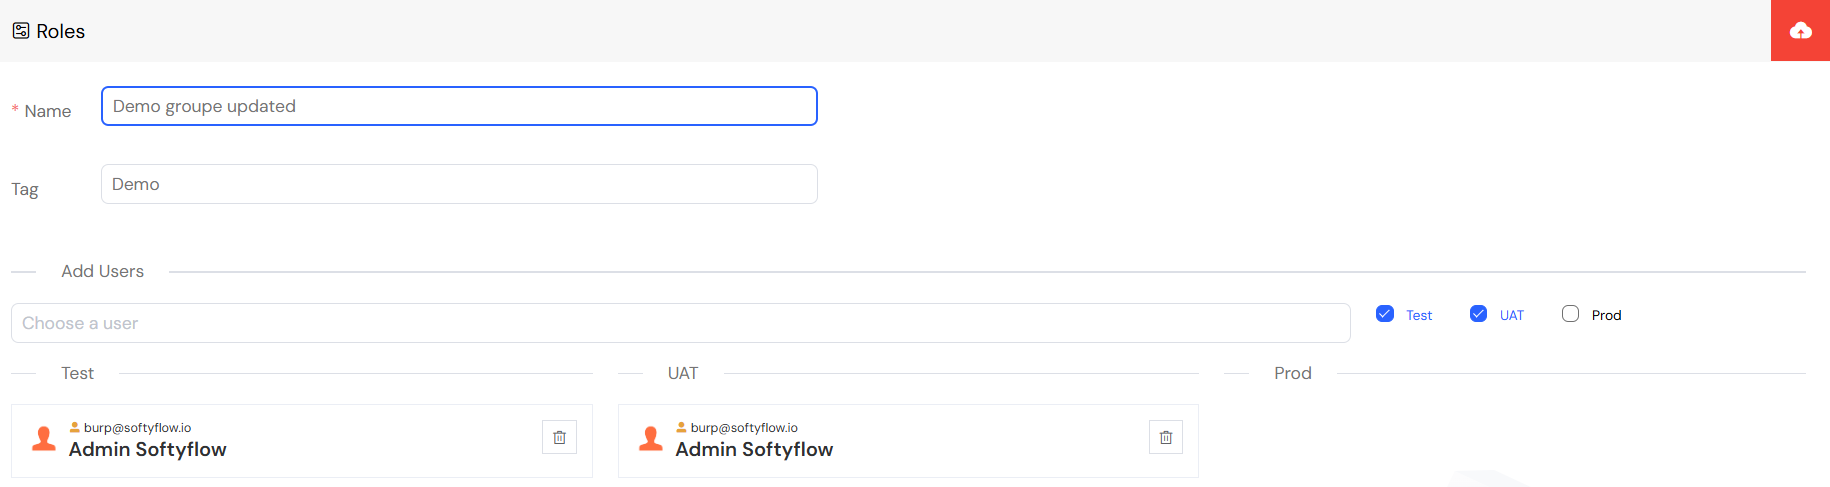
Roles can evolve with your organization. You may need to adjust the name, scope, or assigned users:
Open the Roles interface via Account → Roles.
Locate the role you want to edit and click on the role's row.
From there, you can:
Rename the role
Change its tag
Add or remove users
- Click Save to apply changes.
Changes take effect immediately and can be tracked via the "Last Modified by" column. All role changes are logged in system logs for audit purposes.
5. Delete a Role
To delete a role, go to the Account → Roles section. Locate the role you want to remove from the list, then click on the trash icon in the last column.
A confirmation dialog will appear to validate your choice. Once confirmed, the role will be removed and the action will be recorded in system logs.
Note: In most cases, there is no need to manually unassign users before deletion the system will handle it automatically if no dependency remains.
6. Attache Role to a project
When creating or editing a role, you can attach it to a specific project to scope its permissions and usage contextually.
To do this:
Go to Account → Roles.
Click Create Role or edit an existing one.
In the Tag field, choose the name of the project you want to associate this role with (e.g., Demo).
This tag links the role to the selected project, making it easier to control visibility, data access, and UI behavior per project. This is particularly useful for web interface design where different roles see different interface elements.
7. View Roles attached to a project
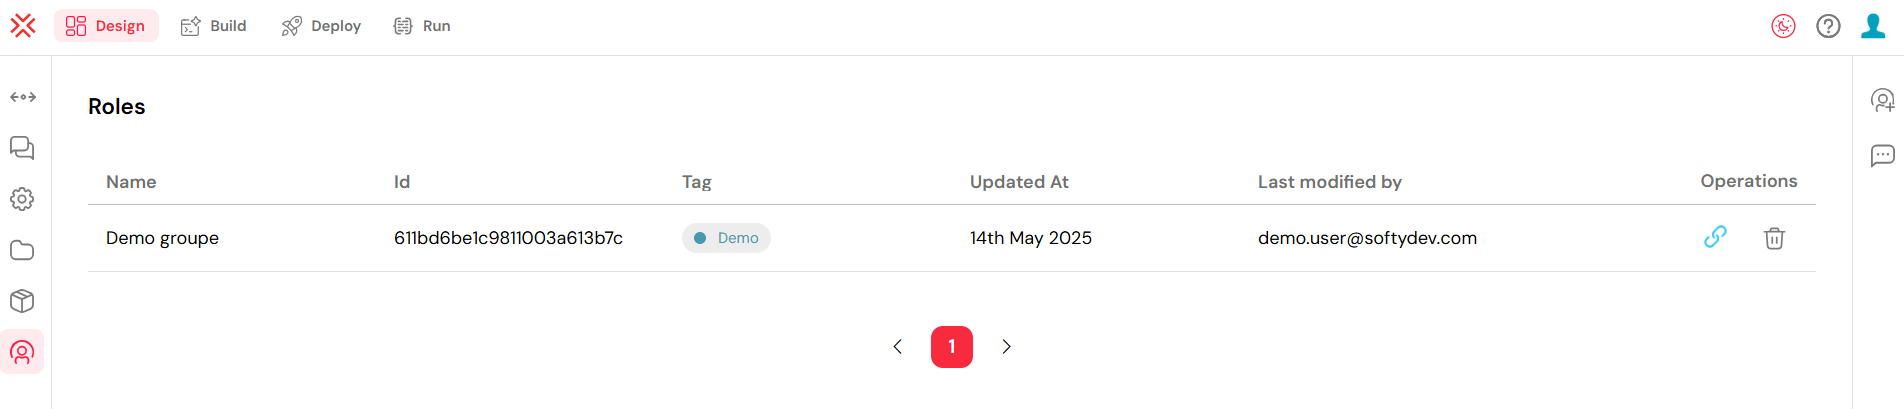
You can also view all roles associated with a project directly from the project interface:
Go to the Ressources section.
Select any project from the list.
Click the Design tab at the top of the page.
On the left-hand sidebar, click Roles.
This will open the list of roles linked to that specific project, organized by environment (Test, UAT, Prod).
From there, you can see which users are assigned per environment and manage access accordingly. This is essential for maintaining proper access control across your deployment pipeline.
8. Role Integration & Best Practices
8.1. Role-Based Access in Development
Roles integrate seamlessly with development workflows:
- Web Interface Design: Use roles to show/hide specific widgets and interface elements
- Process Design: Assign process tasks to specific roles for workflow automation
- Database Integration: Control data access based on user roles
- Integration: Use roles in API calls and external system integration
8.2. Environment-Specific Role Management
Configure roles differently across environments:
- Test: Broader access for development and testing
- UAT: Restricted access for user acceptance testing
- Prod: Minimal required access for production operations
Learn more about managing environments in Test & Deploy.
8.3. Monitoring Role Usage
Track role assignments and usage:
- System Logs: Monitor role assignments and changes
- Run & Instance Management: See which roles are executing processes
- Home Redirection: Configure role-based landing pages
9. Next Steps
Continue with platform administration and development:
Administration:
- User Management - Assign roles to users and manage access
- Authentication & SSO - Configure login methods that work with roles
- Settings - Configure metadata that complements role-based access
- Mail Management - Set up notifications for role-based workflows
- System Logs - Monitor role-related activities
- Home Redirection - Create role-based landing pages
Development Integration:
- Project Setup - Start building applications with role-based access
- Web Interface Design - Design interfaces that respond to user roles
- Process Design - Create workflows with role-based task assignments
- Monitor & Run - Monitor how roles interact with running processes