Project Setup
Welcome to Softyflow! The first step in bringing your application to life is creating a project. Think of a project as a dedicated workspace that organizes everything your application needs to function. This includes all its essential components: from user interfaces and business workflows to data models, user roles, reports, and powerful automations.
This guide will walk you through every step of setting up your project. Before you dive in, we recommend familiarizing yourself with Softyflow’s core concepts and our comprehensive getting started guide to get the most out of the platform.

The Softyflow IDE, where all your projects are managed.
1. Creating a Project
In Softyflow, you have two flexible options for creating a project: you can either build one from scratch to start fresh or import a pre-existing configuration from a .json file. This is ideal for duplicating projects or using templates.
1.1. Create a New Project from Scratch
Starting from a blank canvas gives you the freedom to build your application exactly as you envision it. Here’s how to create a new project directly from the Softyflow IDE:
- From the main IDE dashboard, click the Create New Project button.
- The Application Information screen will appear. Here, you’ll define your project’s identity:
- App Name: Give your project a clear and descriptive name, like
budget-approval-demo. - Description (optional): Briefly explain the purpose of the application, such as “An application for managing budget approvals.”
- App Icon and Color: Personalize your application by choosing an icon and color that reflect its function or branding.
- App Name: Give your project a clear and descriptive name, like
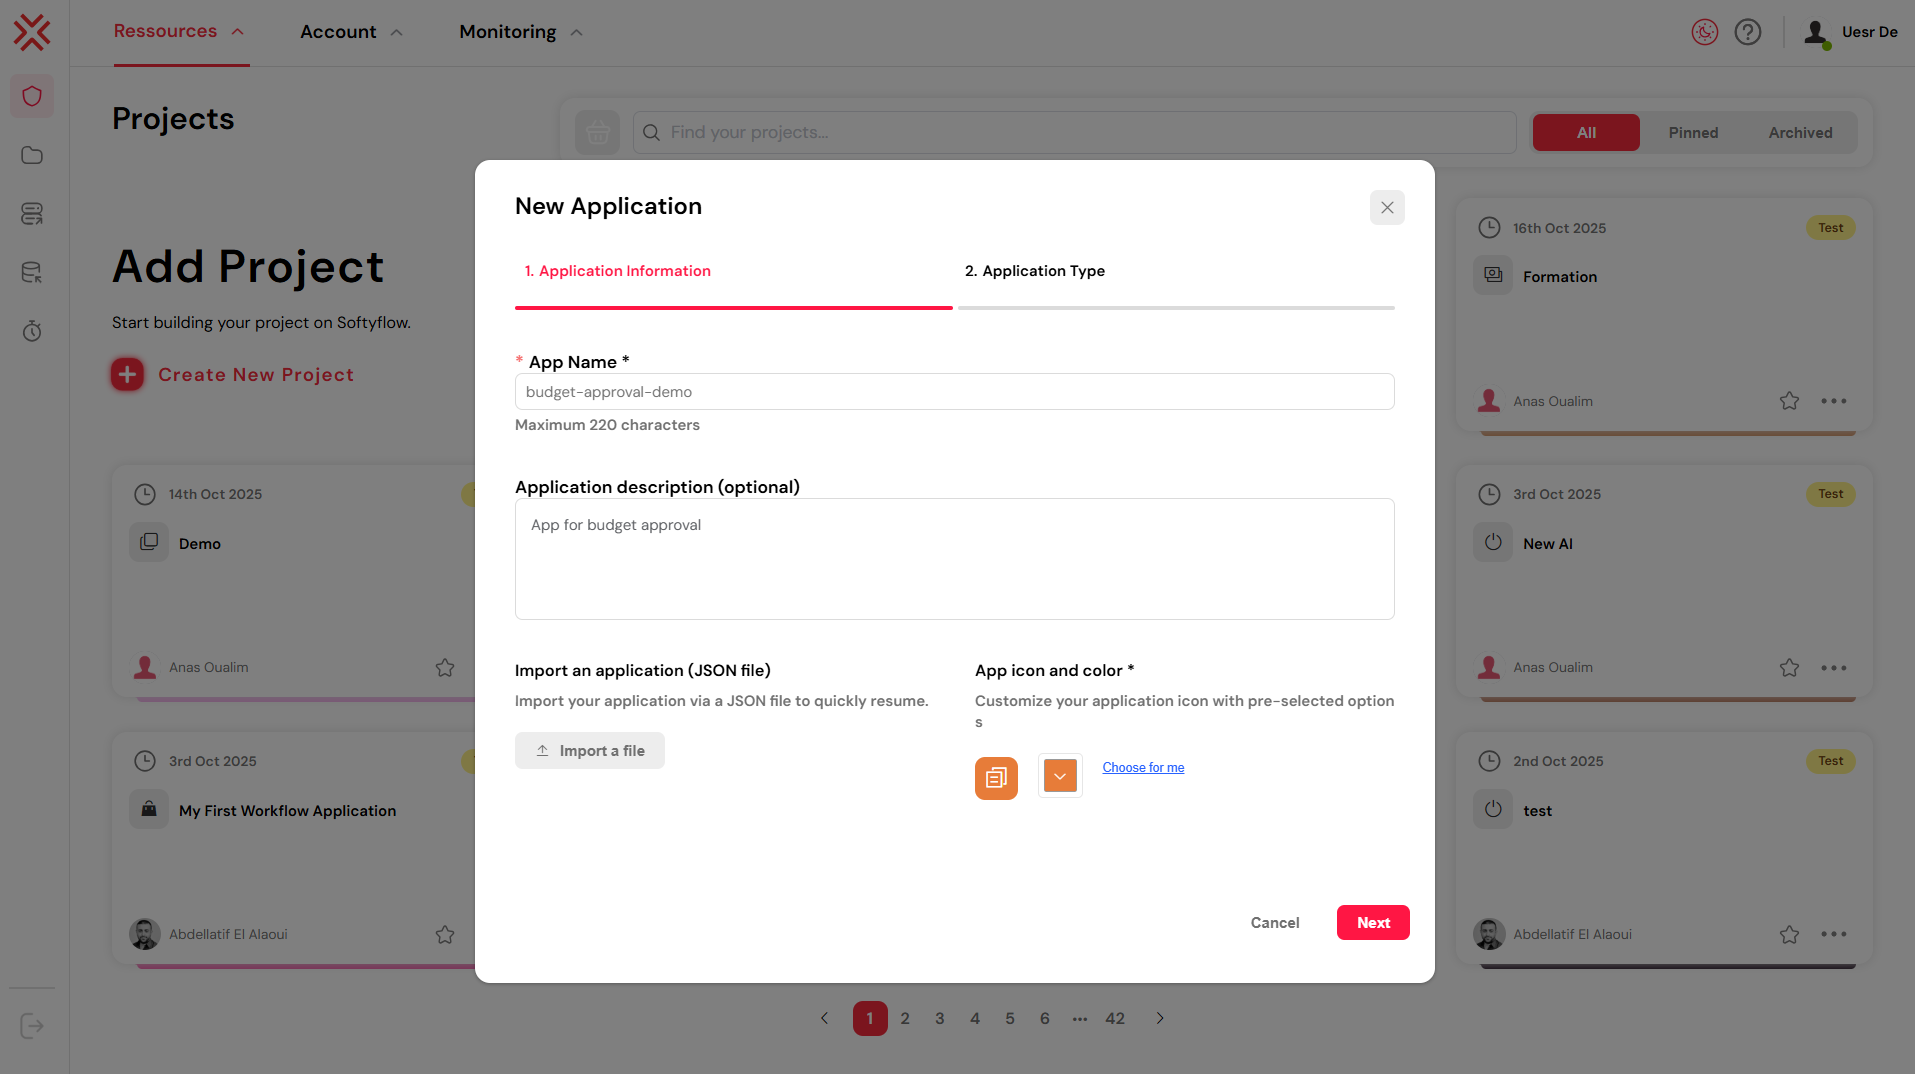
Define your application’s name, description, and appearance.
- Click Next to proceed.
- In the Application Type step, select a template that best fits your needs. Softyflow offers several starting points to accelerate your development:
- Contextual Business Data: Ideal for business-centric applications like CRMs or ERPs.
- Validation Workflow: Perfect for processes that require approvals and sequential steps.
- Admin Panels & CRUD Apps: A great starting point for data management interfaces.
- Start from Scratch: Choose this for complete control over your application’s structure.
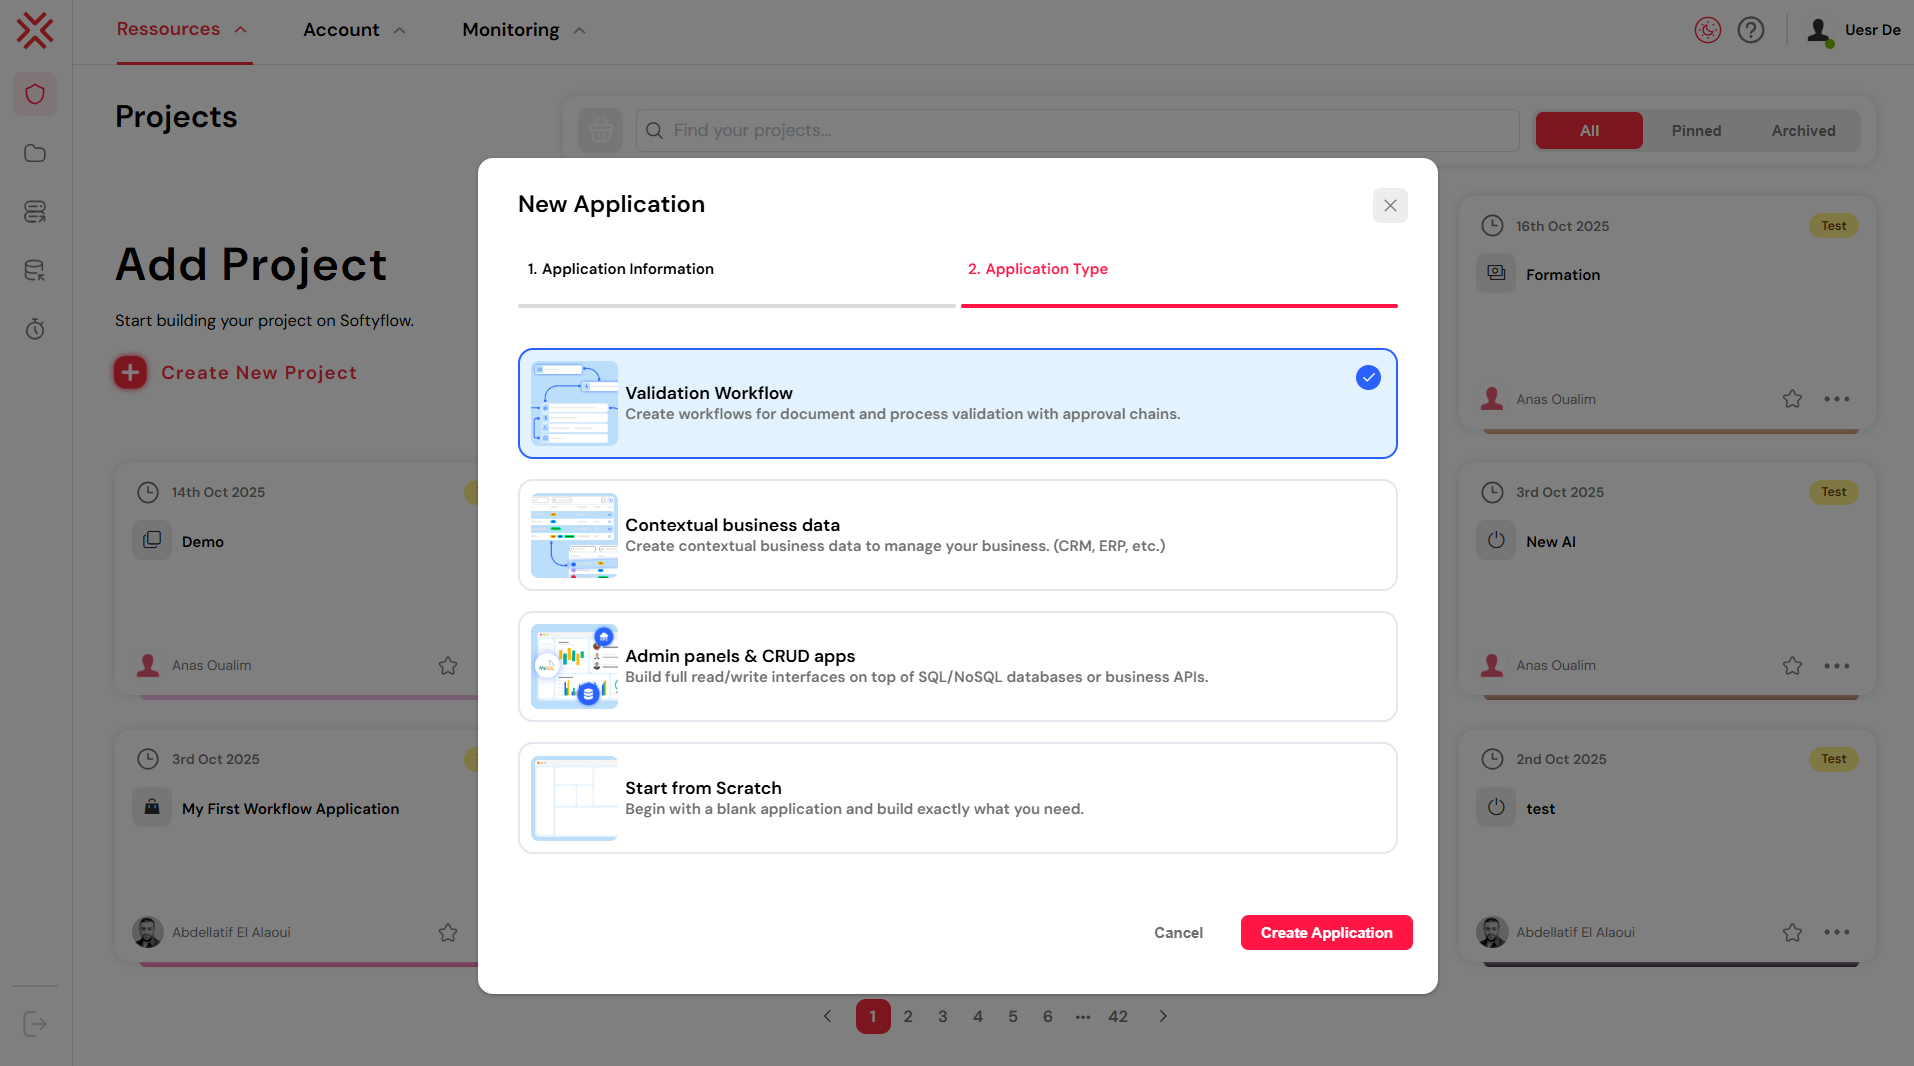
Choose an application template to jumpstart your development.
- Click Create Application. Your project workspace is now initialized and ready for you to start building.
Upon creation, you will be directed to the project workspace. This is your central hub for developing your application. From here, you can design user interfaces with our web interface design tools, model business logic with the process designer, and connect to your data sources via database integration.
1.2. Import or Export a Project via JSON
Softyflow allows you to export your project’s entire configuration into a single .json file. This feature is incredibly useful for versioning, sharing your work with team members, or creating standardized templates for new applications.
Note: The exported
.jsonfile contains the complete project structure, including forms, workflows, and roles. However, it does not include data from collections or reports.
1.2.1. How to Export a Project
- On the IDE dashboard, find the project you wish to export.
- Click the options menu (the three dots: ⋯) on the project card.
- Select Export from the dropdown menu. A
.jsonfile containing your project’s configuration will be automatically downloaded.
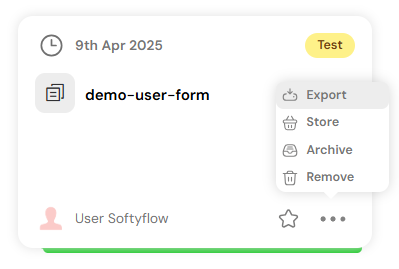
Exporting a project is as simple as a few clicks.
1.2.2. How to Import a Project
- From the IDE dashboard, click Create New Project.
- Enter the basic application information (name, description, etc.).
- Instead of choosing an application type, click Choose File and select the
.jsonfile you wish to import. - Click Create Application. Softyflow will build a new project based on the structure defined in the file.
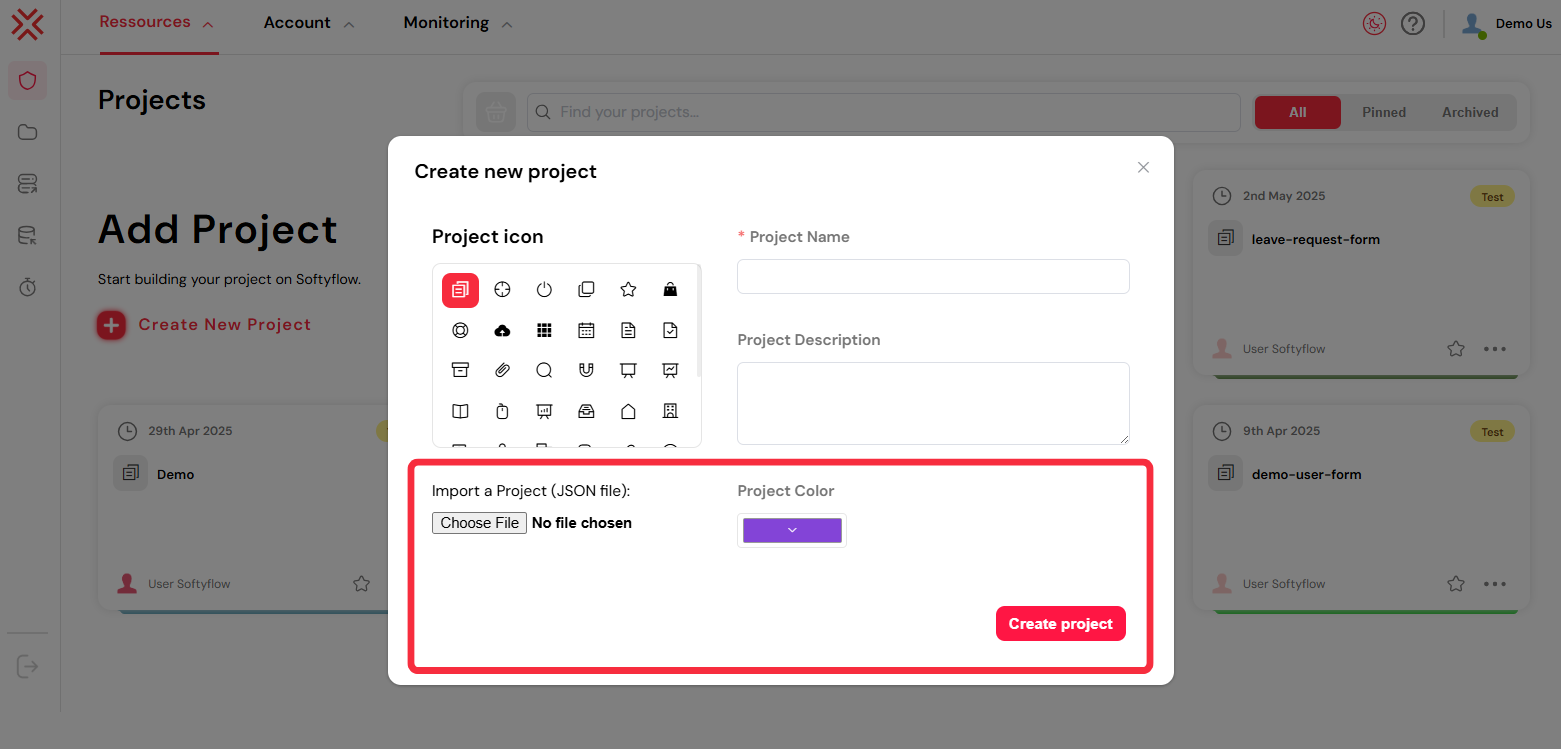
Create a new project from an existing JSON file.
2. Navigating the Project Workspace
The project workspace is where your ideas take shape. It is logically organized into four main tabs, each corresponding to a key stage of the application development lifecycle: Design, Build, Deploy, and Run.
2.1. Design
The Design tab is where you lay the groundwork for your application. Here, you’ll configure foundational settings, manage shared resources, and establish security protocols.
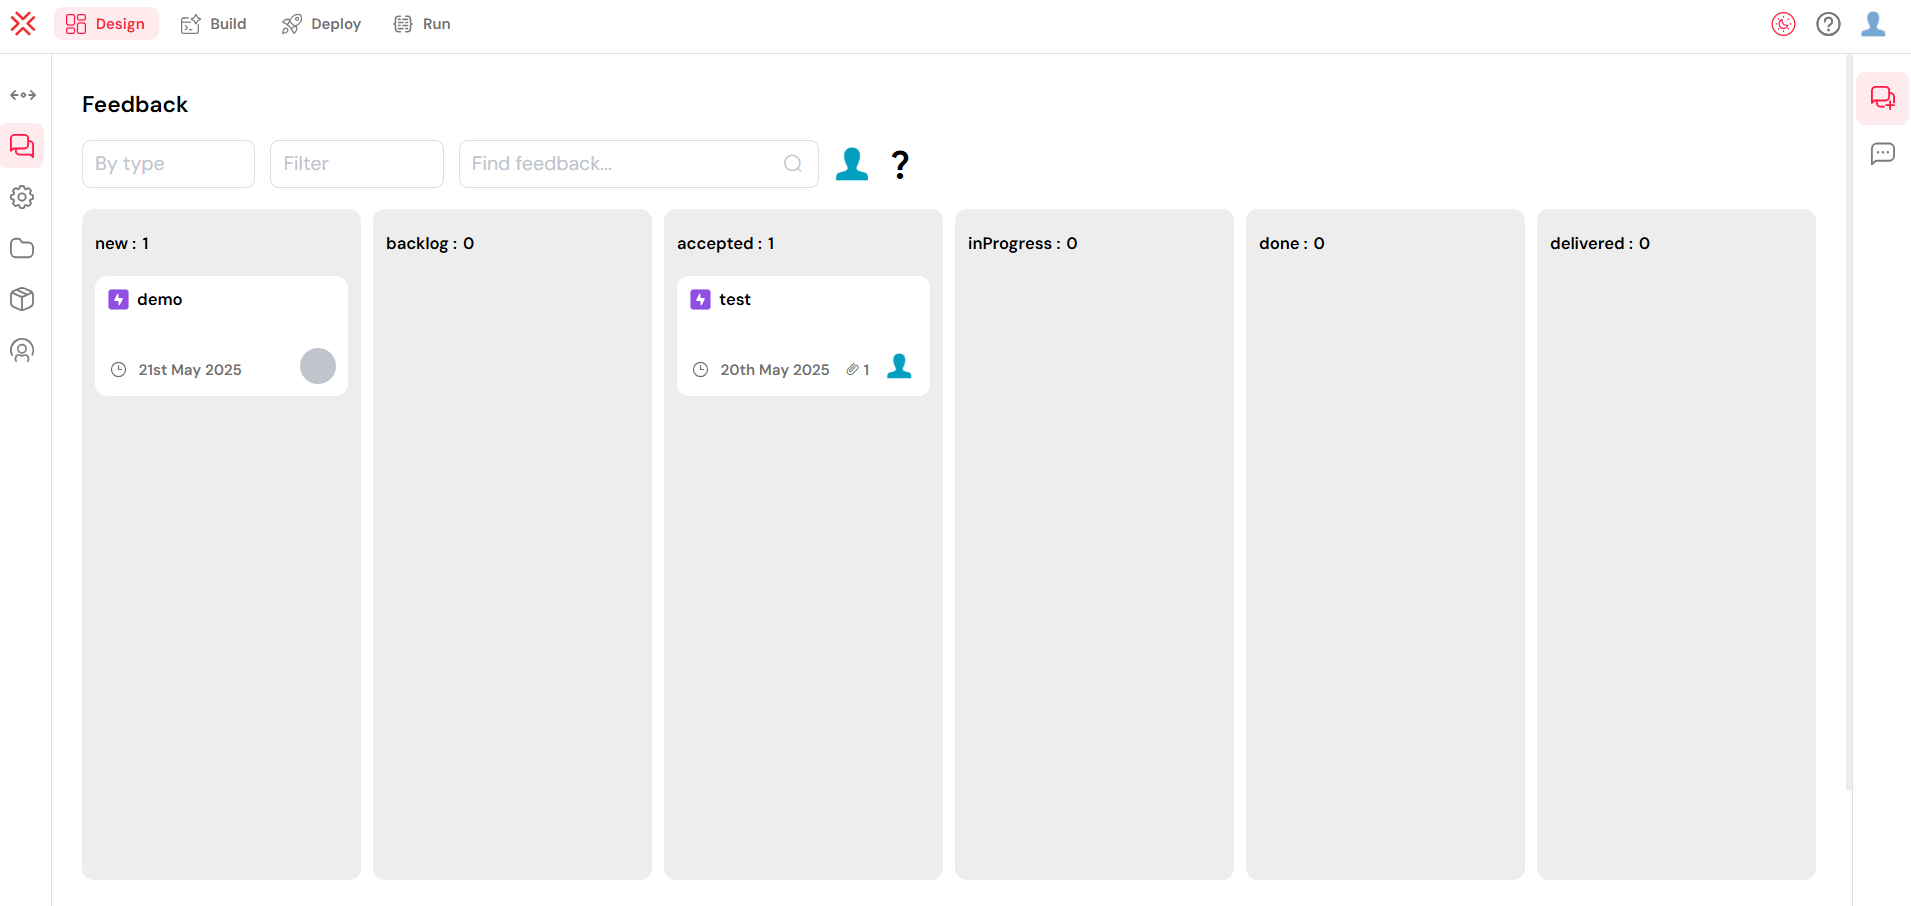
- Feedback: Collect and manage feedback from testers and users to iterate on your application.
- Settings: Customize global project settings, such as branding, metadata, and external integrations.
- Files: Upload and manage all project-related assets, including images, documents, and scripts.
- Volt: Securely store and manage sensitive information like API keys, passwords, and other credentials.
- Role Management: Define user roles and permissions to ensure secure access control throughout your application.
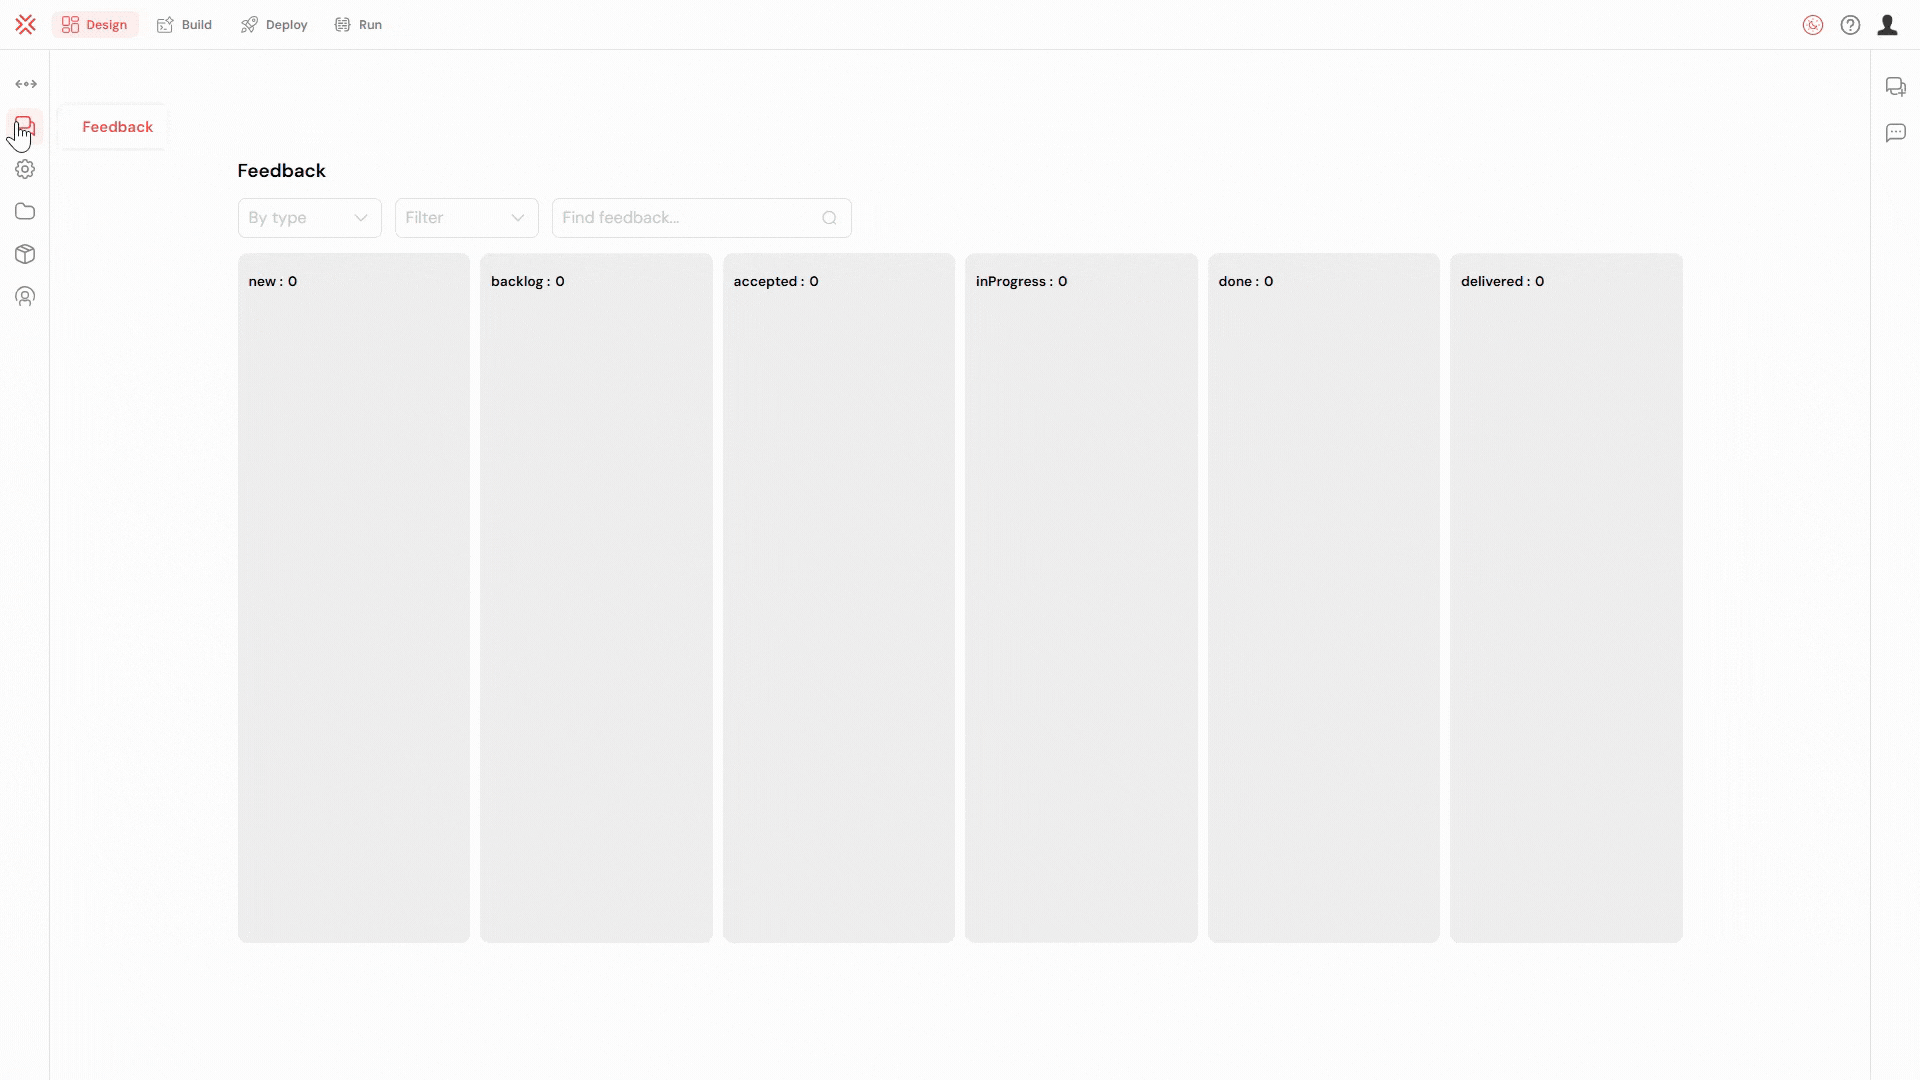
The Design tab, where you configure your project's foundations.
2.2. Build
The Build tab is your primary development environment. This is where you’ll create the core components of your application, from the user-facing interfaces to the backend business logic.
- Web Interface: Design and build responsive user interfaces with an intuitive drag-and-drop form builder.
- Workflow: Model, automate, and orchestrate your business processes using a powerful BPMN-based visual designer.
- Database: Connect to external databases or use the built-in MongoDB to manage your application’s data.
- Reporting: Create custom reports and dashboards to visualize data, track key performance indicators (KPIs), and monitor business activity.
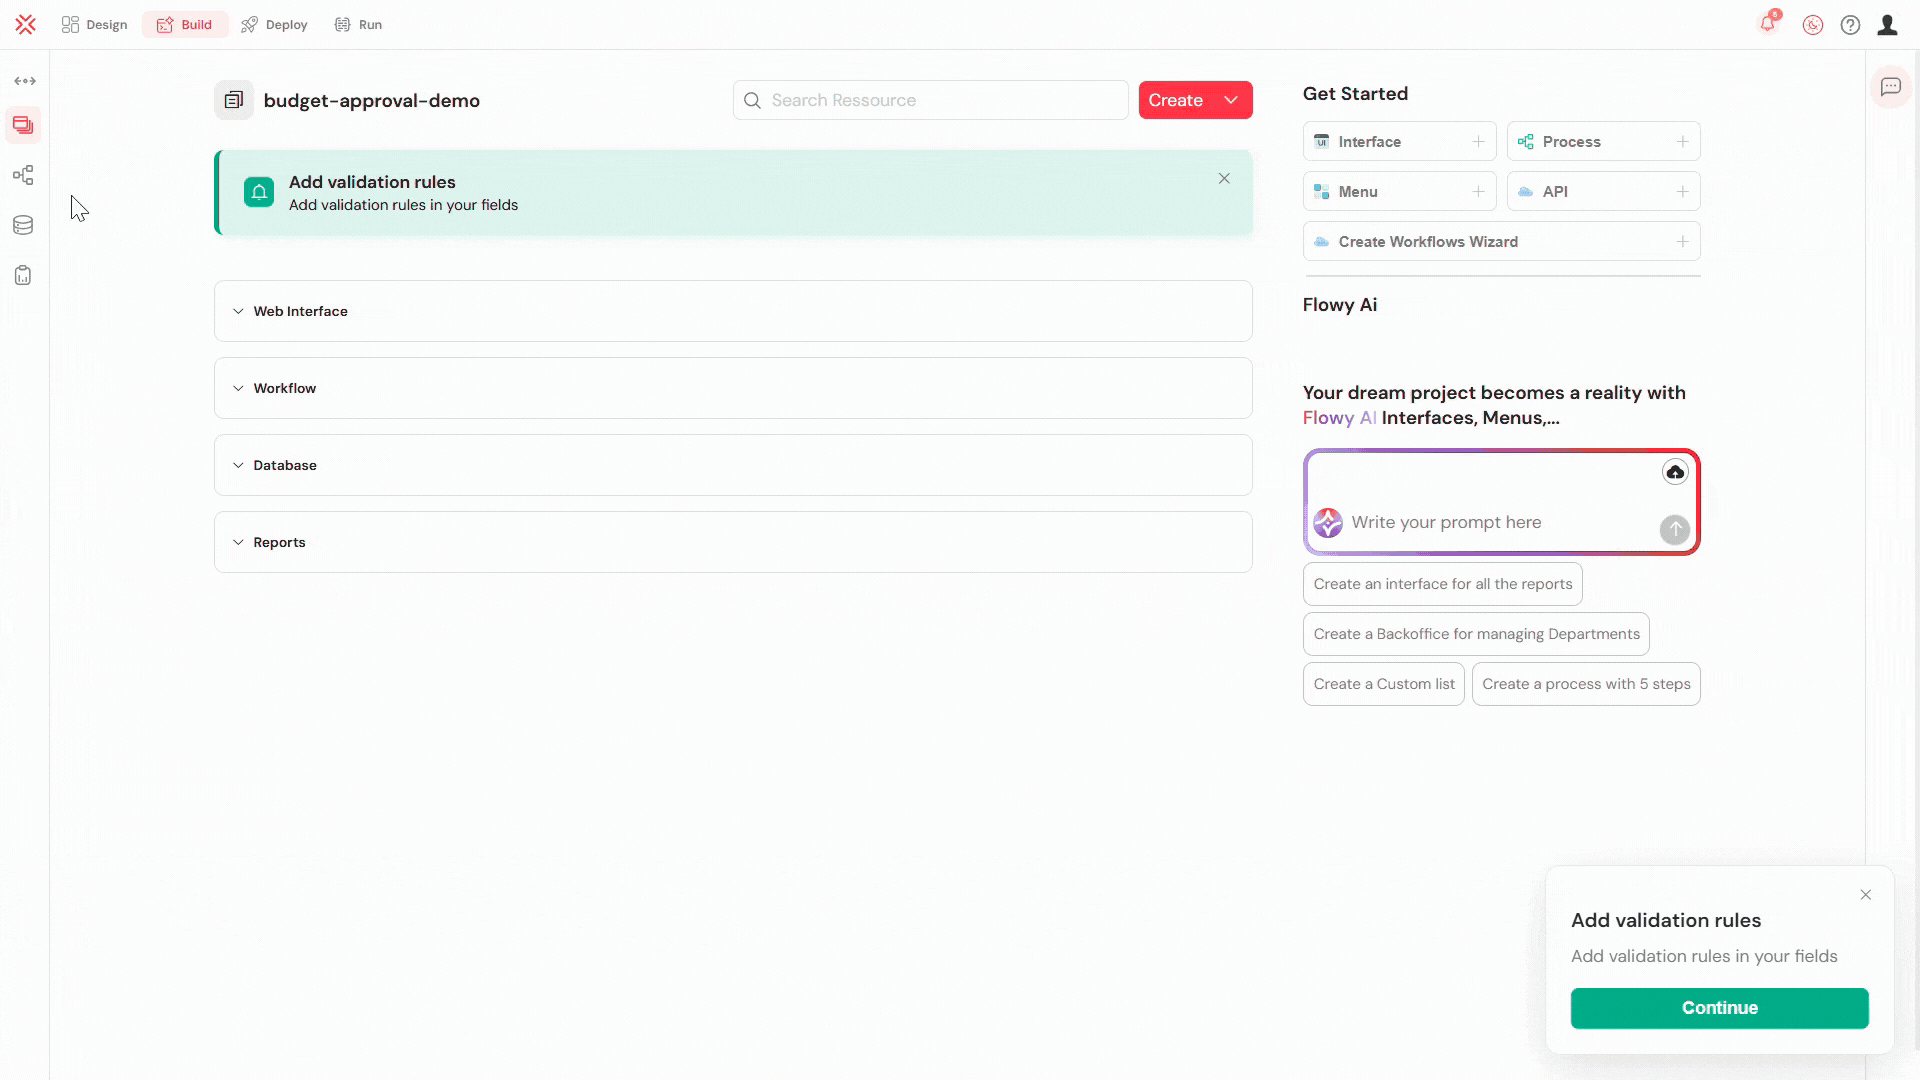
The Build tab contains all the tools to develop your application.
2.3. Deploy
The Deploy tab streamlines the process of moving your application from development to production. It provides tools for managing deployments across different environments.
- Test & Deploy: Automate your deployment pipeline, manage application versions, and seamlessly promote your build across TEST, UAT, and PROD environments.
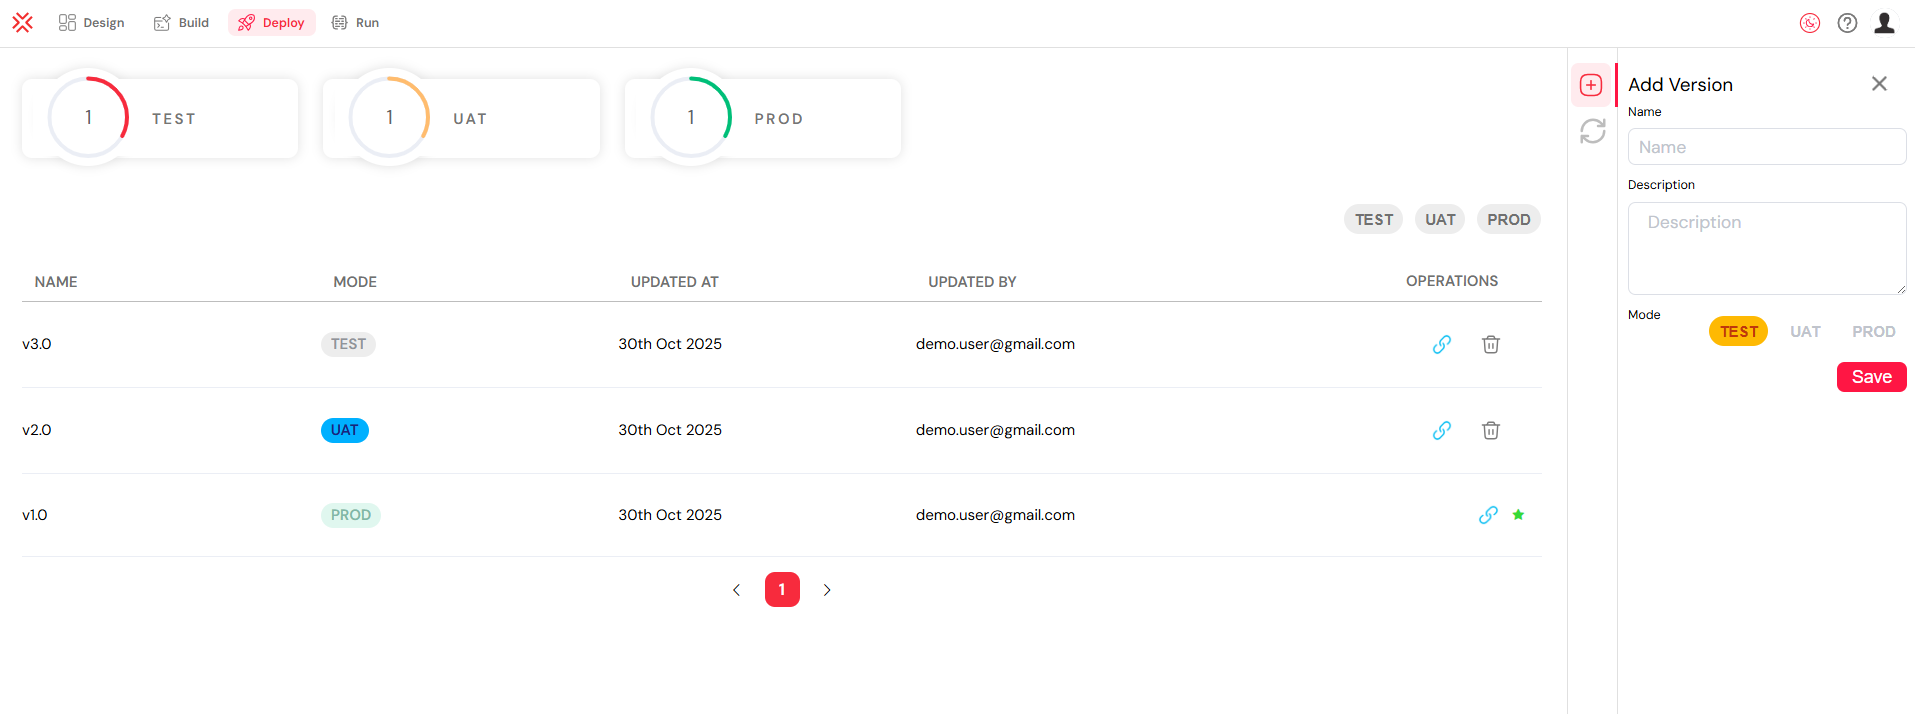
Manage your application's lifecycle from testing to production in the Deploy tab.
2.4. Run
The Run tab is your command center for executing, testing, and monitoring your live application. It offers real-time insights into your application’s performance and operational health.
- Monitor & Run: Track the status of active process instances, manage user tasks, and troubleshoot issues with powerful monitoring tools.
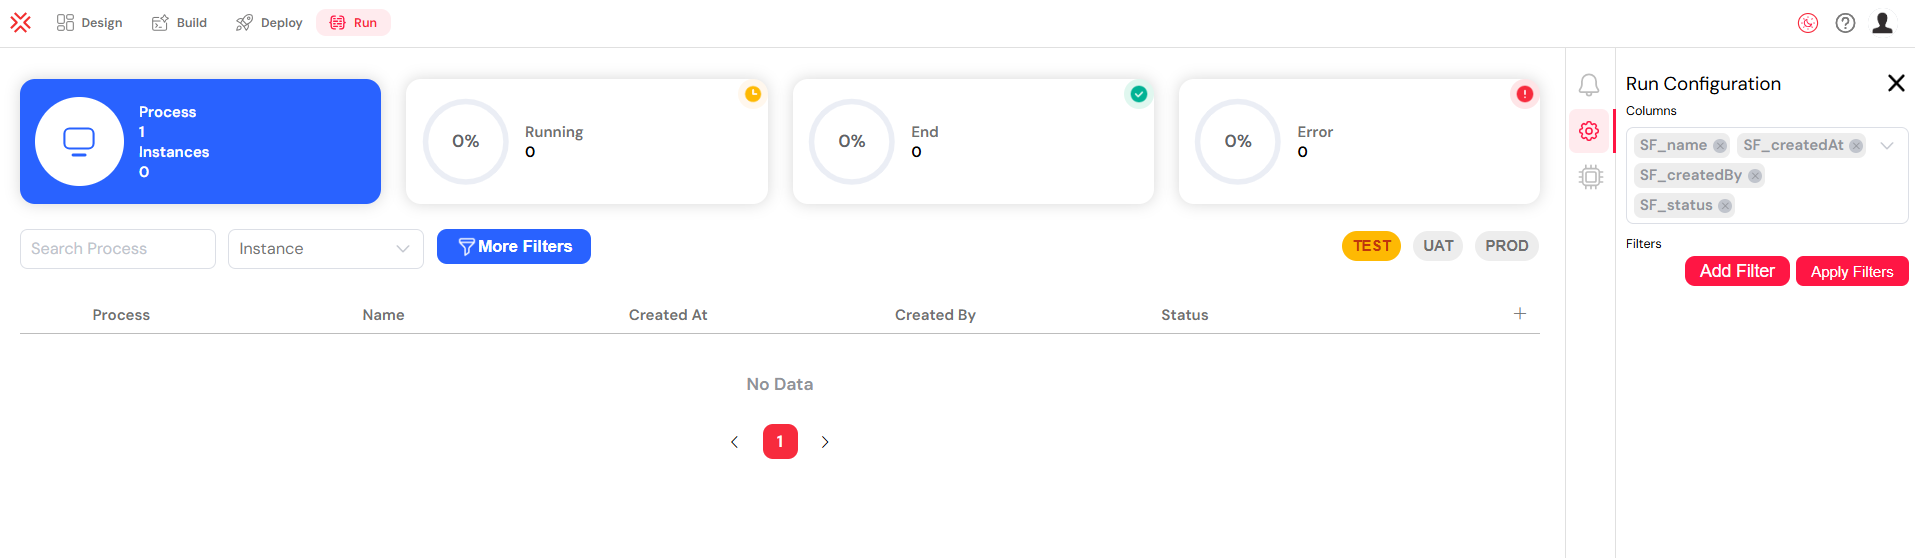
Execute and monitor your live application from the Run tab.
3. Collaboration and Feedback
Effective collaboration is key to building great applications. Softyflow includes a built-in Feedback system that allows team members, testers, and end-users to provide input directly within the application. This feature is invaluable during the testing and deployment phases and for continuous improvement while the application is live.
3.1. Accessing and Managing Feedback
All submitted feedback is collected in the Feedback tab, accessible from the Design section of the project workspace. Here, you can view, manage, and track the status of each feedback item. Each entry provides important context, including:
- The reporter's name and message.
- A direct link to the form or page where the feedback was submitted.
- A timestamp.
- A status tracker (e.g.,
New,In Progress,Done).
The Feedback dashboard centralizes all user comments and issues.
3.2. How to Submit Feedback from the Live Application
Users can submit feedback directly while using the application, ensuring that reports are contextual and precise.
- While previewing or using a form, click the grid icon in the top-right corner to open the app tools.
- Select the Feedback option.
- A modal window will appear. Fill in the details:
- Choose a feedback type (e.g., Question, Issue, Suggestion).
- Provide a clear title and description.
- A screenshot of the current page is automatically attached to provide visual context.
- Click Add new ticket to submit the feedback.
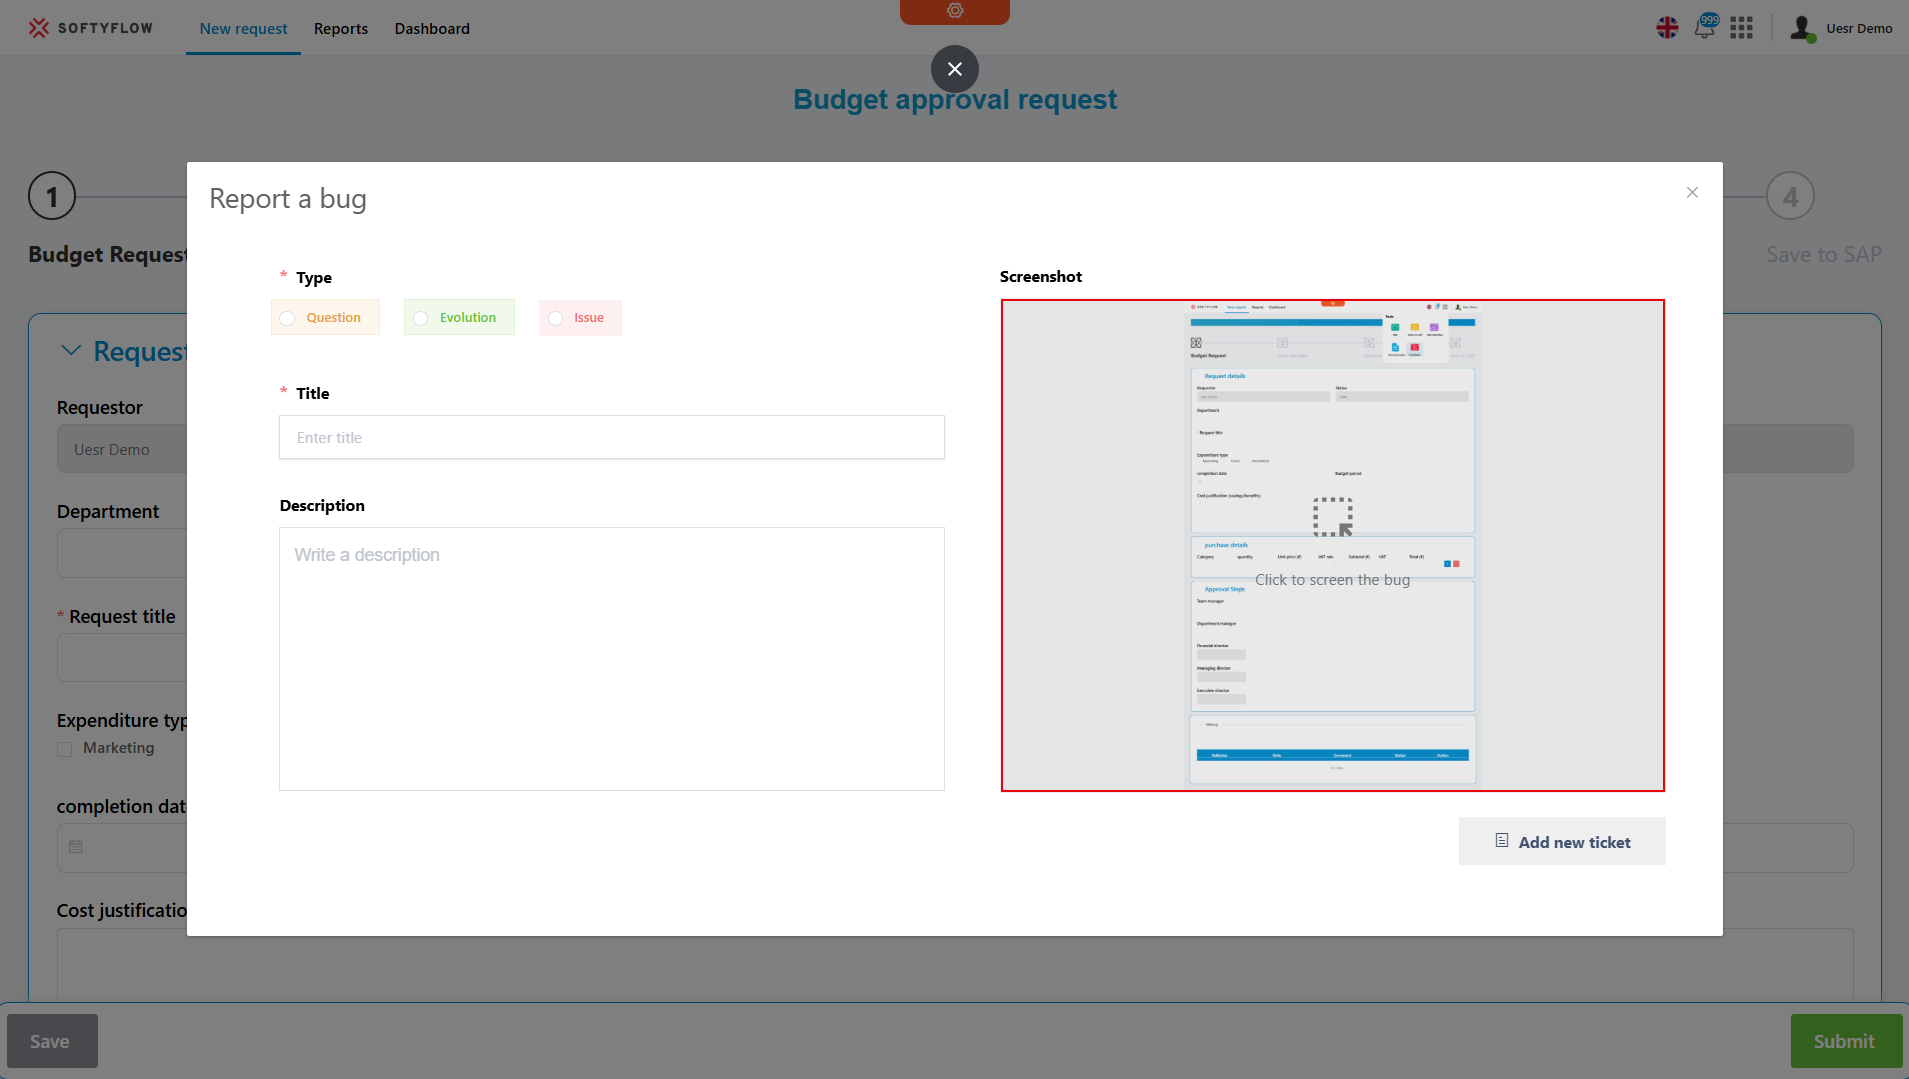
Submitting feedback is easy and automatically includes a screenshot for context.
This makes it easy for users or testers to report precise issues with context, including a screenshot, directly from the screen they are viewing.
Next Steps
With your project successfully set up, you are now ready to start building. The upcoming chapters will dive deep into the Build tab, guiding you through each stage of application development.
To continue your journey, we recommend the following resources:
- Hands-on Learning: Try our step-by-step tutorials to build your first application.
- Visual Guides: Explore our video library for practical demonstrations of Softyflow’s features.