Process Modeler
The Softyflow Process Modeler provides the tools required to design, configure, and test business workflows. It is based on the BPMN 2.0 standard, allowing you to model business processes visually and connect them with application logic.
Building a Process
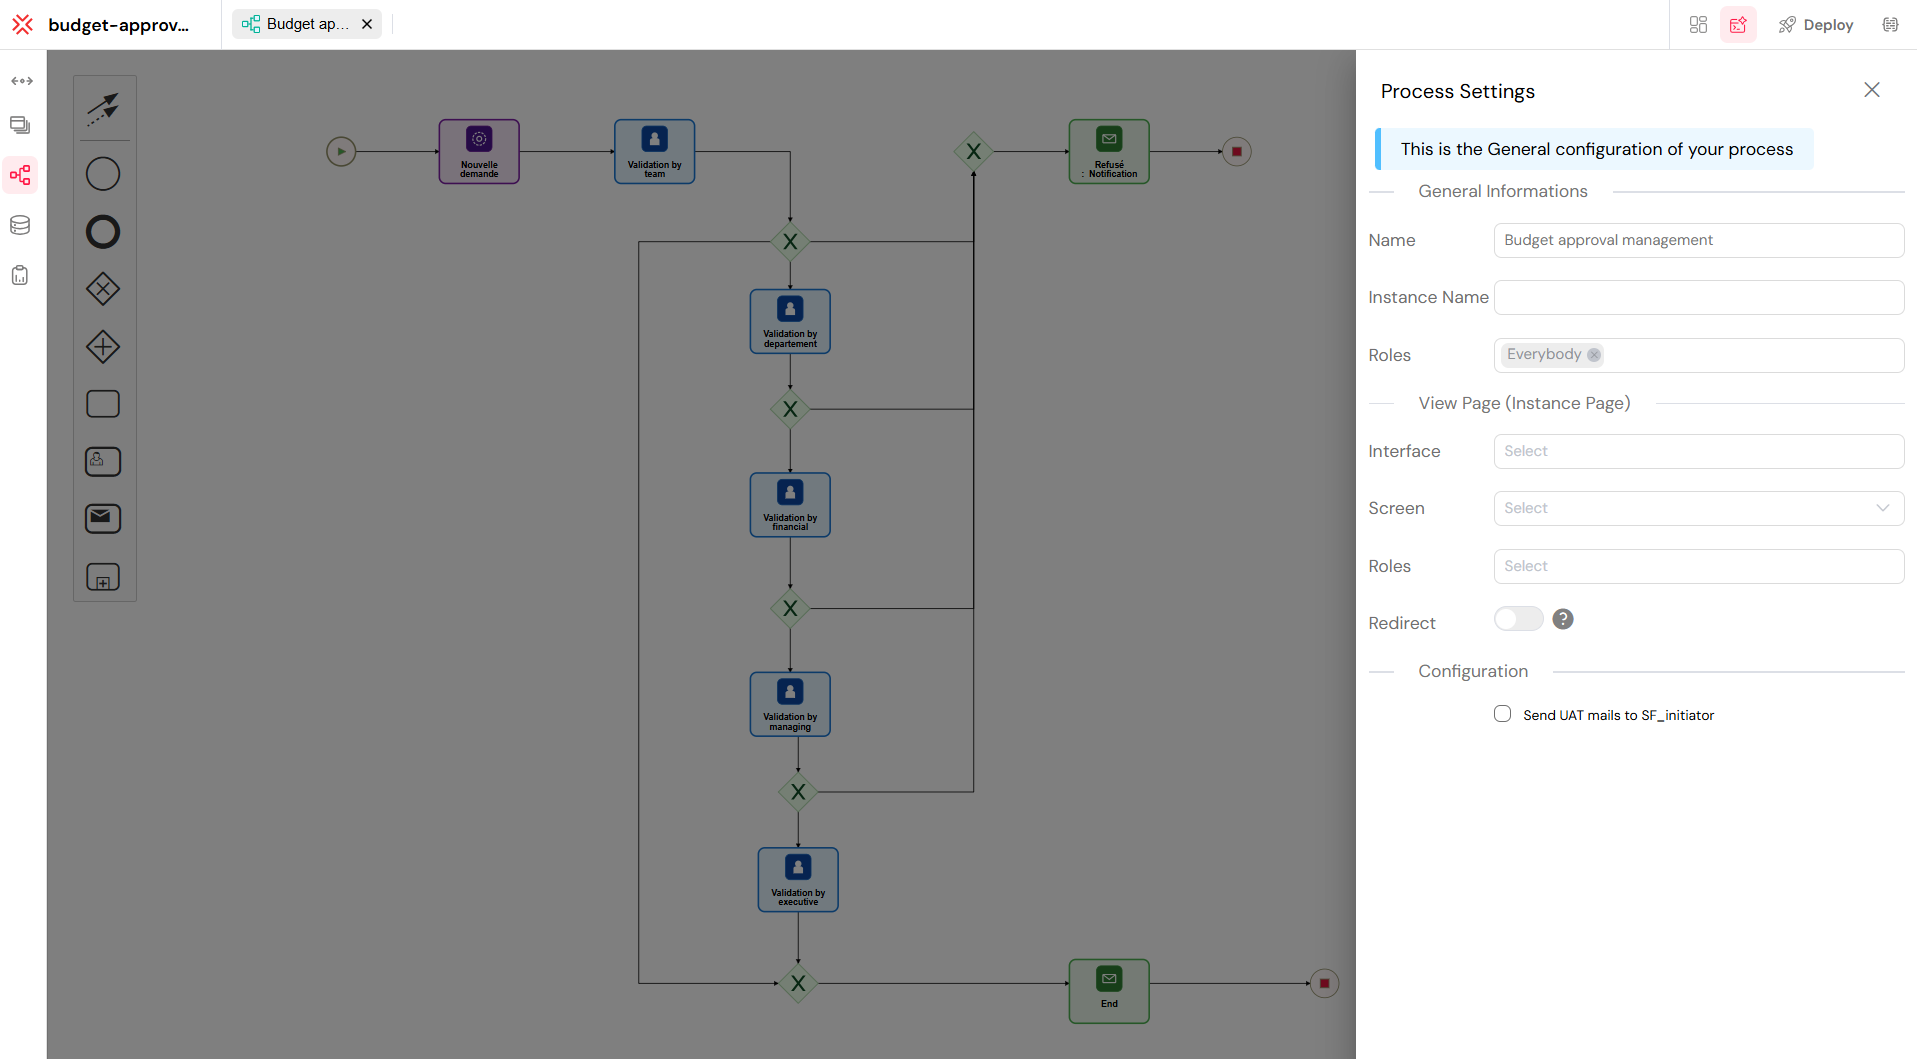
The Process Modeler consists of a central canvas where you design your workflow and a component palette on the left. Building a process is an intuitive and visual experience.
When a new process is created, a simple default workflow is automatically generated, consisting of a Start Event, a Normal Task, and an End Event.
To build your process, simply drag and drop components from the palette onto the canvas. You can then arrange them, configure their properties using the right panel, and connect them to other elements to define the overall process flow.
General Configuration
The General Configuration panel allows you to define the basic properties of your process, including naming conventions, user access permissions, and the associated web interface for viewing instances.
How to Use General Configuration
The General Configuration panel is your first step in setting up a new process. Here’s how to use each field:
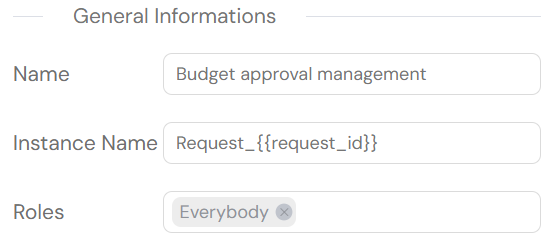
Name: This is the identifier for your process in the Softyflow environment. Choose a clear and descriptive name. This name will appear in process lists and reports.
Instance Name: This field lets you define a dynamic name for each new process that is started. You can use variables to create unique and informative names. For example,
Request_{{request_id}}would generate instance names like "Request_001," "Request_002," etc. This makes it easier to track individual instances.Roles (Process Access): Use this field to control who can start and interact with the process. You can select one or more user roles (e.g., "Admin," "Managers"). Only users belonging to the selected roles will be able to see and use this process.
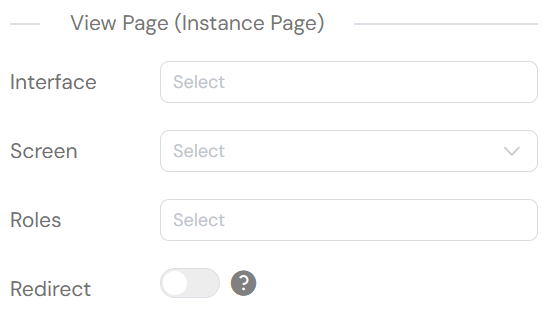
Interface (View Page): This links your process to a specific web interface. Select the interface that contains the screen you want to use for viewing process instances. This is often a dashboard or a detailed view page.
Screen (View Page): After selecting an interface, choose the specific screen where users will be redirected to view the details of a process instance. This screen typically displays the instance data and progress.
Roles (View Page Access): This setting determines which user roles can access the view page. This provides an additional layer of security, allowing you to specify, for example, that only "Managers" can view the progress of a request, even if other roles can start it.
Redirect: This option automatically redirects the user to the active task page if they have permission to access it. It streamlines navigation by taking the user directly to their current task upon starting or opening a process instance. (Note: This option does not support delegation or subprocesses.)
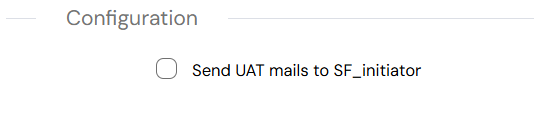
- Send UAT mails to SF_initiator: When enabled, this option ensures that UAT-related email notifications are sent to the process initiator (SF_initiator). This is useful during testing or pre-production phases to verify that the initiator receives all UAT communication, such as approval requests or process status updates
BPMN Components
A process consists of a sequence of components connected by arrows to represent the workflow path. You can build your process by dragging components from the toolbar on the left and dropping them onto the canvas. Once on the canvas, you can arrange them and connect them with sequence flows (arrows) to define the workflow.
Softyflow supports three main types of components: Events / Tasks / Gateways
Events
Events represent something that happens during a process. They can start a process, occur during it, or end it.
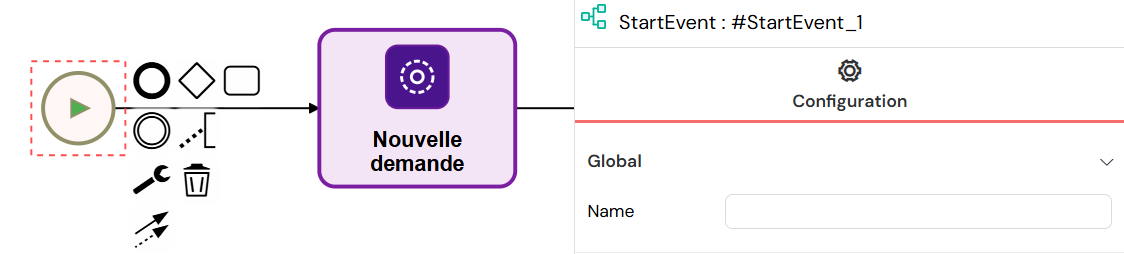
Start Event
Every process must begin with a Start Event. It’s the entry point of your workflow.
- How to use: Drag the circular Start Event icon from the palette to begin your process map.
Intermediate Events
Intermediate Events occur during process execution and are used to handle conditions, throw signals, or redirect the workflow based on specific criteria.
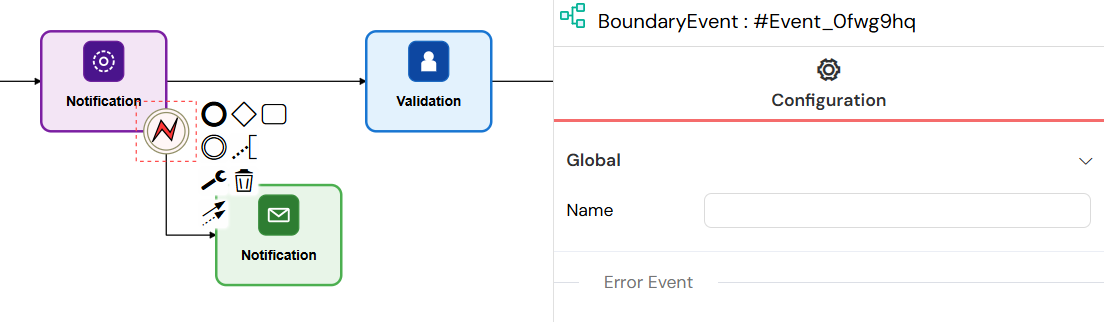
- Occur during the execution of a process (between components)
- Used to handle conditions such as errors or flow redirection
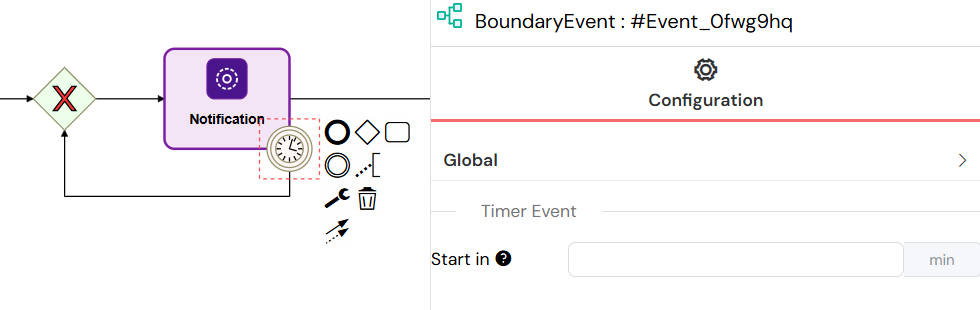
Timer Events
Timer Events trigger actions after a specified delay, allowing you to schedule tasks or create time-based workflow behavior. They support both interrupting and non-interrupting modes.
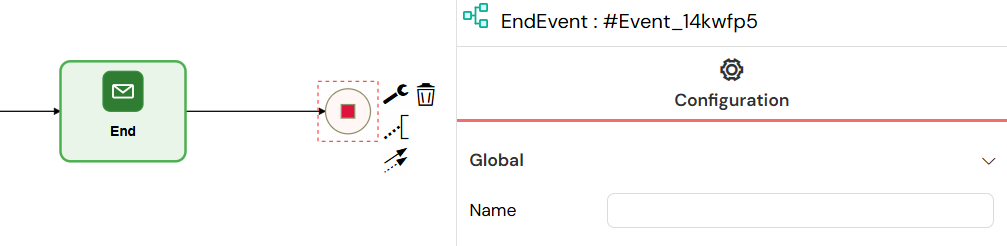
End Event
Every path in your process must lead to an End Event. It marks the completion of the workflow.
- How to use: Drag the bold-lined circular End Event icon to the canvas to conclude a process path.
Tasks
Tasks are units of work performed during a process. They can be automated or require human interaction.
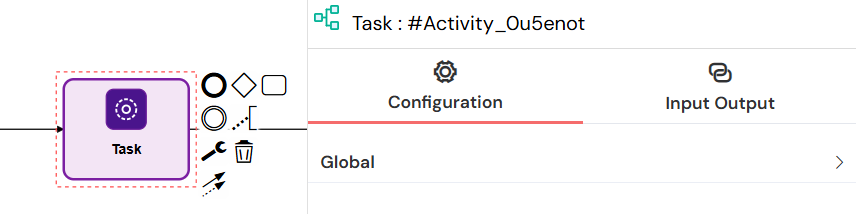
Empty Task (Normal Task)
Element Type: bpmn:Task
An Empty Task (or Normal Task) is a versatile component used for automated steps that don't require human intervention. It is ideal for backend logic, such as running scripts, performing calculations, or integrating with external systems.
- How to use: Drag the Empty Task (a plain rectangle) onto the canvas. Use the Input/Output panel to configure scripts or actions that will execute automatically when the process reaches this step.
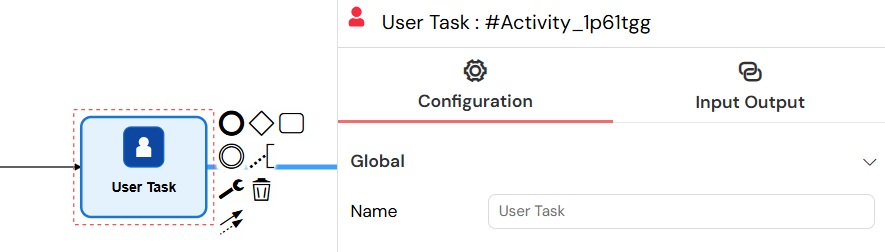
User Task
A User Task is a step that requires a person to perform an action, such as filling out a form or approving a request.
- How to use: Drag the User Task (rectangle with a person icon) onto the canvas. You can then link it to a web form and assign it to specific users or roles.
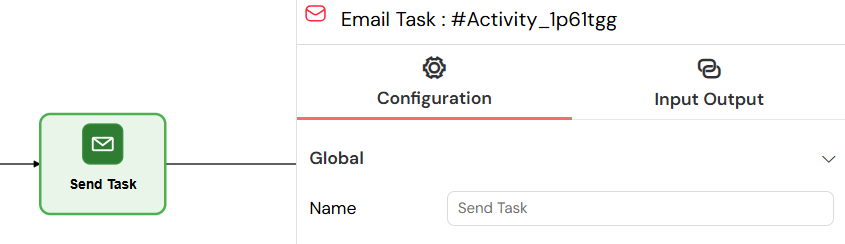
Send Task
A Send Task automatically sends an email. This is useful for notifications and automated communication.
- How to use: Drag the Send Task (rectangle with an envelope icon) and configure the recipients, subject, and email body.
Gateways
Gateways control the flow of the process, allowing you to create branches and parallel paths.
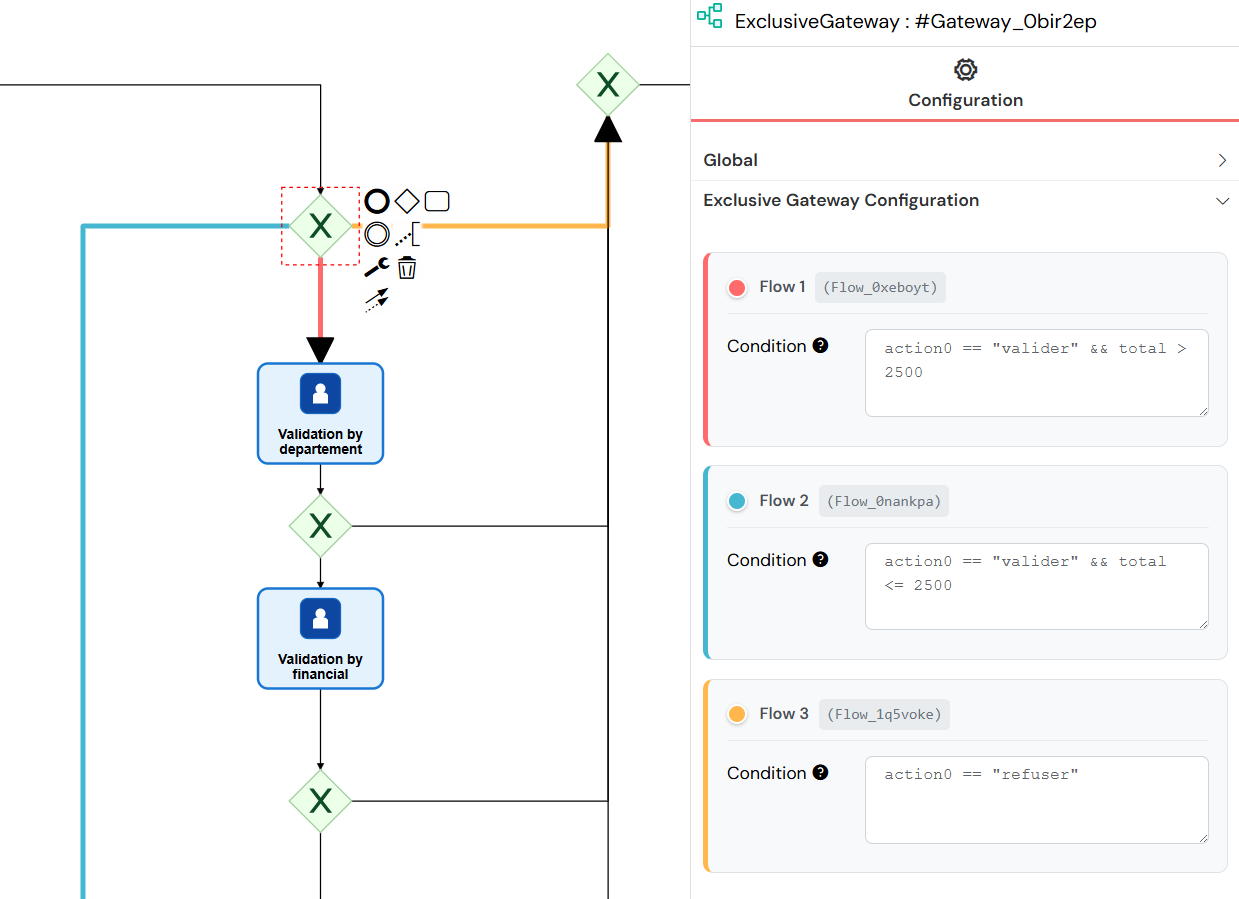
Exclusive Gateway (XOR)
An Exclusive Gateway creates a decision point where only one path can be taken.
- How to use: Drag the diamond-shaped Exclusive Gateway. Connect it to multiple outgoing paths and set conditions on each path. The process will only follow the first path whose condition evaluates to true.
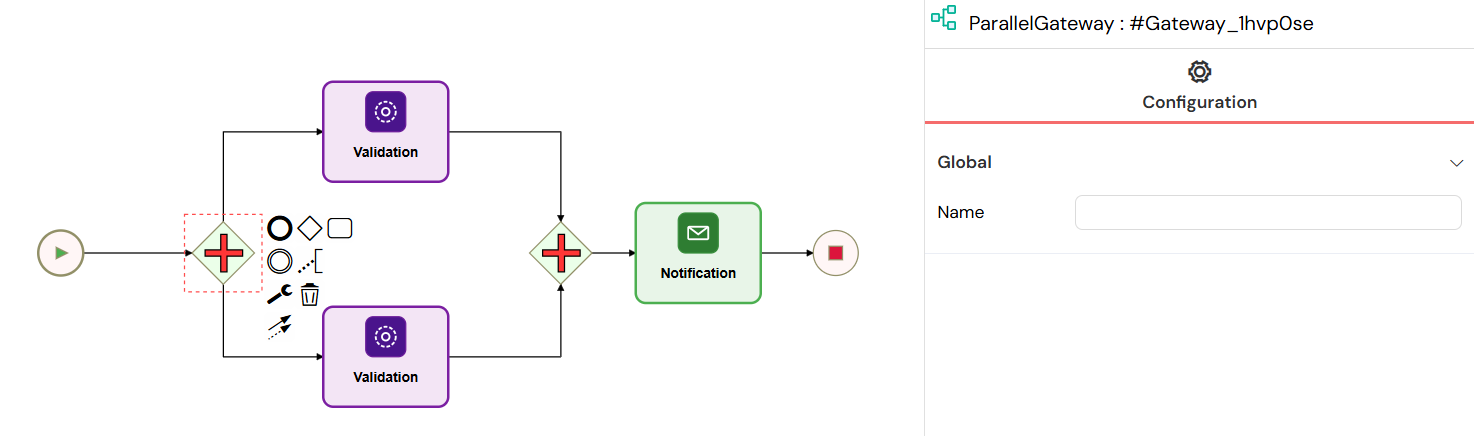
Parallel Gateway
A Parallel Gateway splits the flow into multiple paths that run simultaneously. It can also be used to merge them back together.
- How to use: Drag the diamond-shaped Parallel Gateway with a plus sign inside. All outgoing paths will be activated at the same time.
Input/Output Variables
Tasks can process data before and after execution using Input/Output variables. These support:
- Scripts: JavaScript with full SDK access
- Expressions: Simple value assignments
- Actions: Visual workflow builder
For comprehensive documentation on data transformation, see Input/Output Parameters.