Build
Build your application project
After building your project, it's time to build your application step by step, and there are two ways to build your wishes, manually or using the wizard.
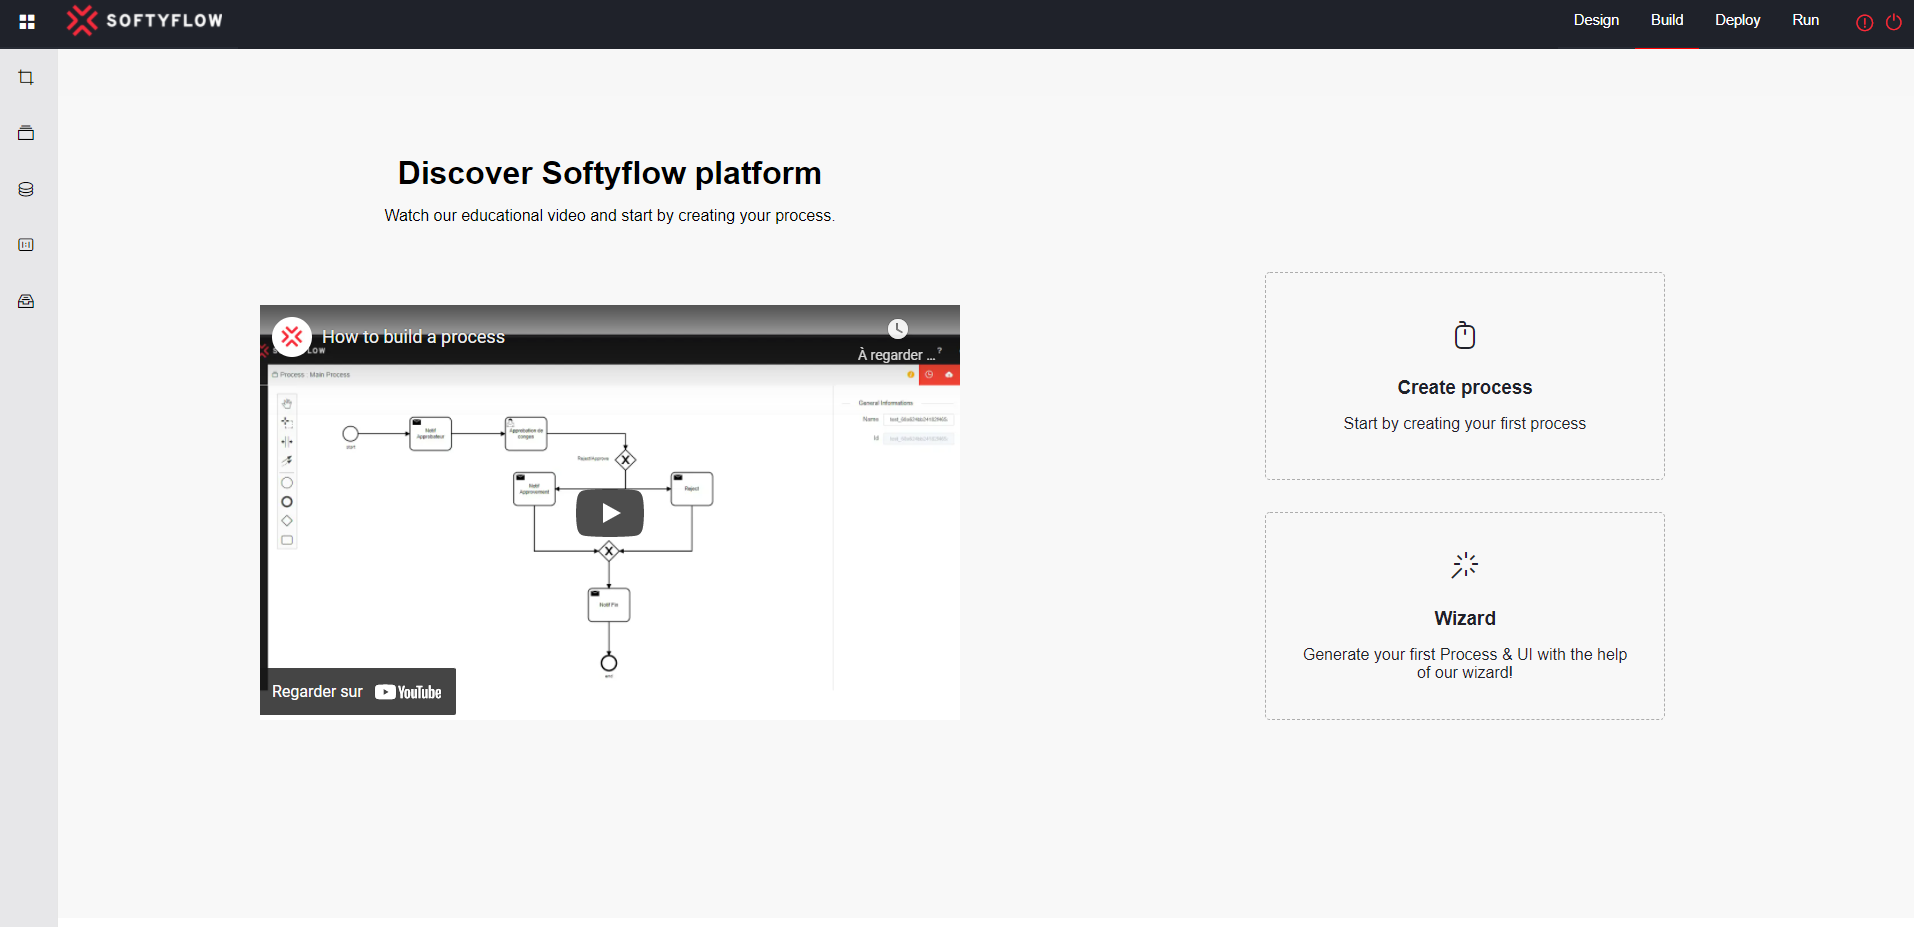
1. Wizard
SoftyFlow has an embedded wizard that lets you easily create applications.
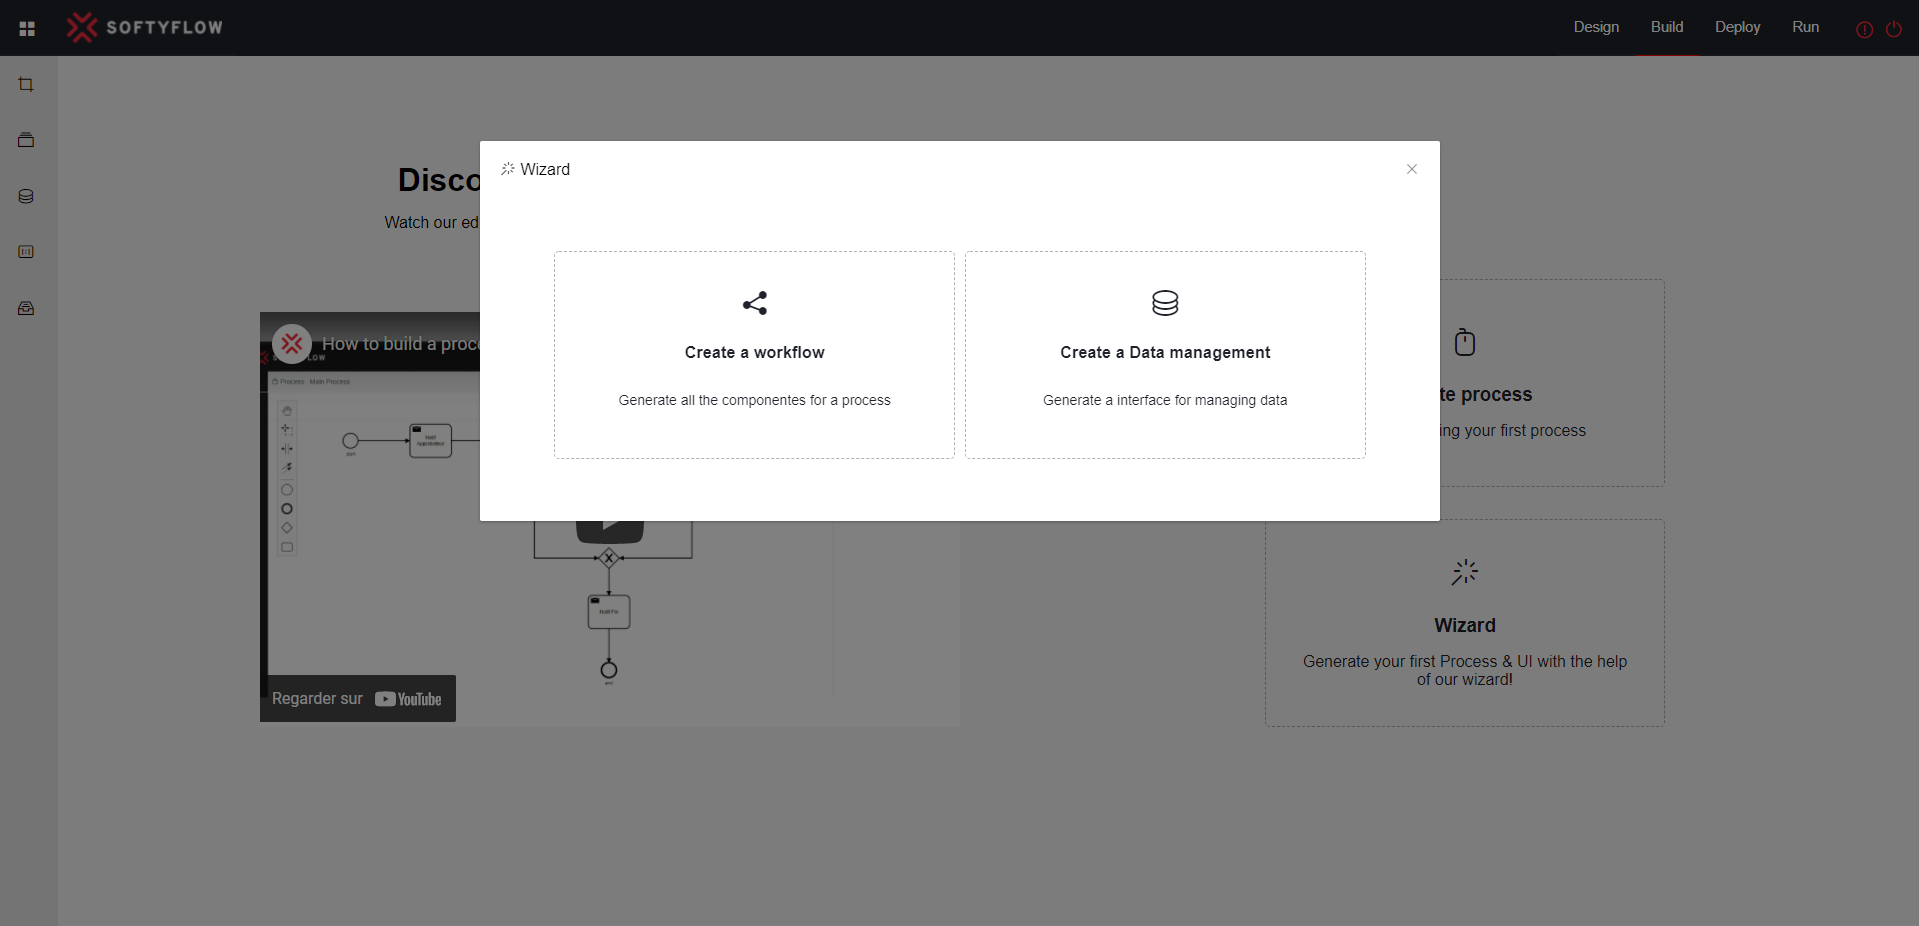
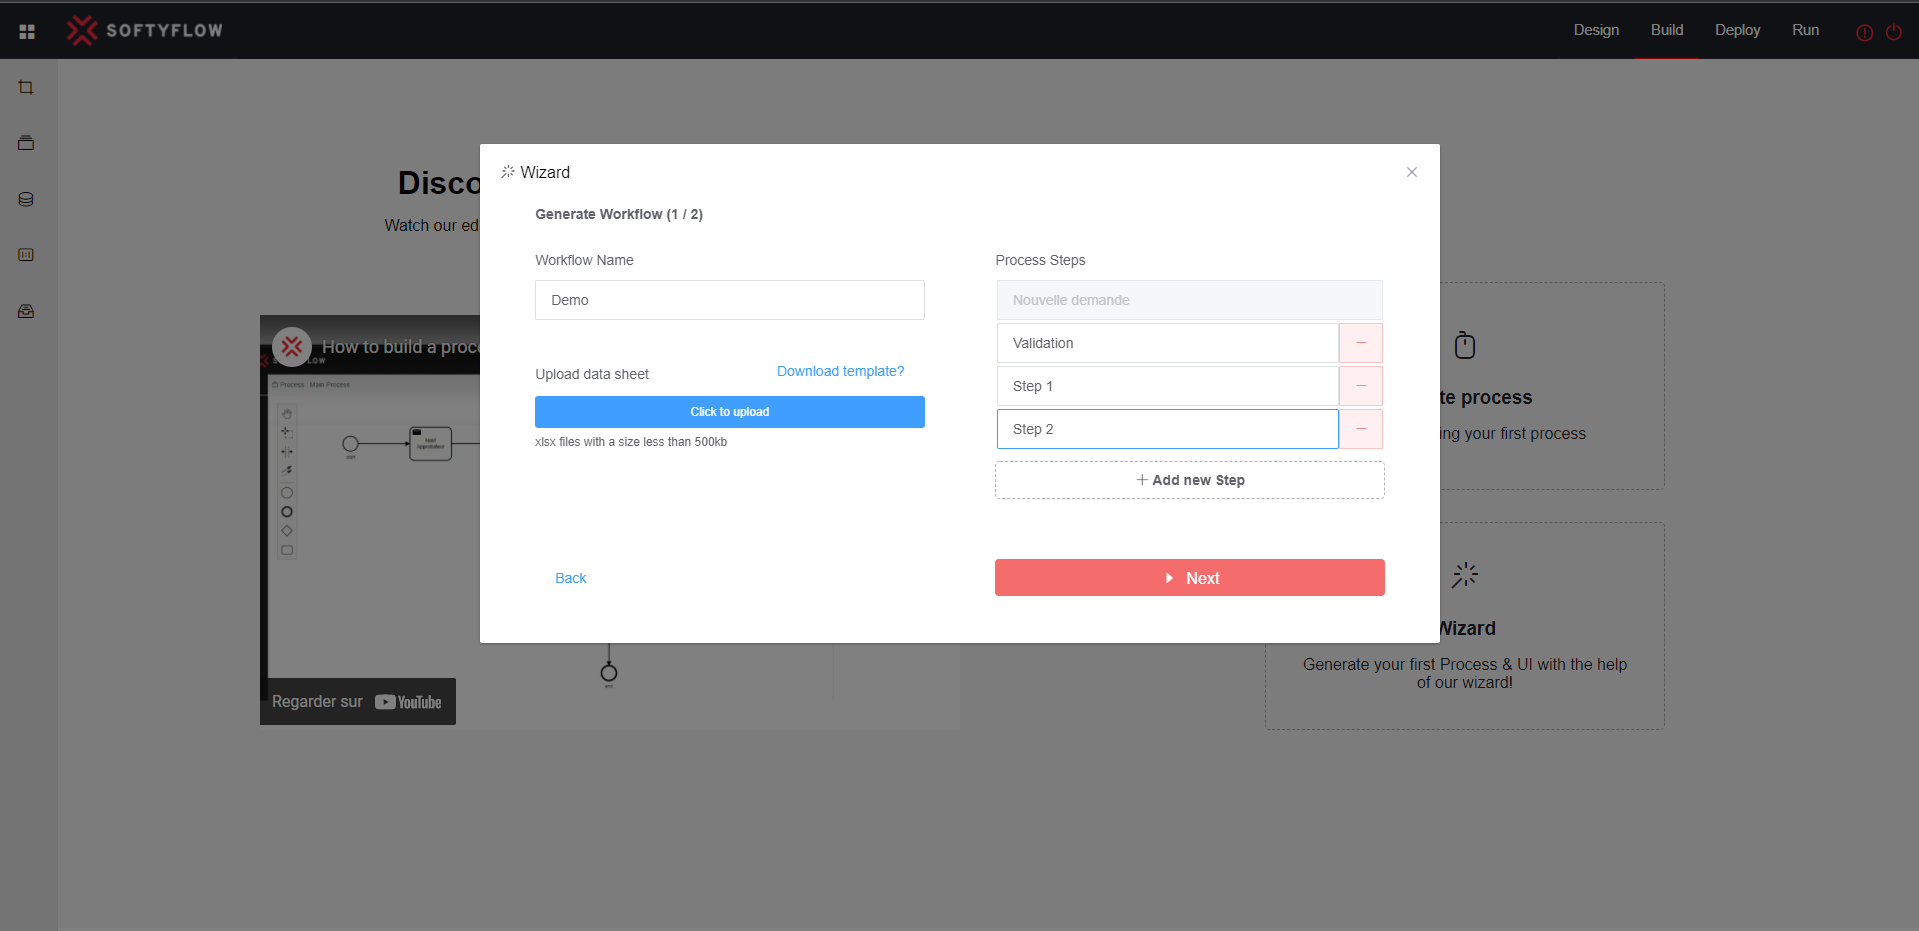
1.1 Create a workflow
Create your application easily by adding app steps or you can customize it.
 | ||
|---|---|---|
 |  |  |
Customize your application using wizard
First, you need to download the Excel file by clicking on Download template. Open it to edit it by adding process steps and customize your screens by adding widgets and their rules management (Visible, Required or Editable).
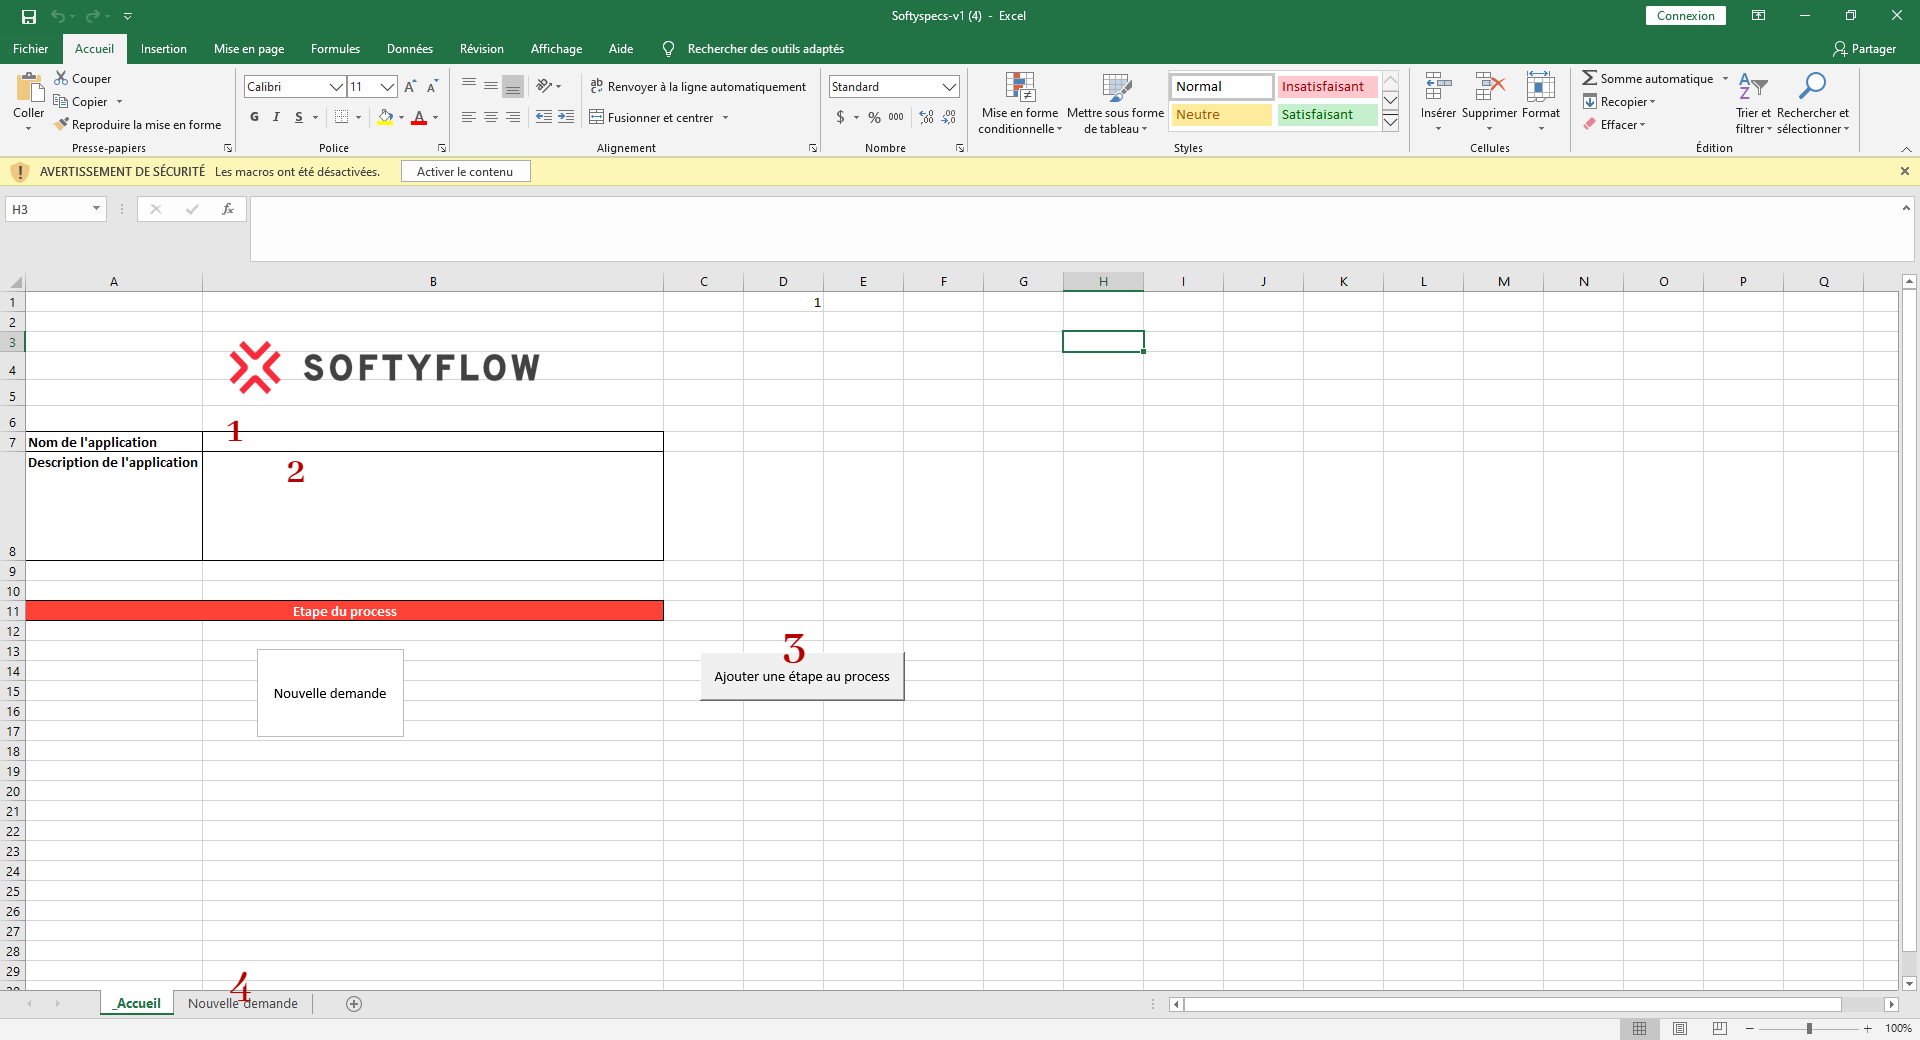
- 1: Give you the option to add title to your application.
- 2: Give you the option to add a description to your application.
- 3: Give you the option to add step to your process.
- 4: Give you access to configure your screen.
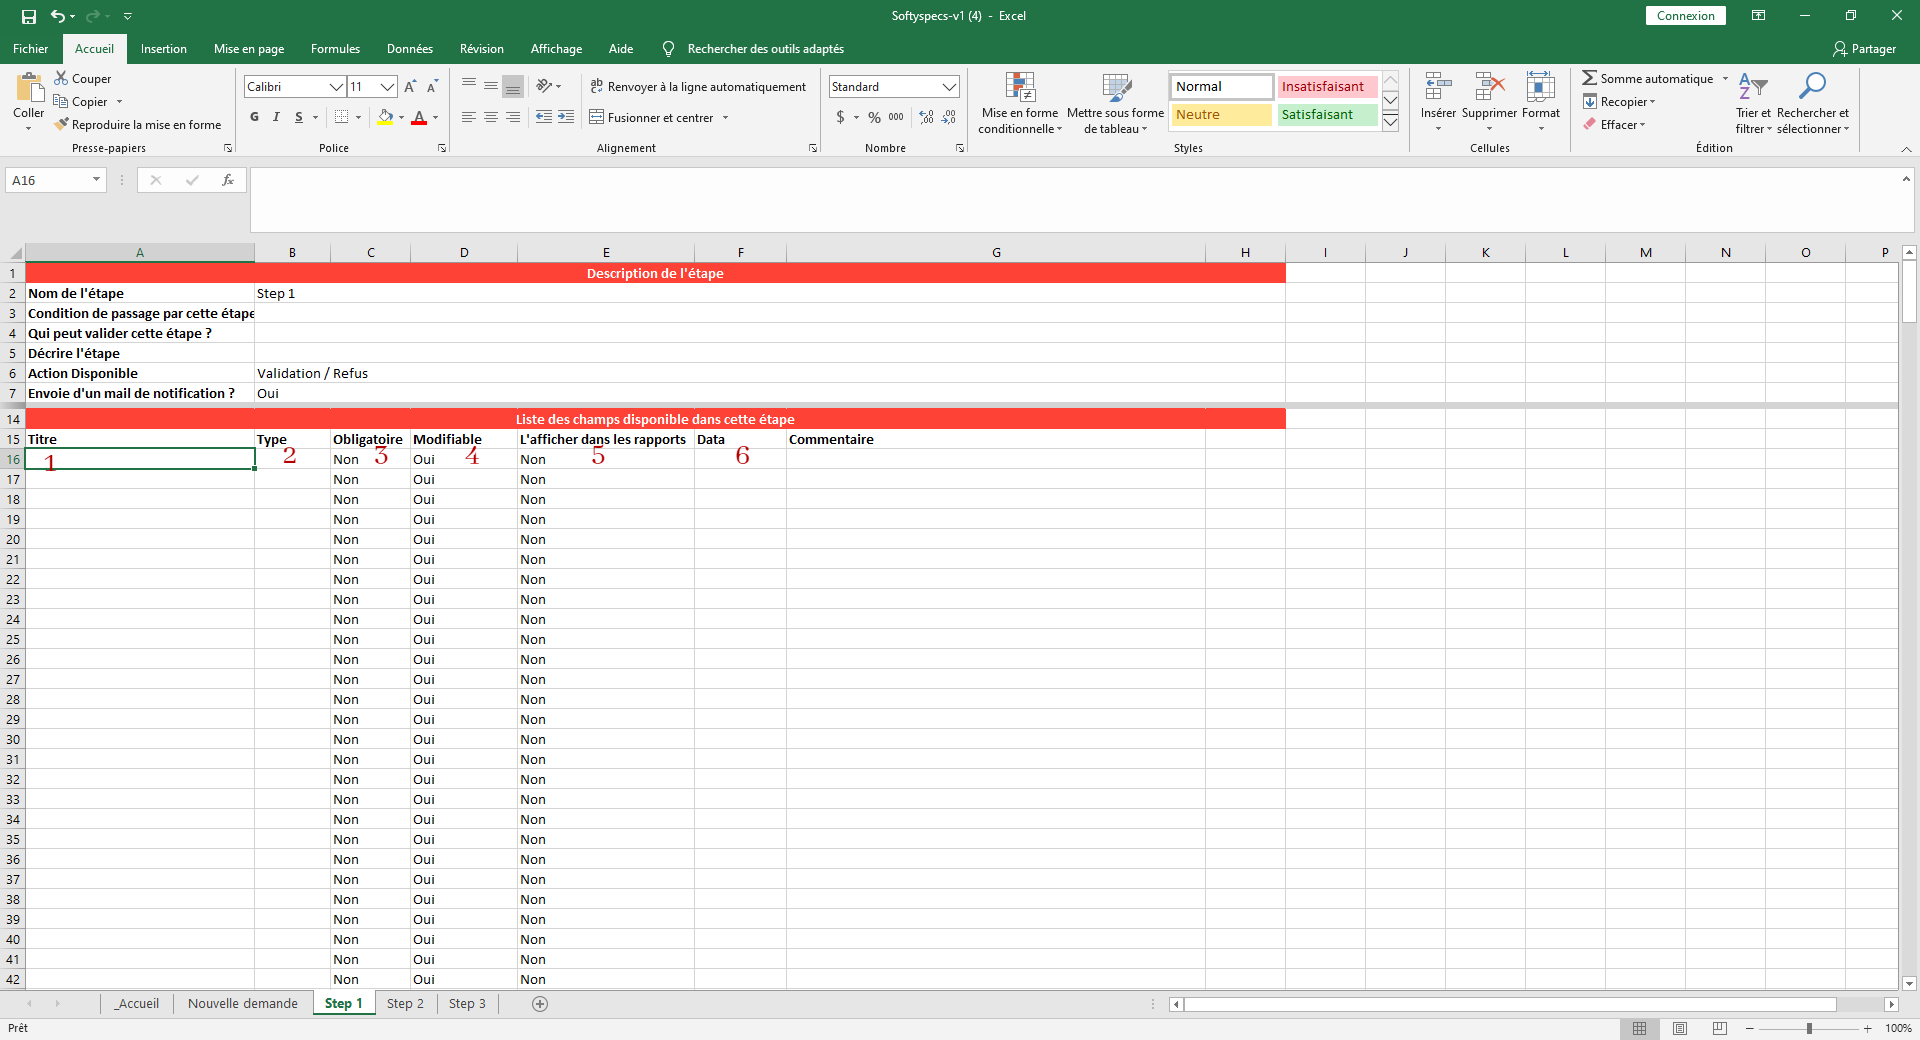
- 1: Add title to your widget.
- 2: Choose your widget type form dropdown box (input, number, checkbox...).
- 3: Set the value to yes if your widget is required.
- 4: Choose if your widget will be editable.
- 5: Set the value to yes if this will be added to your reports.
- 6: If the type is (Drop-down list, Checkbox, Radiobutton) you may add data that will be displayed in your widget.
After saving the Excel file, upload it and continue the steps to create your application using wizard mentioned above.
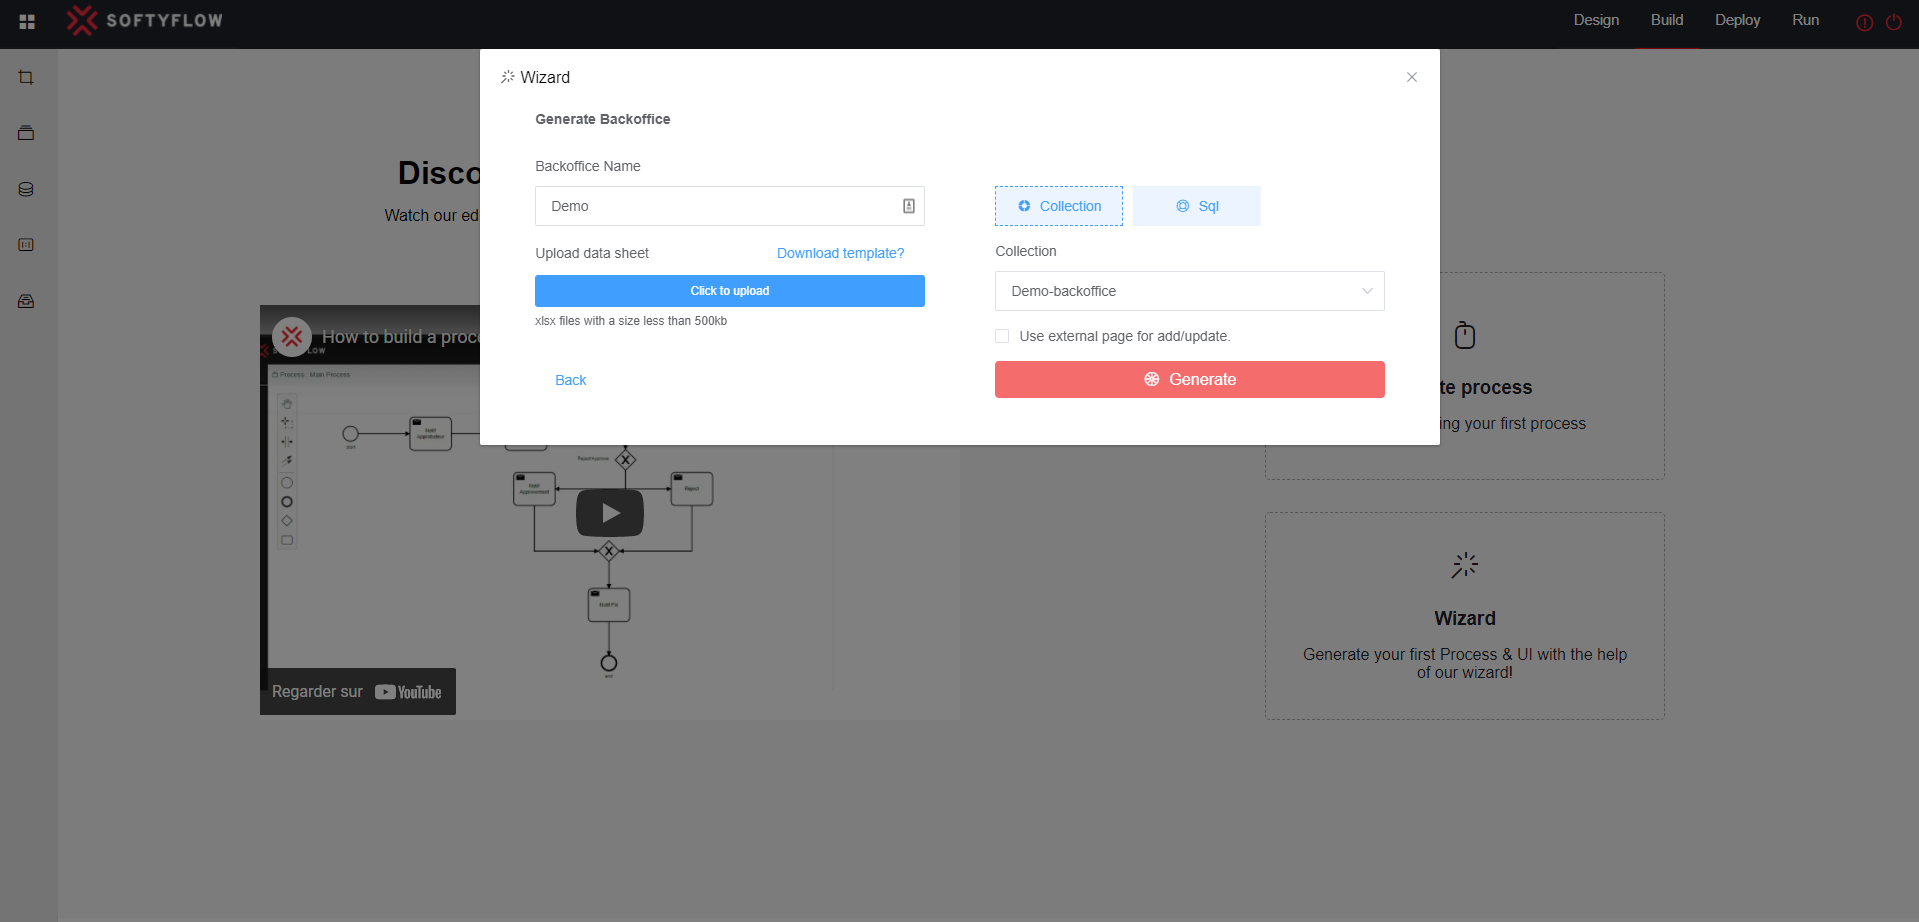
1.2 Create a data management
Easily create your backoffice with the help of the wizard, after creating the BD where we will store the data comes from that backoffice. There it two type of BD you can use, the collection DB or an external SQL DB.
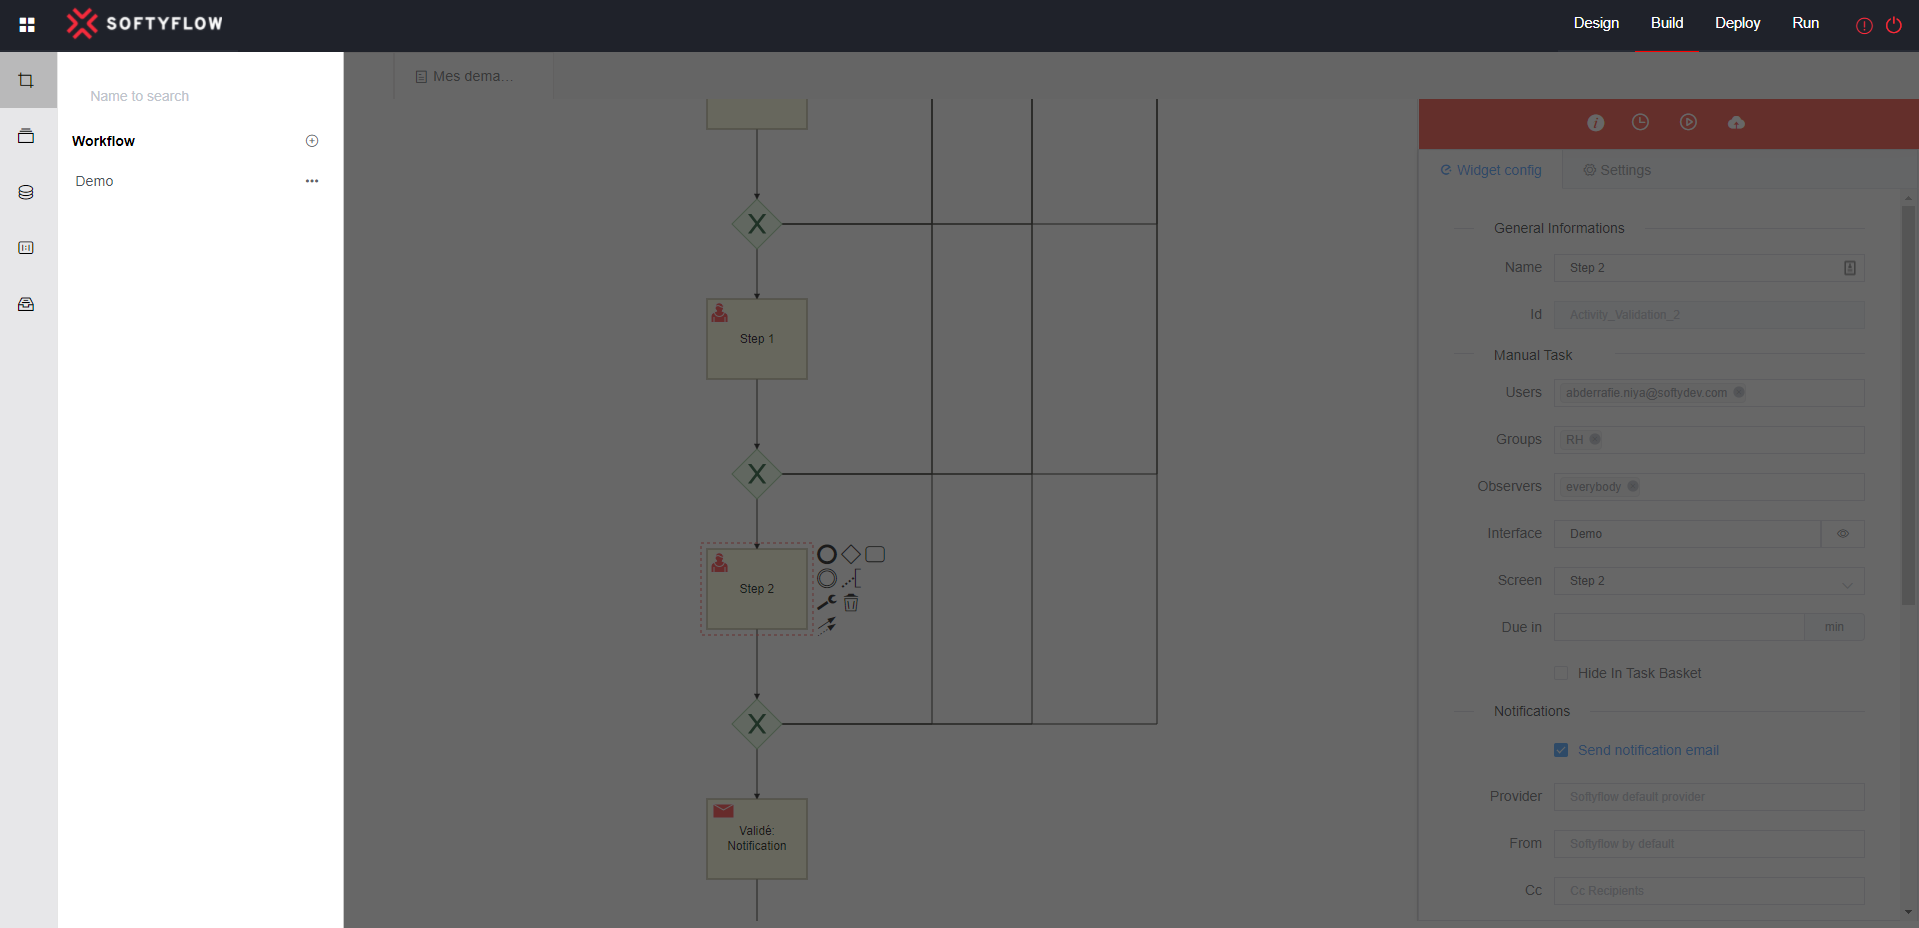
2. Manual Build
2.1 Create your first user form
Create a new user form with the following name : demo-user-form
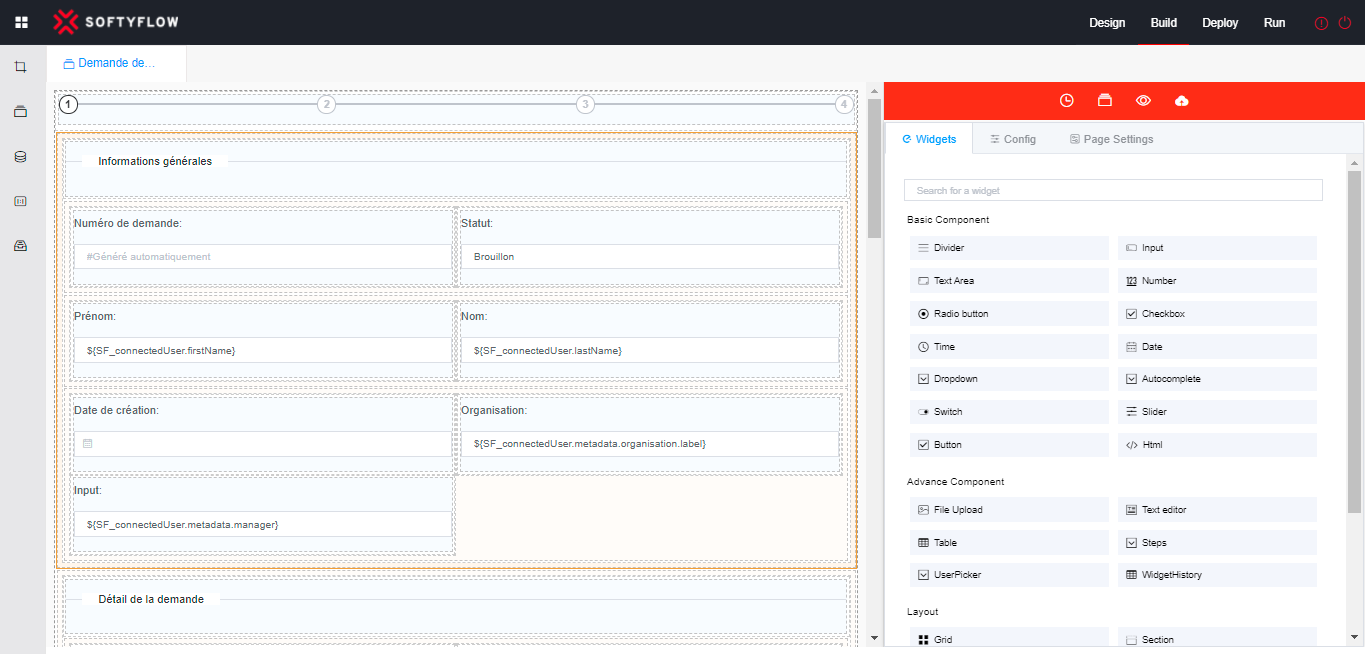
2.2 Build & Save your form
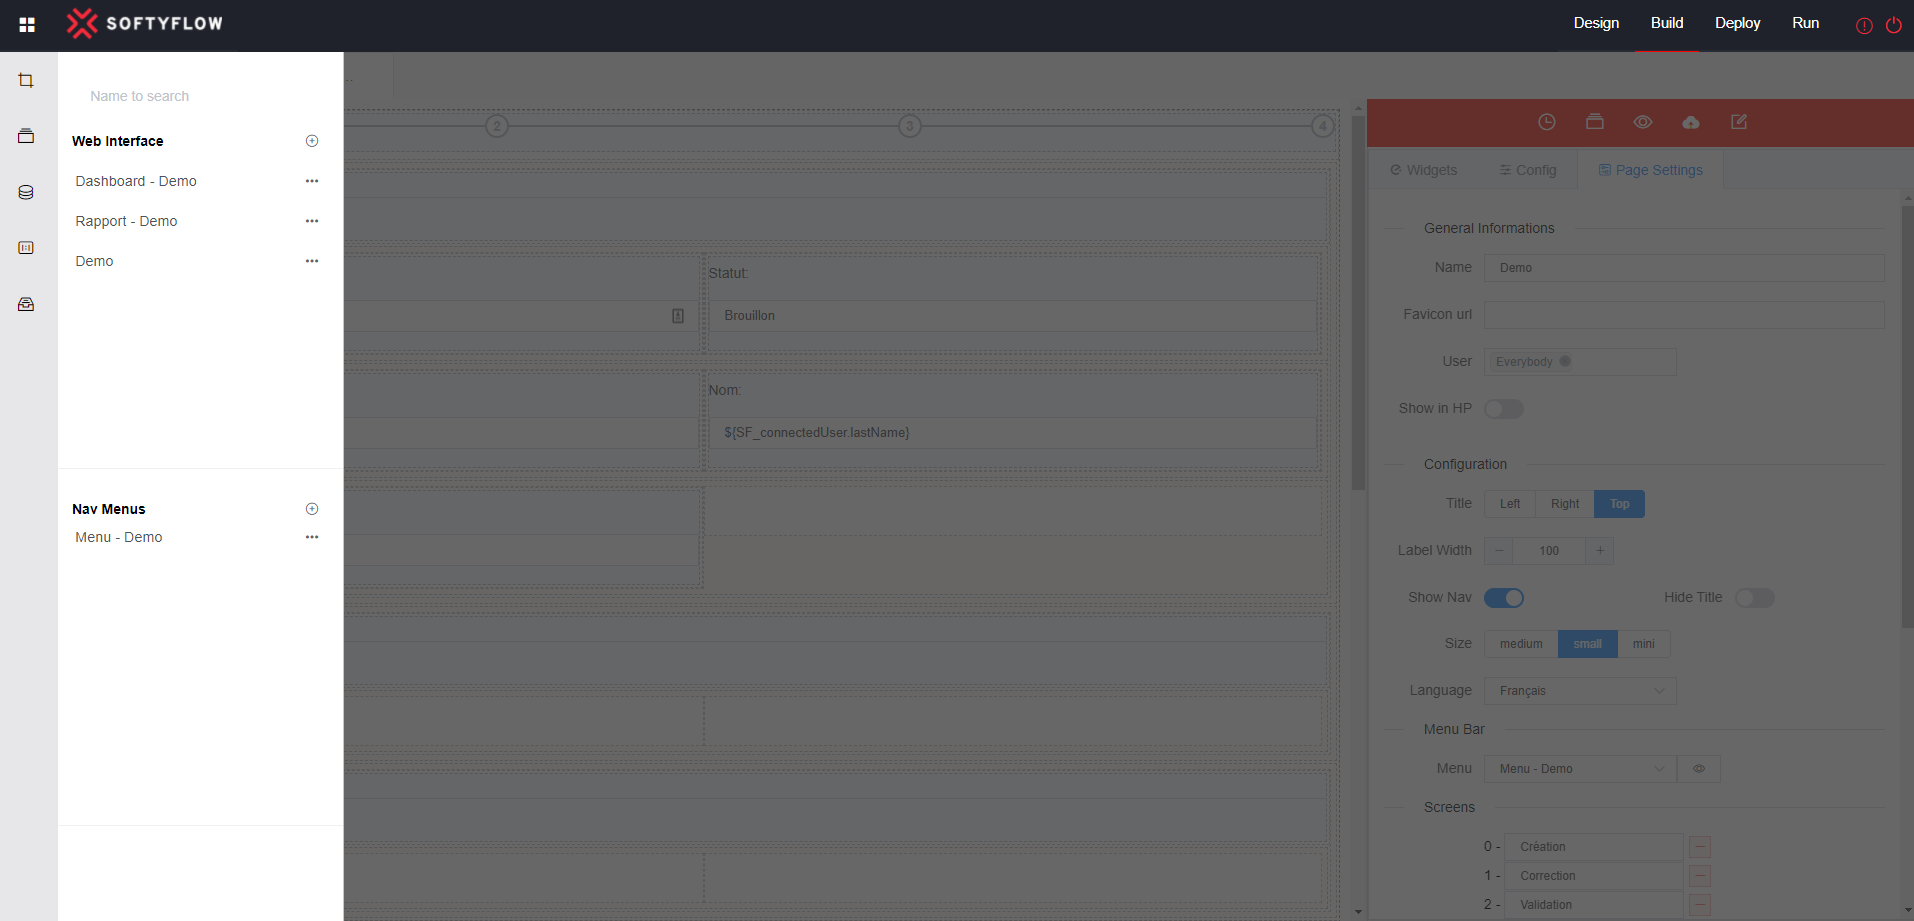
Drag and drop the desired components from the right sidebar and organize your form as expected by following the settings defined in Web Modeler.
2.3 Customize your application using custom code with Softyflow editors
You may attach actions to your user interface components with low code. By following the settings defined in Web Modeler.
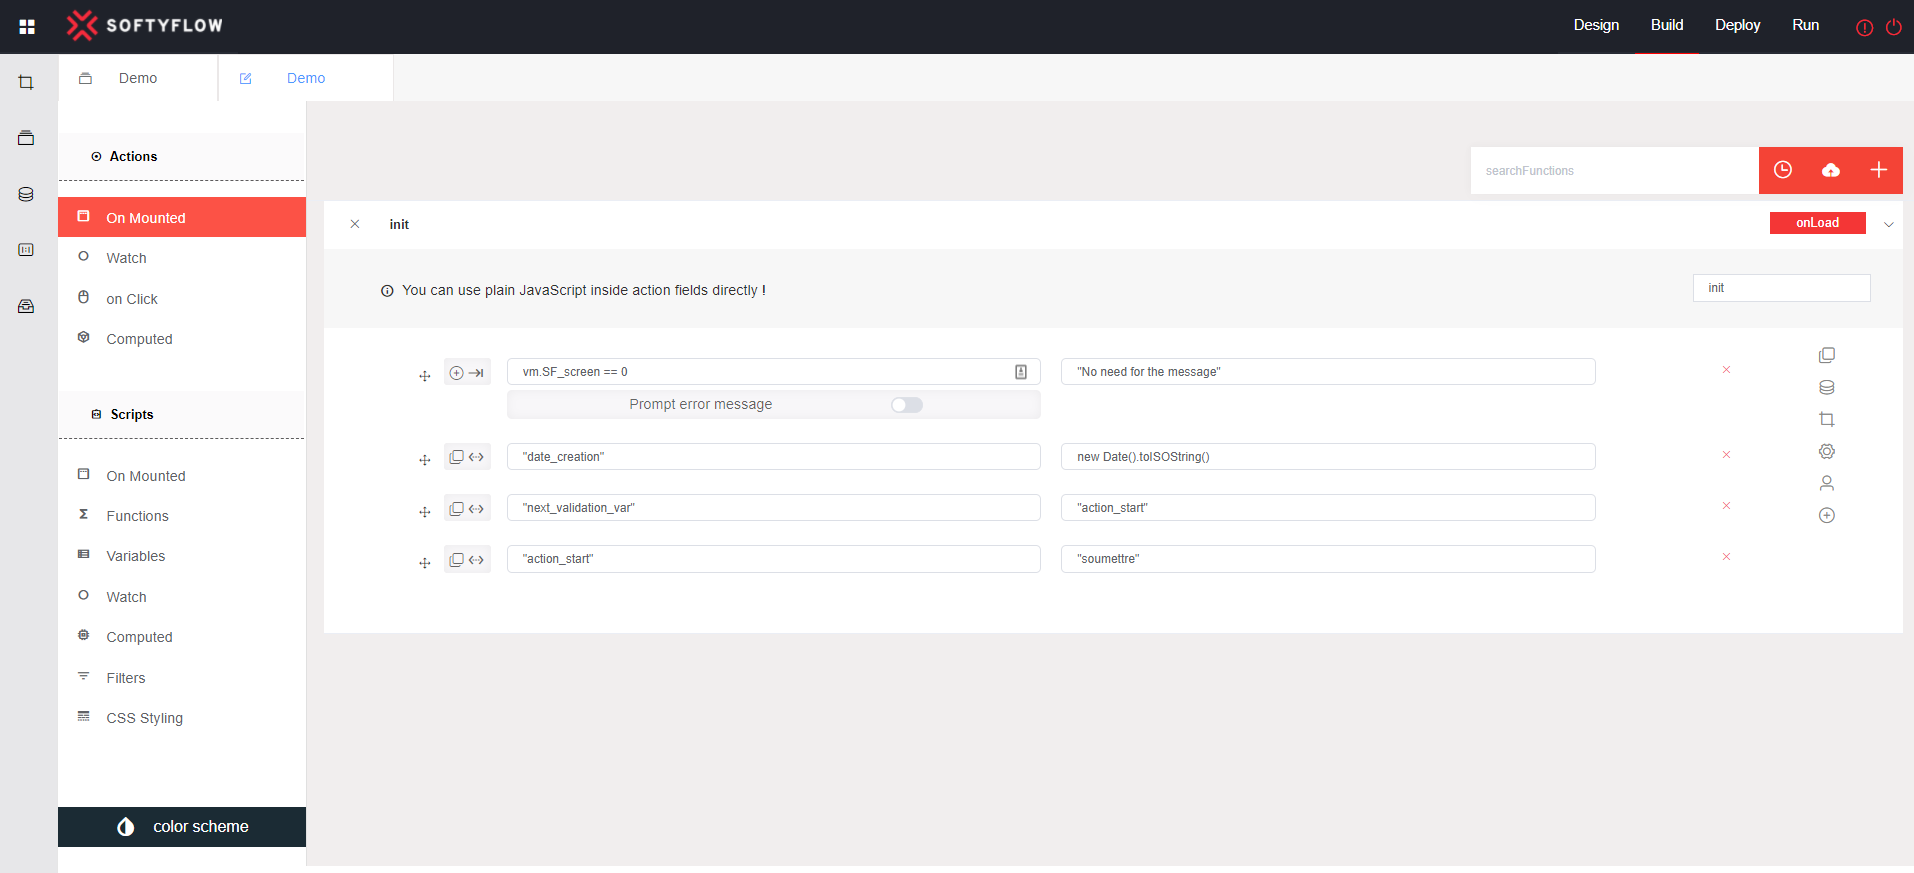 Or even you can define your functions in the scripts that will be used as an action.
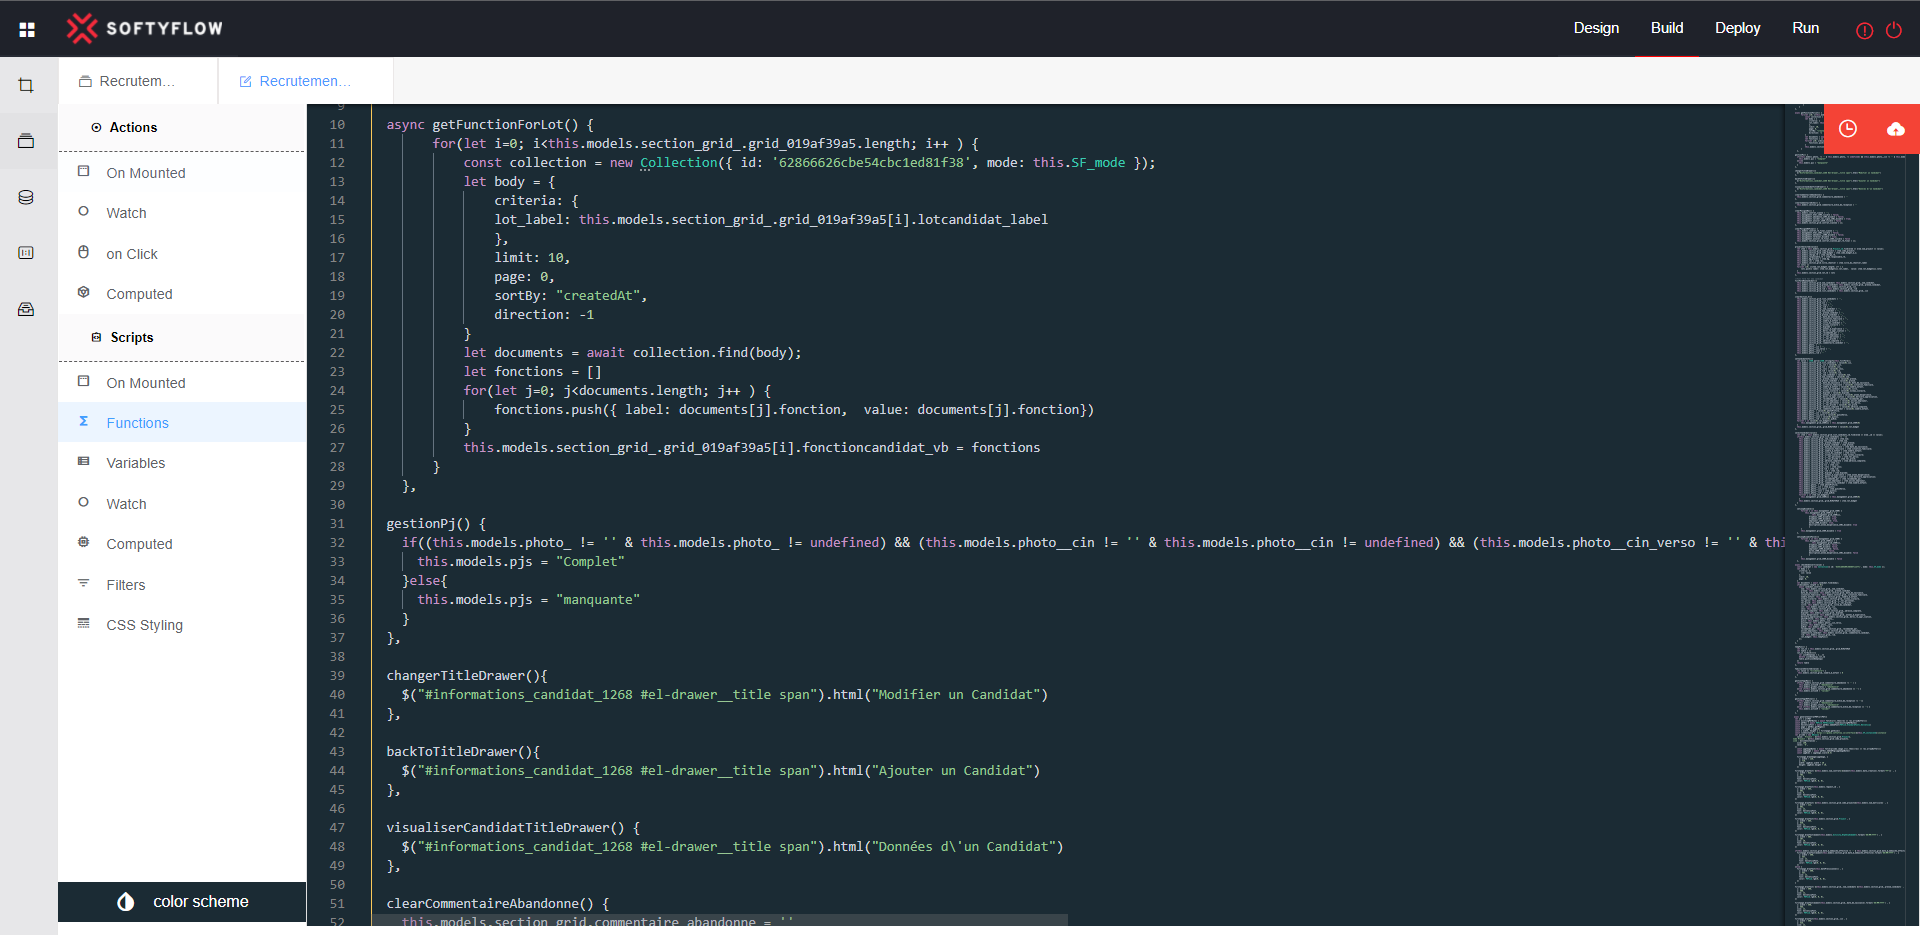
2.4 Preview your form
Click on the eye icon on the top right panel to preview your form in TEST mode.
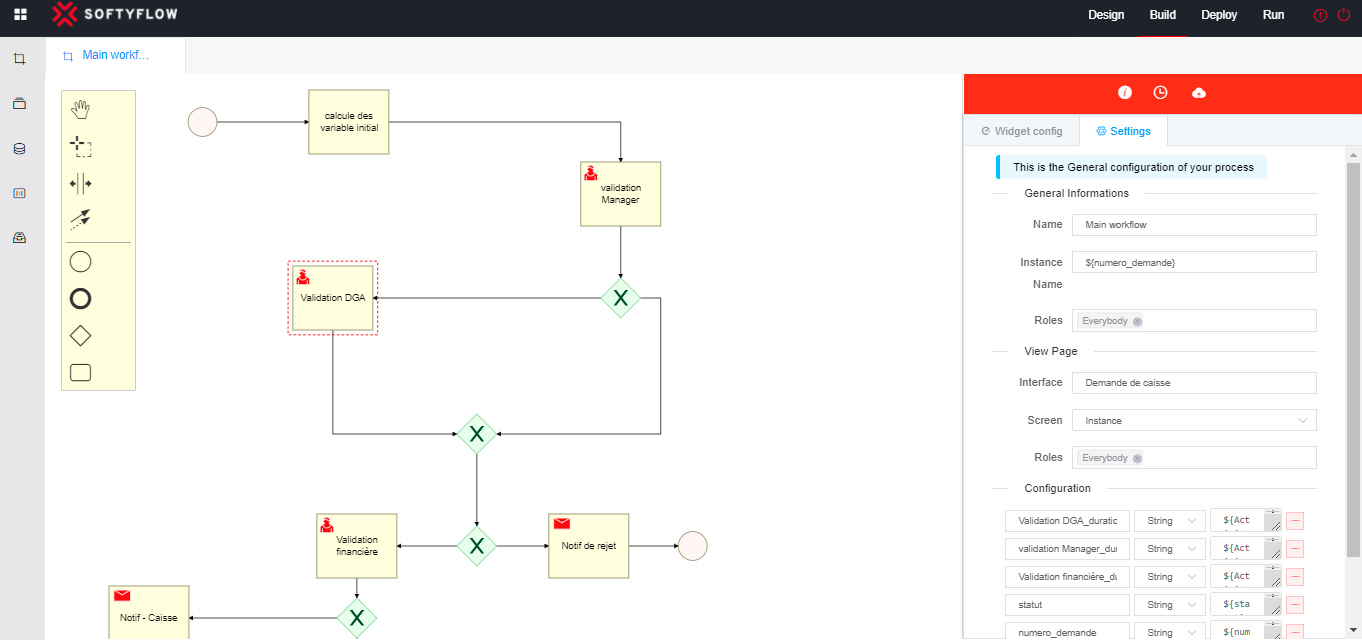
2.5 Build & Save your process
Drag and drop the desired components from the tools box to create your workflow. by following the settings defined in Process Modeler.
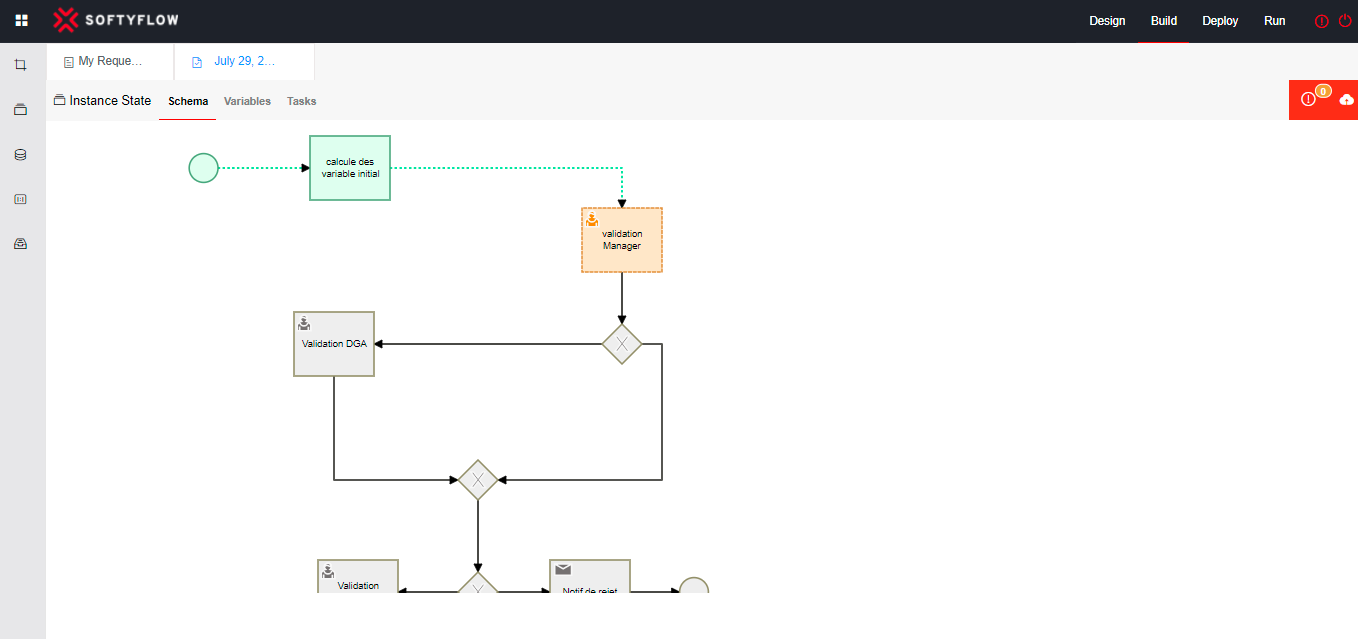
 Run a test from your application by triggering the workflow
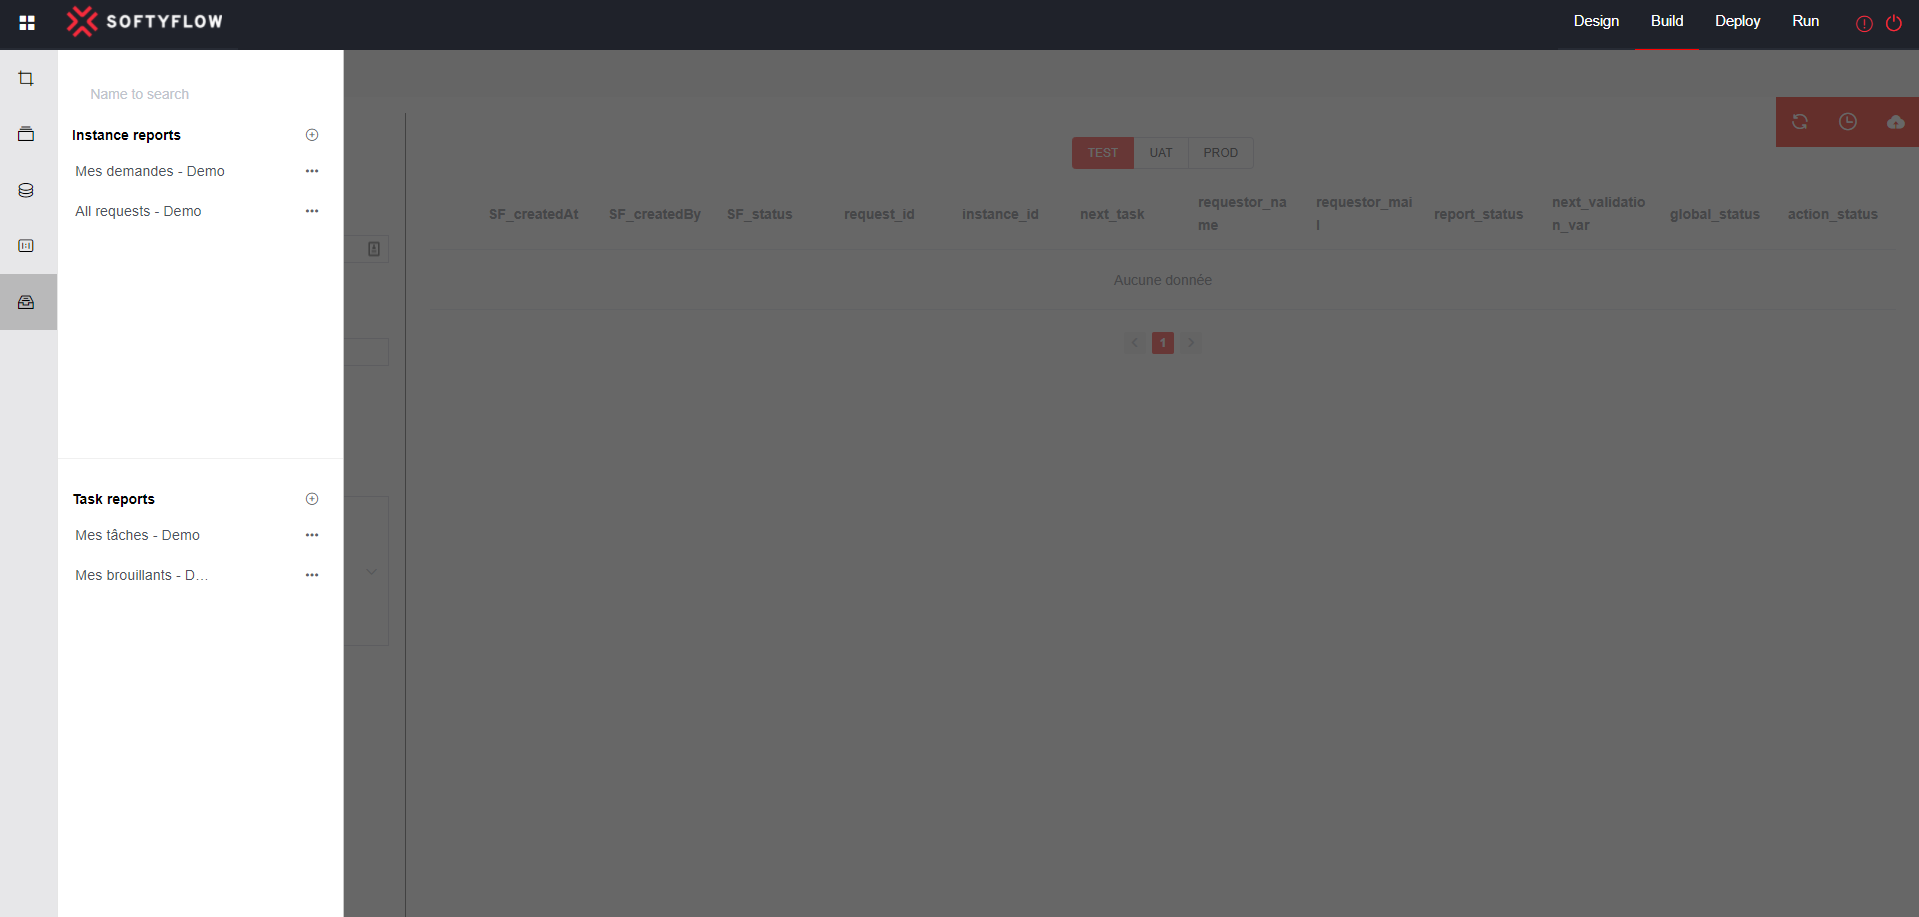
Check the workflow instance in real time
2.6 Deploy your application
After testing your application, the application can be used in the UAT or PROD mode by deploying it see next chapter.