User Management
Users Management Description
Softyflow provides administrators with a robust set of functionalities that empower them to effortlessly manage user entities. With Softyflow, administrators can seamlessly create, update, and delete user profiles, while enjoying the added flexibility of attaching custom metadata to each user. Furthermore, Softyflow offers administrators the convenience of effortlessly associating users with existing groups within the system.
Create a User
When creating a new user using Softyflow, the administrator is required to provide specific information to ensure accurate user setup. The following details need to be specified:
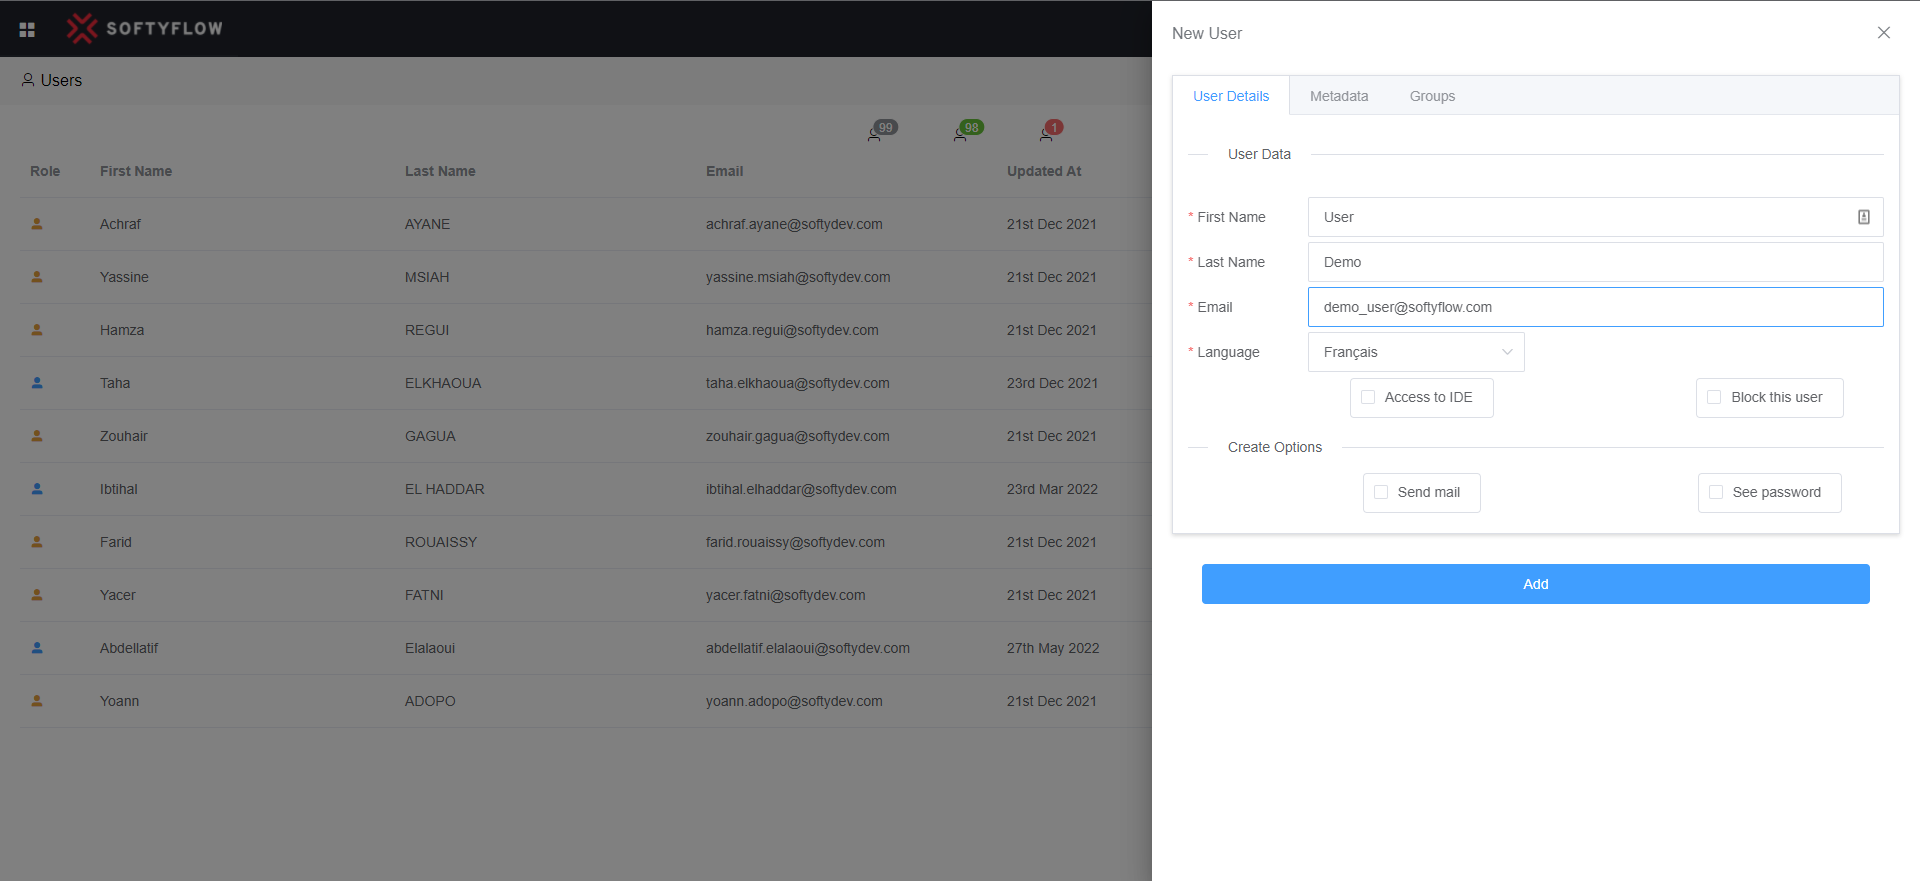
- Email: The email address of the new user must be provided. This serves as the unique identifier for the user within the system.
- First Name: The administrator should enter the first name of the user, allowing for personalized identification and communication.
- Last Name: The last name of the user should be specified to ensure proper identification and differentiation between users.
- Default Language: Softyflow allows for the selection of a default language for the user. This language preference will determine the language used throughout the platform for the respective user.
- Access to IDE: By enabling this option, the created user gains access to Softyflow's Integrated Development Environment (IDE). This empowers the user to create, develop, and deploy applications seamlessly within the platform.
- Block User: The administrator has the option to activate this feature, which blocks the user from accessing the platform or making any changes. This can be useful in scenarios where temporary restrictions or administrative actions are required.
- Send Mail: Enabling this option triggers the system to send a welcome email to the user. This email contains important information such as the platform password and login link, ensuring a smooth onboarding experience for the new user.
- See Password: This feature allows the administrator to view the user's password. By enabling this option, administrators can access the user's password for specific administrative purposes, providing increased flexibility and control.
View & Search for Users
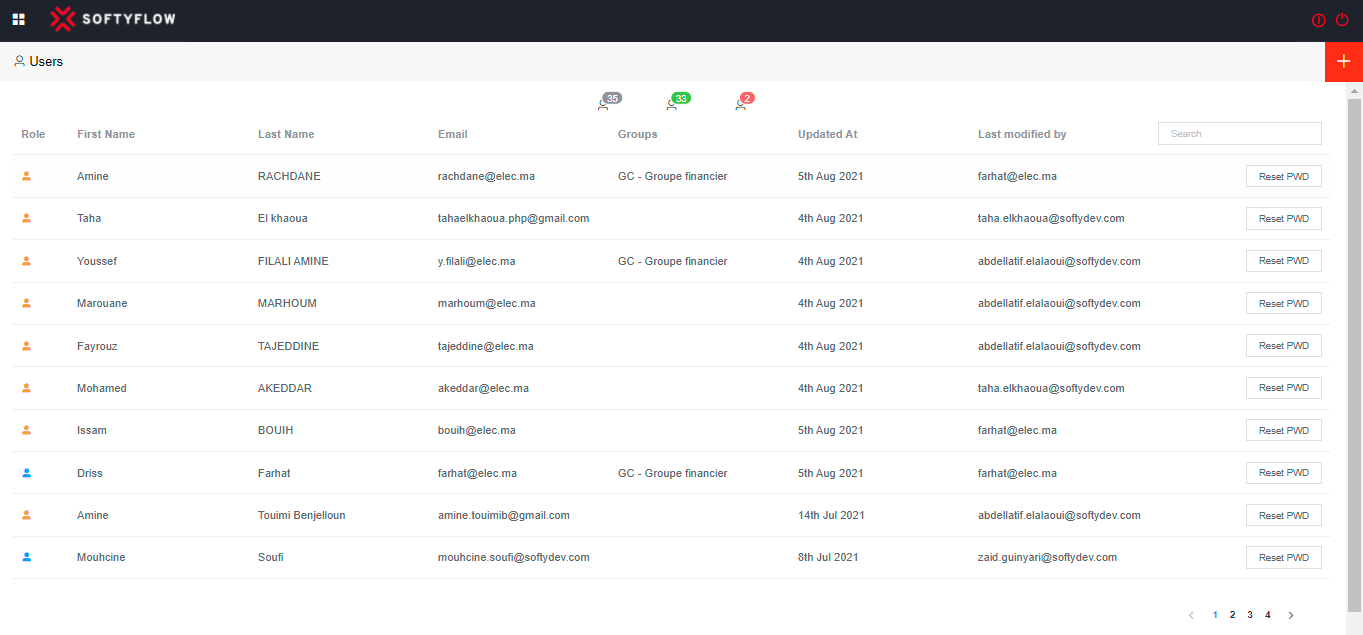
Softyflow offers a comprehensive user listing and auditing feature, empowering administrators with efficient user management capabilities. By accessing the user management interface within the Integrated Development Environment (IDE), administrators can easily navigate to the designated location for user management.
To access the user management interface in Softyflow, simply navigate to the path /ide/users within the IDE. This intuitive interface provides administrators with a centralized hub to oversee and manage user entities effectively.
Once within the user management interface, administrators can take advantage of the powerful search functionality. By utilizing the search button, administrators can conveniently filter the user list based on specific criteria across any column. This allows for quick and targeted searches, enabling administrators to locate and review user profiles with ease.
Update a User
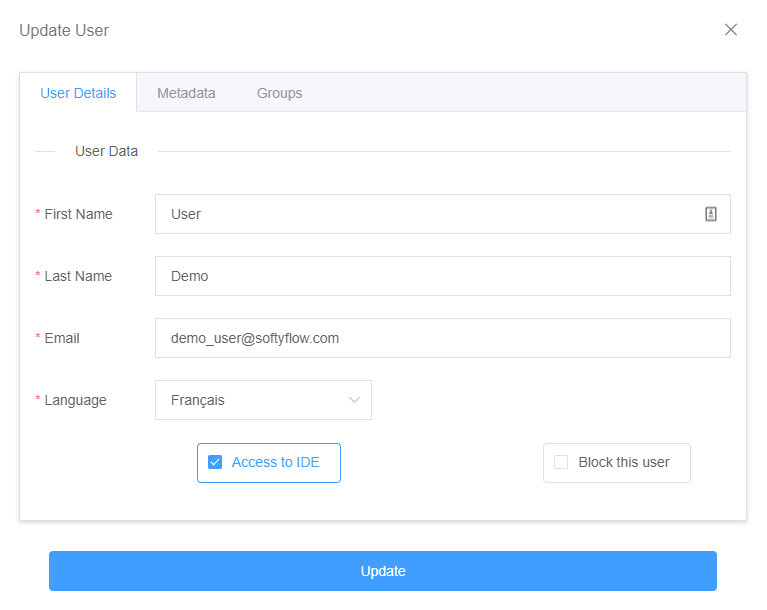
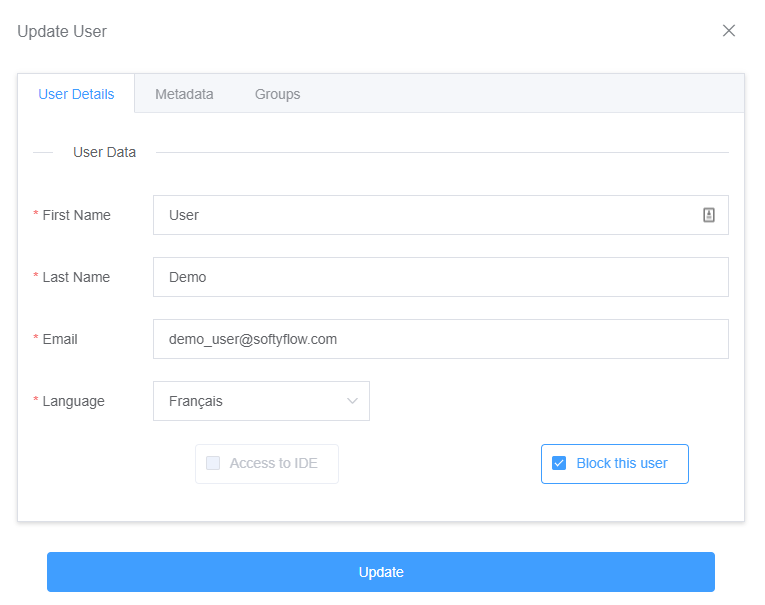
Updating a user in SoftyFlow is a straightforward process that allows administrators to modify various aspects of the user's profile. To update a user, follow these steps:
Locate the user you wish to update in the user management interface. This can be done by navigating to the relevant section, such as /ide/users.
Click on the user's profile to open the slider associated with their account. This slider provides a comprehensive view of the user's information and settings.
Within the user slider, you will find different sections for updating specific aspects of the user's profile:
a. General Information: This section allows you to update the user's general details such as their email, first name, last name, and default language. Make the necessary changes in the corresponding fields to update the user's general information.
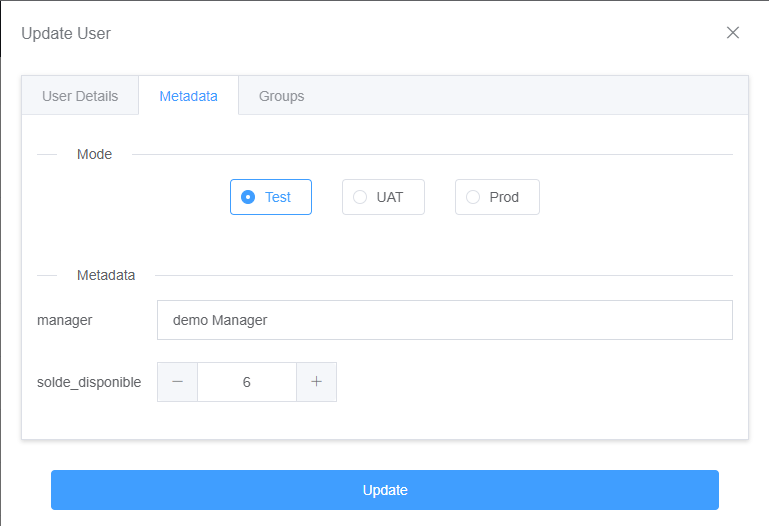
b. Metadata: The metadata section enables administrators to attach additional custom information to the user's profile. Here, you can add or modify metadata relevant to the user, such as job titles, department affiliations, or any other pertinent details specific to your organization. Update the metadata as needed. Configure your metadata in accordance with each development mode (TEST, UAT, PROD).
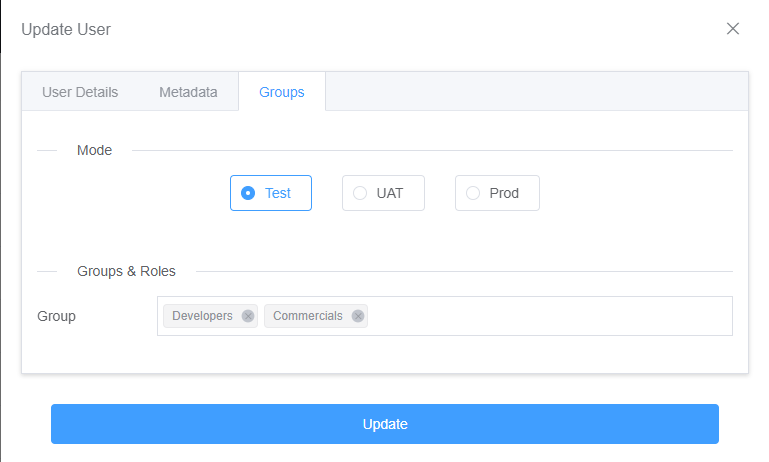
- c. Roles and Groups: SoftyFlow provides administrators with the ability to assign roles and associate users with specific groups. In this section, you can manage the user's roles and group memberships. Add or remove roles and groups according to the user's permissions and requirements. Configure your Roles in accordance with each development mode (TEST, UAT, PROD).
- d. Delegations: The delegation section allows administrators to assign certain user permissions or actions to other users. This can be useful for delegating tasks or granting temporary access to specific functionalities. Update the delegation settings based on your organizational needs.
After making the desired updates, ensure that you save the changes. Depending on the interface, this may involve clicking a "Update" button to confirm and apply the modifications to the user's profile.
Delete a User
SoftyFlow provides a straightforward process for deleting a user. Follow these steps to successfully delete a user account:
NB: Before finalizing the deletion, it is advisable to create a delegation to assign any pending tasks or responsibilities of the user to another user within the system. This step ensures that important tasks or workflows are not disrupted due to the user's deletion. Assign the necessary tasks or responsibilities to the designated user.
Locate the user you wish to delete within the user management interface. You can navigate to the relevant section, such as /ide/users, to find the user.
Before proceeding with deletion, you need to block the user to restrict their access and prevent any unauthorized actions. Locate the user's profile and activate the "Block User" option. By enabling this feature, you ensure that the user is unable to log in or make any changes while the deletion process is underway.
- After blocking the user, proceed with the deletion. Depending on the SoftyFlow interface, you may find a "Delete User" button or a similar option within the user's profile. Click on this option to initiate the deletion process.

- Confirm the deletion. SoftyFlow may prompt you to confirm the deletion action to ensure that the deletion is intentional. Confirm the deletion to permanently remove the user account from the system.
By following these steps, administrators can effectively delete a user account in SoftyFlow. Blocking the user prior to deletion and creating a delegation help maintain workflow continuity and ensure a smooth transition of tasks to another user. This approach allows administrators to efficiently manage user accounts and maintain the integrity of the system.