Generate PDF
Generate PDF Description
The Generate PDF Model allows users to create dynamic pdfs, containing variables, and dynamic tables. That can be generated in the process modeler or in the web modeler.
Create PDF Template

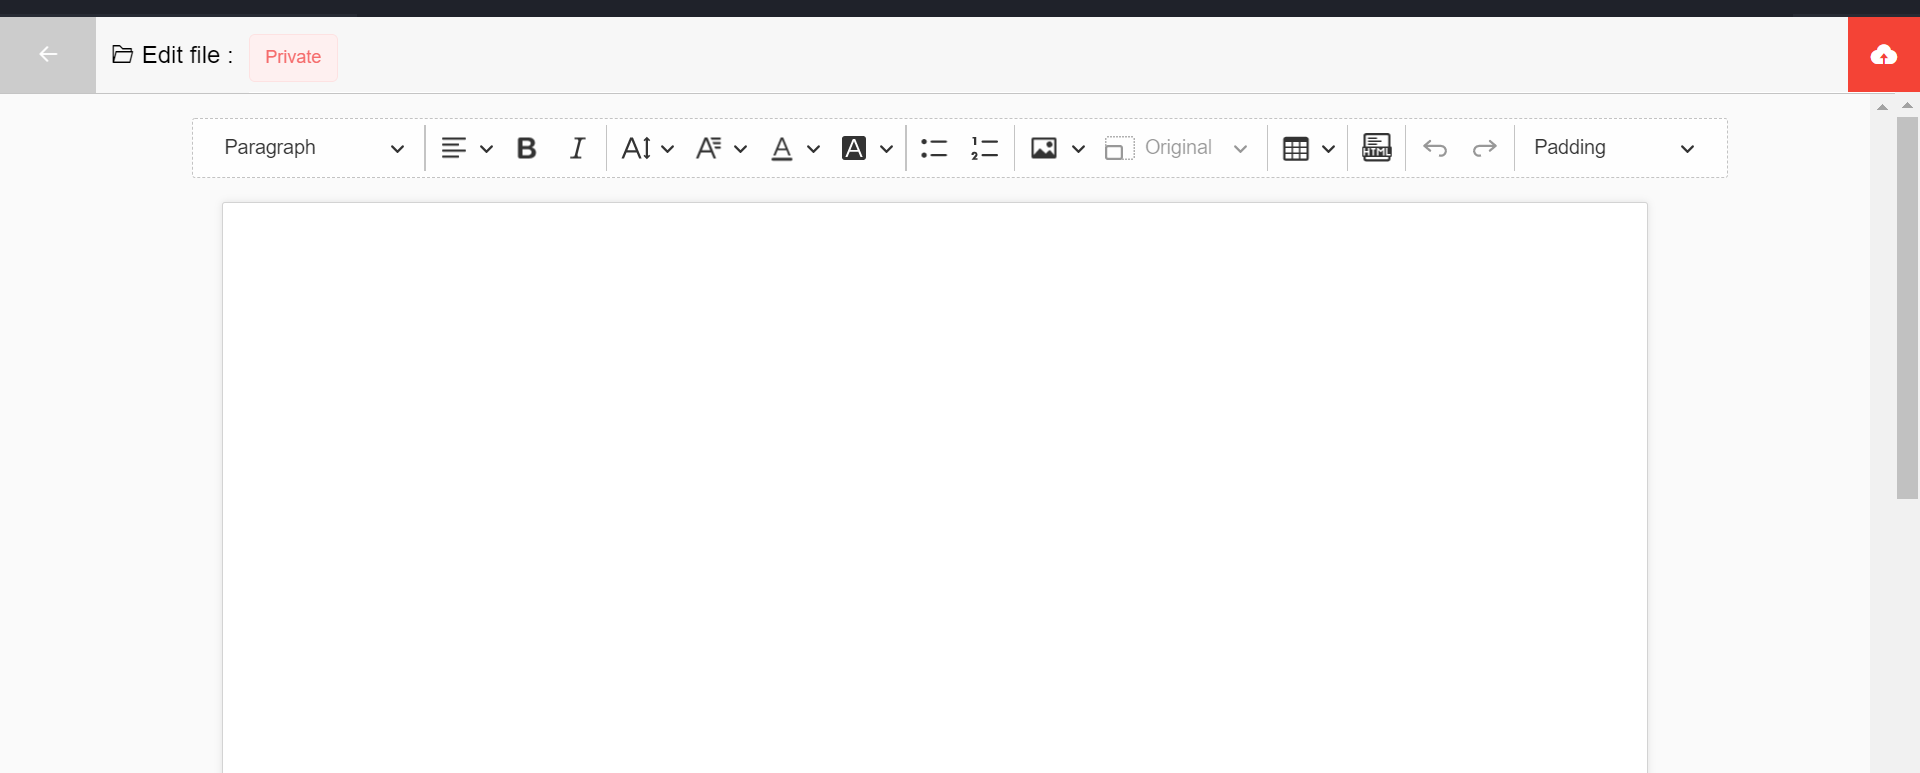
- First we need to create a new pdf file, in New File choose Create a PDF.

Sidbar:
The top bar contains different tools that you can need in your editing
- Padding
- Top : is the padding-top CSS property sets the height of the padding area on the top of the template.
- Bottom : is the padding-bottom CSS property sets the height of the padding area on the bottom of the template.
- Left : is the padding-left CSS property sets the width of the padding area to the left of the template.
- Right : is tThe padding-right CSS property sets the width of the padding area on the right of the template.
- Insert Table:
- You can insert a table,and choosing the number of columns and rows you want.
- Insert Image
- Insert an image via an url
- Insert an image from your local
- Insert Html:
- Provide a html editor area, that allows users to add html elements into template.
- Text Style:
- Heading
- Text alignment
- Bold
- Italic
- Front size / Front family / Font color / Font background color
- List Types:
- You can add different types of list.
Editor:
Here you can build your template and place your widgets.
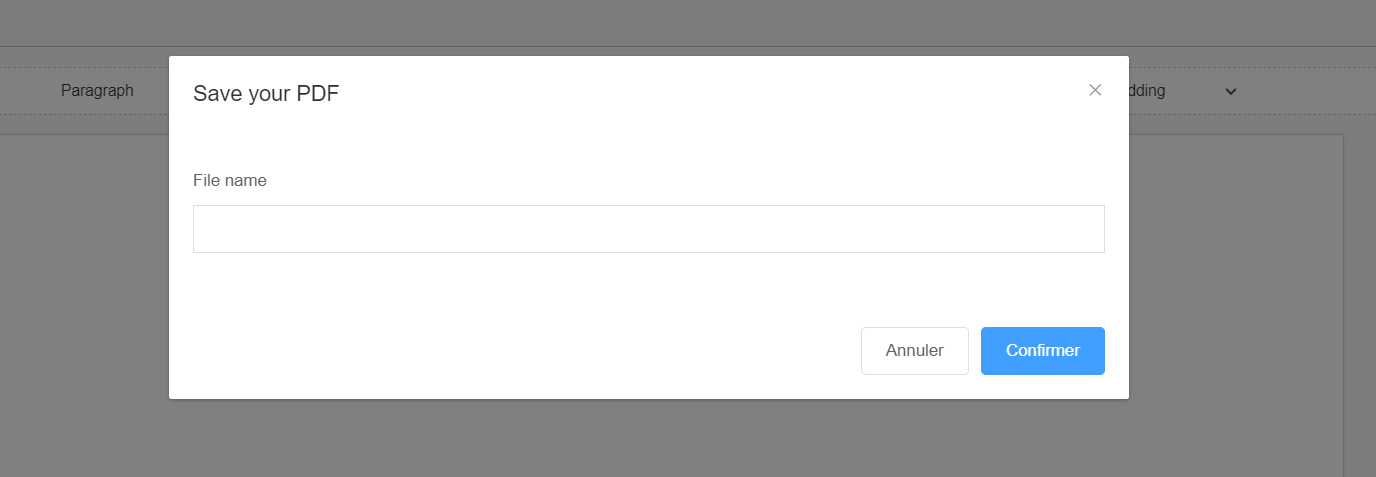
- Save the file and give it a name, then start your editing.

Create dynamic Template
The user can add Variables to the pdf template by EJS syntax:
<%=varName%>
Example
Name : <%=name%>
Age : <%=age%>
Country : <%=country%>
Example

- In the Top right corner you can found a test pdf generator icon, where you can test your template, that require you to put your variables in variables pop-up then click in generate pdf button.

In the following sections we will explic how we can use this syntax to create dynamic PDF.
Add dynamic table
In Pdf Editor, insert a sample table(at less two rows, the first should be for the header), then add our dynamic table syntax.
Example 1
| ID | Name | Age |
|---|---|---|
| #:tableData:# <%=row.id%> | <%=row.name%> | <%=row.age%> |
So, What is meaning of these characters?
#:tableData:#
tableData is our data that we want present in our table, it should be an array of objects. To be recognized we write it between #: and :#.
<%=row.id%>
Does not this looks familiar?, yes it is the EJS syntax that we cover in the introduction. This is the data that we want present in our columns, and <%=row. %> is a fixed syntax and we add to it our column( id in this column, and name in the second one).
row is the item element looped in tabledata, so you can use it as you want
Results
| Id | Name | Age |
|---|---|---|
| 3 | 10 | Ayoub |
| 2 | 35 | Sami |
| 1 | 50 | Adam |
Example 2
What you should know is that the pdf template is very elastic in it creation. let cover that in the next example.
| ID | Name | Age |
|---|---|---|
| #:tableData:# <%=row.id%> | <%=row.name%> | <%=row.age%> |
| Max Age | <%=Math.max(...tableData.map(item=>item.age))%> | |
| Min Age | <%=Math.min(...tableData.map(item=>item.age))%> |
Results
| Id | Name | Age |
|---|---|---|
| 3 | 10 | Sami |
| 2 | 35 | Adam |
| 1 | 50 | Ayoub |
| Max Age | 50 | |
| Min Age | 10 |
Add personal widgets
The power of our editor is that you can use EJS syntax to create anything you want other than the existing in sidebar.
Example 1
We can loop through an array of objects, and present there data as we need:
<% for (const item of data){%>

  Name : <%=item.name%>

<%}%>
Example 2
We can create a if condition to display or not a part of the editor:
<% if(isInStore){ %>

  Product Name : <%=item.name%>

<%}%>
Use the created PDF Template
We can use the created PDF template in three ways: Action in Process Modeler, Action in Web Modeler or create a function that call pdf generator api.
Action

Action in Process Modeler as in Web Modeler, you click in other actions then choose PreviewPDF : (Generate PDF). That will generate a previewPDF inputs, all what you should to do is to put 'Dump var' variable, to receive pdf data generated (in process this variable is the action name by default), then choose the name of your template created in previous sections, and insert the values of your template variables in Context object.
Function
We can create a function in scripts, where we use directly pdf generator api.
    async generatePdf(){
        let variables ={
                "variables": {
                    "tableData": [
                            { "id": 3, "name": "Saad", "age":10},
                            { "id": 2, "name": "Ahmed", "age":35 },
                            { "id": 1, "name": "Fouad", "age":50 }
                        ],
                    "country":"US",
                    "command":"000018",
                    "isExist":true,
                    "date":"08/05/2022",
                }
        }
        let pdf = await axios.post(`https://softydev.softyflow.io/api/v1/files/generate/content/${templateID}`,variables)

       let pdflink=`https://softydev.softyflow.io/uploads/${pdf.data._id}/name/${pdf.data.filename}.pdf`
    }
Instead of softydev.softyflow.io use your Instance url!